Android Jetpack Navigationで画面遷移する
こんにちは、tkyです。
下タブ(BottomNavigation)とNavigationをあわせて画面遷移とアニメーションを実現するところまで実装してみようと思います。
Navigationがわからない人が
- AtivityとFragmentの画面遷移ができる
- アニメーションに必要なパラメータがわかる
なんとなくNavigationわかってきたくらいを目標に記事を書いています。
作ったプロジェクトはこちら
Navigation
公式ドキュメントも合わせて確認しながら理解していこうと思います。
Androidアプリ内の「目的地」間を移動するためのフレームワーク、とのことです。目的地はActivityでもFragmentでもどちらでも問題なく、一貫した呼び方ができるのが特徴のようです。
今まで画面遷移は activity.startActivity(Intent(this, FooDetailActivity::class.java)) だったり fragmentTransaction.replace(R.id.container, BarDetailFragment.newInstance() のように呼び方がActivity/Fragmentで異なりましたが、
Navigationを使用するとActivity/Fragment遷移関係なくfindNavController().navigate(R.id.navigation_home) のように統一されたIFなるみたいです。
AndroidStudioのプロジェクトテンプレート
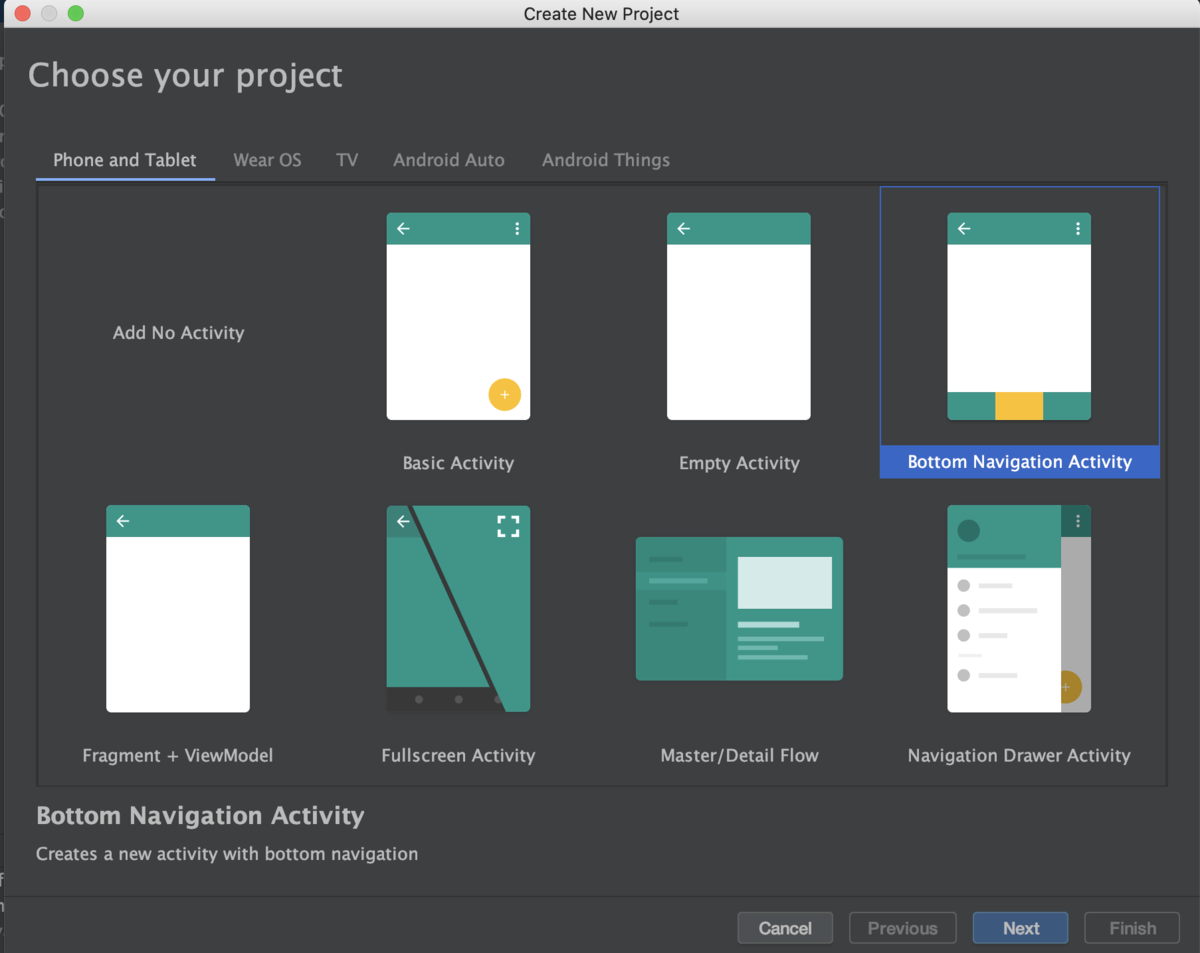
実はプロジェクトテンプレートでBottomNavigationActivityを選択すれば手早くサンプルアプリが構築できるので使わない手はありません。早速作ってみます

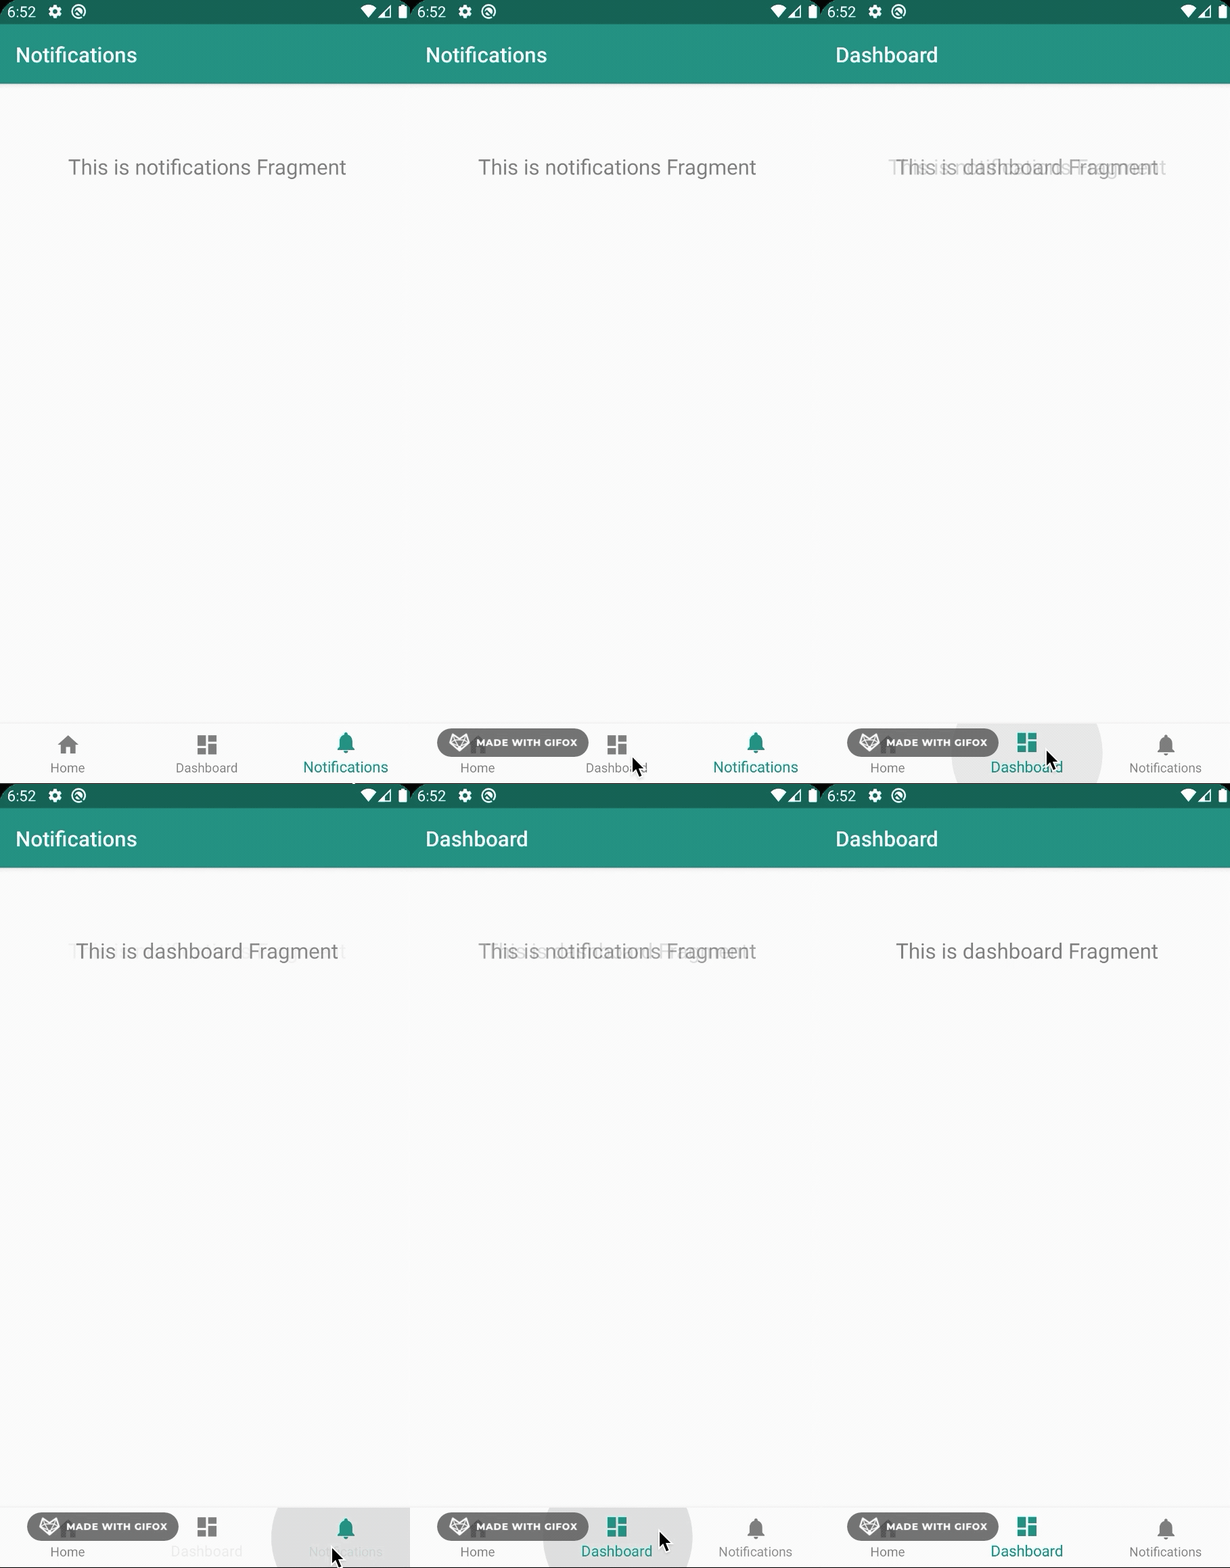
デフォルトでふわっとしたフェードアニメーションが付与されているのが確認できます。

更に嬉しいのがViewModelまで作っておいてくれている親切設計。ありがたいですね
class NotificationsFragment : Fragment() {

    private lateinit var notificationsViewModel: NotificationsViewModel

    override fun onCreateView(
        inflater: LayoutInflater,
        container: ViewGroup?,
        savedInstanceState: Bundle?
    ): View? {
        notificationsViewModel =
            ViewModelProviders.of(this).get(NotificationsViewModel::class.java)
        val root = inflater.inflate(R.layout.fragment_notifications, container, false)
        val textView: TextView = root.findViewById(R.id.text_notifications)
        notificationsViewModel.text.observe(this, Observer {
            textView.text = it
        })
        return root
    }
}
class NotificationsViewModel : ViewModel() {

    private val _text = MutableLiveData<String>().apply {
        value = "This is notifications Fragment"
    }
    val text: LiveData<String> = _text
}
activity_main.xml
まずはActivityから理解を深めます。
BottomNavigationが配置されています。メニューは@menu/bottom_nav_menuで定義しています。Home,Dashboard,Notificationsが定義されているだけです。
    <com.google.android.material.bottomnavigation.BottomNavigationView
        android:id="@+id/nav_view"
        android:layout_width="0dp"
        android:layout_height="wrap_content"
        android:layout_marginStart="0dp"
        android:layout_marginEnd="0dp"
        android:background="?android:attr/windowBackground"
        app:layout_constraintBottom_toBottomOf="parent"
        app:layout_constraintLeft_toLeftOf="parent"
        app:layout_constraintRight_toRightOf="parent"
        app:menu="@menu/bottom_nav_menu" />

    <fragment
        android:id="@+id/nav_host_fragment"
        android:name="androidx.navigation.fragment.NavHostFragment"
        android:layout_width="match_parent"
        android:layout_height="match_parent"
        app:defaultNavHost="true"
        app:layout_constraintBottom_toTopOf="@id/nav_view"
        app:layout_constraintLeft_toLeftOf="parent"
        app:layout_constraintRight_toRightOf="parent"
        app:layout_constraintTop_toTopOf="parent"
        app:navGraph="@navigation/mobile_navigation" />
次に nav_host_fragment というFragment領域が定義されています。 androidx.navigation.fragment.NavHostFragment が実体のようです。
ドキュメントによると「NavHostはナビゲーション グラフからの宛先を表示する空のコンテナ。」ということらしいです。NavHostFragmentはNavHostインターフェースの実装クラスということですね。
一番下には app:navGraph="@navigation/mobile_navigation" の記述があります。ナビゲーショングラフと呼ばれ、ユーザが遷移可能なすべてのデスティネーション(遷移先/宛先)を指定します。
これでNavHostとナビゲーションを紐付けているわけですね。
MainActivity
        val navView: BottomNavigationView = findViewById(R.id.nav_view)

        val navController = findNavController(R.id.nav_host_fragment)
        // Passing each menu ID as a set of Ids because each
        // menu should be considered as top level destinations.
        val appBarConfiguration = AppBarConfiguration(
            setOf(
                R.id.navigation_home, R.id.navigation_dashboard, R.id.navigation_notifications
            )
        )
        setupActionBarWithNavController(navController, appBarConfiguration)
        navView.setupWithNavController(navController)
findNavController() は拡張関数です、ですのでJavaから呼ぶ場合は Navigation.findNavController(Activity, @IdRes int viewId) で呼ぶ必要があります。
続いてAppBarConfigurationですが表示している画面に合わせてAppBarの表示タイトルを変更するのに使っているぽいです。
コメントによると「メニューIDとナビゲーションのIDを一致させる必要がある」というような記述があります。 確認するとたしかにxml上でIDが一致していました。ここは知らないとハマりそうなポイントです。
MenuIdとNavigationIdが一致していれば、画面と画面名をAppBarと連携する必要がないならAppBarConfigurationの記述は省いても問題なさそうです。
後はメニューとNavitgationを関連付ける処理が入っている感じです。 メニューとNavigationを紐付けているのでドロワーメニューなどでも同様のやり方で画面遷移実現できそうです。
<?xml version="1.0" encoding="utf-8"?>
<navigation xmlns:android="http://schemas.android.com/apk/res/android"
    xmlns:app="http://schemas.android.com/apk/res-auto"
    xmlns:tools="http://schemas.android.com/tools"
    android:id="@+id/mobile_navigation"
    app:startDestination="@+id/navigation_home">

    <fragment
        android:id="@+id/navigation_home"   ★★★ここと★★★
        android:name="com.github.ticktakclock.bottomnavigationsample.ui.home.HomeFragment"
        android:label="@string/title_home"
        tools:layout="@layout/fragment_home" />

    <fragment
        android:id="@+id/navigation_dashboard"
        android:name="com.github.ticktakclock.bottomnavigationsample.ui.dashboard.DashboardFragment"
        android:label="@string/title_dashboard"
        tools:layout="@layout/fragment_dashboard" />

    <fragment
        android:id="@+id/navigation_notifications"
        android:name="com.github.ticktakclock.bottomnavigationsample.ui.notifications.NotificationsFragment"
        android:label="@string/title_notifications"
        tools:layout="@layout/fragment_notifications" />
</navigation>
<?xml version="1.0" encoding="utf-8"?>
<menu xmlns:android="http://schemas.android.com/apk/res/android">

    <item
        android:id="@+id/navigation_home"   ★★★ここのIDを一致させる必要がある★★★
        android:icon="@drawable/ic_home_black_24dp"
        android:title="@string/title_home" />

    <item
        android:id="@+id/navigation_dashboard"
        android:icon="@drawable/ic_dashboard_black_24dp"
        android:title="@string/title_dashboard" />

    <item
        android:id="@+id/navigation_notifications"
        android:icon="@drawable/ic_notifications_black_24dp"
        android:title="@string/title_notifications" />

</menu>
mobile_navigation.xml
先程登場したナビゲーションのxmlですがデザインモードというのがあって、グラフィカルに画面が表示されるモードがあります。
ここでnavigation_homeをクリックしたまま→navigation_dashboardにドラッグして線を引いてみます。 するとxml側にアクションが追加されます。アクションIDから「HomeはDashboardへの遷移アクションを持っている」というような文脈が想定できます
    <fragment
        android:id="@+id/navigation_home"
        android:name="com.github.ticktakclock.bottomnavigationsample.ui.home.HomeFragment"
        android:label="@string/title_home"
        tools:layout="@layout/fragment_home" >
        <action
            android:id="@+id/action_navigation_home_to_navigation_dashboard"
            app:destination="@+id/navigation_dashboard" />
    </fragment>
せっかくなのでHomeFragmentにButtonを追加して遷移してみましょう。
findNavController().navigate()はActionかDestinationのリソースIDを受けて画面遷移します。
class HomeFragment : Fragment() {

    private lateinit var homeViewModel: HomeViewModel

    override fun onCreateView(
        inflater: LayoutInflater,
        container: ViewGroup?,
        savedInstanceState: Bundle?
    ): View? {
        // 〜中略〜
        val button: Button = root.findViewById(R.id.button)
        button.setOnClickListener {
            findNavController().navigate(R.id.action_navigation_home_to_navigation_dashboard)
        }
        return root
    }
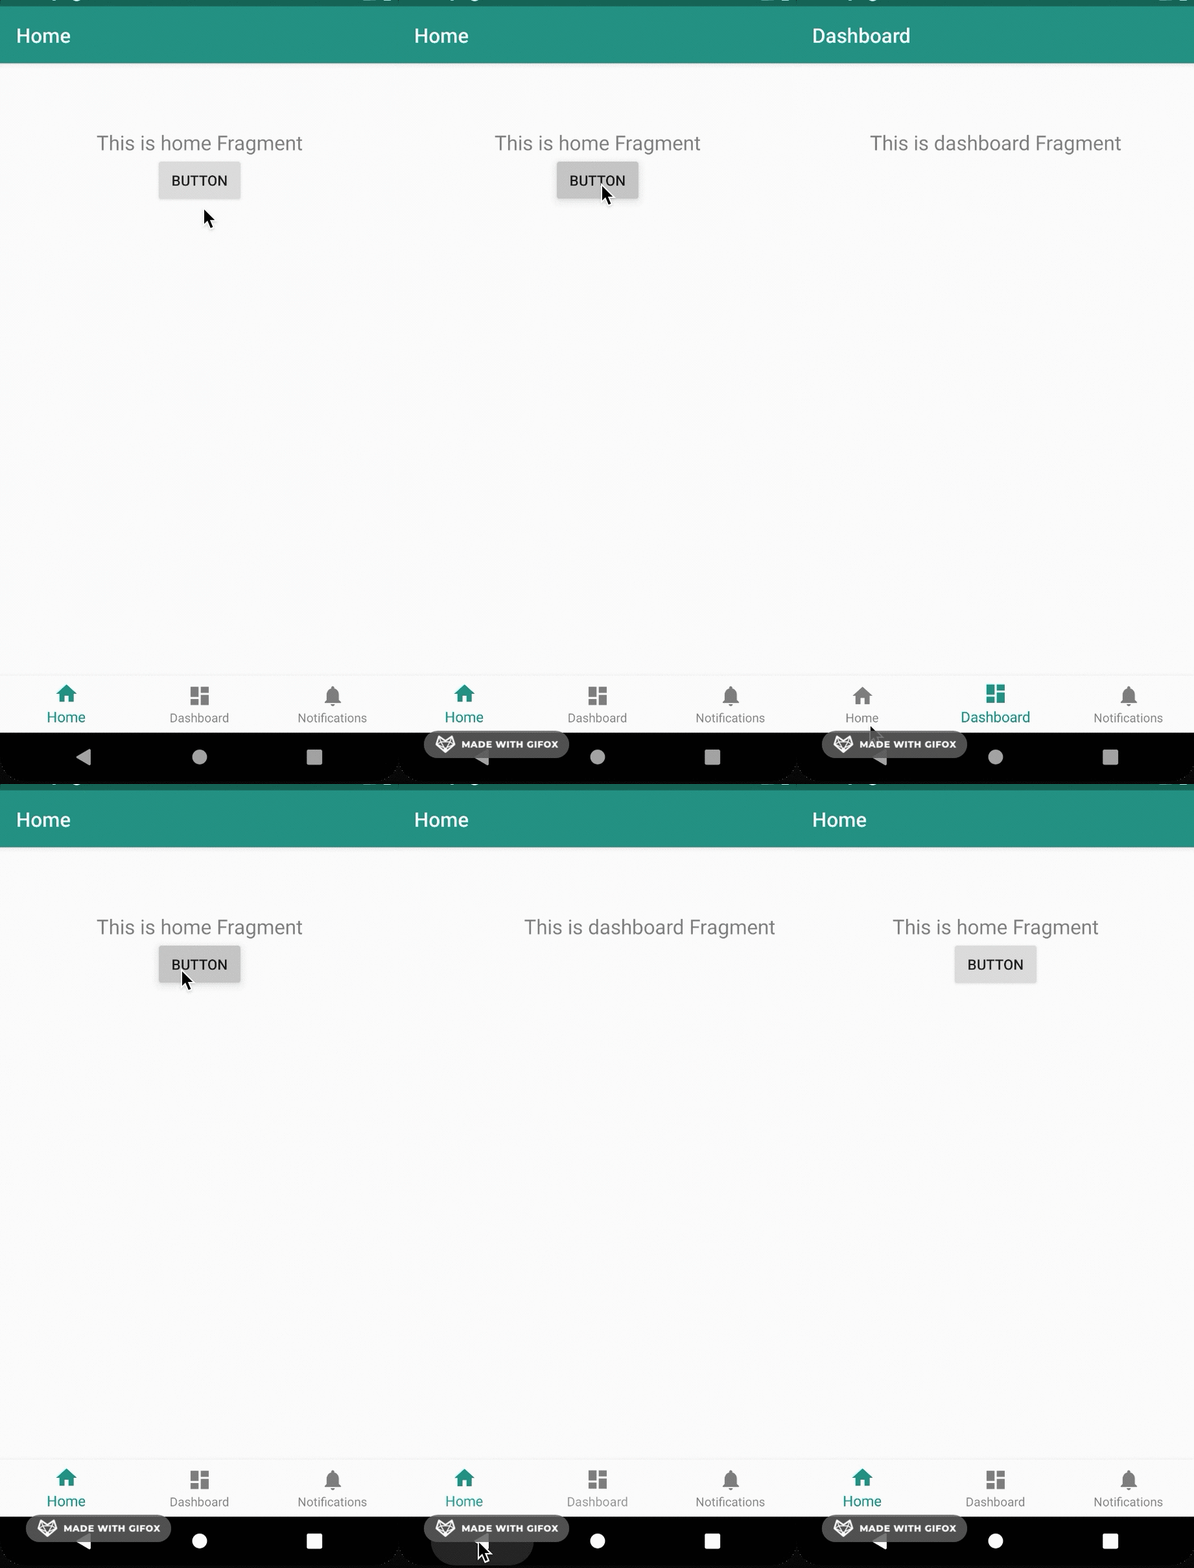
ボタンを押すとぱっと画面が切り替わることが確認できました。ここにはデフォルトのアニメーションは適用されないようです。
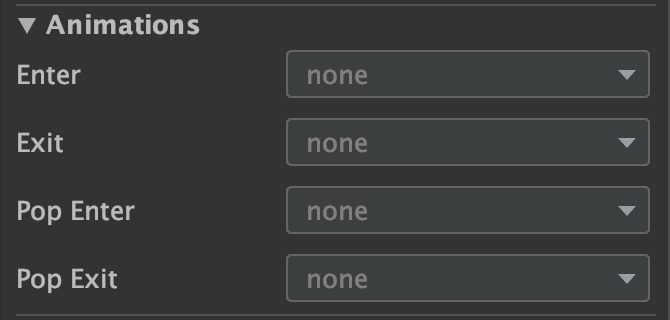
独自のアニメーションを実現するにはAnimationsを修正します。

Home->Dashboardへの画面遷移の場合の各アニメーションの役割です
それぞれ
nav_side_enter.xml
<?xml version="1.0" encoding="utf-8"?>
<set xmlns:android="http://schemas.android.com/apk/res/android">
    <translate
        android:duration="@android:integer/config_mediumAnimTime"
        android:fromXDelta="100%p"
        android:toXDelta="0" />
</set>
nav_side_exit.xml
<set xmlns:android="http://schemas.android.com/apk/res/android">
    <translate
        android:duration="@android:integer/config_mediumAnimTime"
        android:fromXDelta="0"
        android:toXDelta="-100%p" />
</set>
nav_side_pop_enter.xml
<?xml version="1.0" encoding="utf-8"?>
<set xmlns:android="http://schemas.android.com/apk/res/android">
    <translate
        android:duration="@android:integer/config_mediumAnimTime"
        android:fromXDelta="-100%p"
        android:toXDelta="0" />
</set>
nav_side_pop_exit.xml
<?xml version="1.0" encoding="utf-8"?>
<set xmlns:android="http://schemas.android.com/apk/res/android">
    <translate
        android:duration="@android:integer/config_mediumAnimTime"
        android:fromXDelta="0"
        android:toXDelta="100%p" />
</set>
またナビゲーションは先程定義したアニメーションのIDを指定していきます。
    <fragment
        android:id="@+id/navigation_home"
        android:name="com.github.ticktakclock.bottomnavigationsample.ui.home.HomeFragment"
        android:label="@string/title_home"
        tools:layout="@layout/fragment_home" >
        <action
            android:id="@+id/action_navigation_home_to_navigation_dashboard"
            app:destination="@+id/navigation_dashboard"
            app:enterAnim="@anim/nav_side_enter"
            app:exitAnim="@anim/nav_side_exit"
            app:popEnterAnim="@anim/nav_side_pop_enter"
            app:popExitAnim="@anim/nav_side_pop_exit"/>
    </fragment>
こんな感じに動きました

Activityに遷移する
DashboardFragmentにボタンを追加してSubActivityに遷移するように作ってみます。

先ほどと同様にmobile_navigation.xmlには
    <fragment
        android:id="@+id/navigation_dashboard"
        android:name="com.github.ticktakclock.bottomnavigationsample.ui.dashboard.DashboardFragment"
        android:label="@string/title_dashboard"
        tools:layout="@layout/fragment_dashboard" >
        <action
            android:id="@+id/action_navigation_dashboard_to_navigation_sub"
            app:destination="@id/navigation_sub"
            app:enterAnim="@anim/nav_default_enter_anim"
            app:exitAnim="@anim/nav_default_exit_anim"
            app:popEnterAnim="@anim/nav_default_pop_enter_anim"
            app:popExitAnim="@anim/nav_default_pop_exit_anim" />
    </fragment>

    <activity
        android:id="@+id/navigation_sub"
        android:name="com.github.ticktakclock.bottomnavigationsample.SubActivity"
        android:label="@string/title_sub"
        tools:layout="@layout/activity_sub" />
FragmentでもActivityでも Action として画面遷移を定義しているのでActivitiyは遷移先がActivity/Fragmentどちらなのか意識することなく画面遷移できていることがわかります。
class DashboardFragment : Fragment() {

    private lateinit var dashboardViewModel: DashboardViewModel

    override fun onCreateView(
        inflater: LayoutInflater,
        container: ViewGroup?,
        savedInstanceState: Bundle?
    ): View? {
        // 〜中略〜
        val button: Button = root.findViewById(R.id.button)
        button.setOnClickListener {
            findNavController().navigate(R.id.action_navigation_dashboard_to_navigation_sub)
        }
        return root
    }
}
まとめ
- Navigationを使うと画面遷移を定義できる
- 画面遷移はActivity/Fragment意識することなく同じインターフェースで実現できる
- 遷移はActionを使い、遷移時のアニメーションも定義できる
次はSafeArgsを試してみようと思います。
→Next article ticktakclock.hatenablog.com