GCP上に動画配信サーバーを作成する
はじめましてtkyです。
かねてから動画配信の仕組みに興味があったのでいろいろと調べて 理解ついでにやったことをまとめていきます。 GCPのインスタンスの作り方は説明しません。
何作ったの
GCP上にUbuntuの仮想マシンを構築、nginxを使用して動画配信サーバを作成しました。
図としてはこんな感じです。YouTubeLiveやニコニコ生放送のように配信者1名がいて、複数名の視聴者がいるような感じのライブ配信サービスですね。

GCPで仮想マシンを作る
GCPの12か月無料のやつを使いました。 やり方はググってください!クレカ片手にLet's try!
こんなにスペックいらないかな?と思いつつ以下の構成で作成します。
- Ubuntu 18.04.1 LTS x86_64
- n1-standard2(vCPUx2 7.5GB)
- asia-northeast-a
- http,httpsトラフィックを許可する
- ローカルディスク50GB
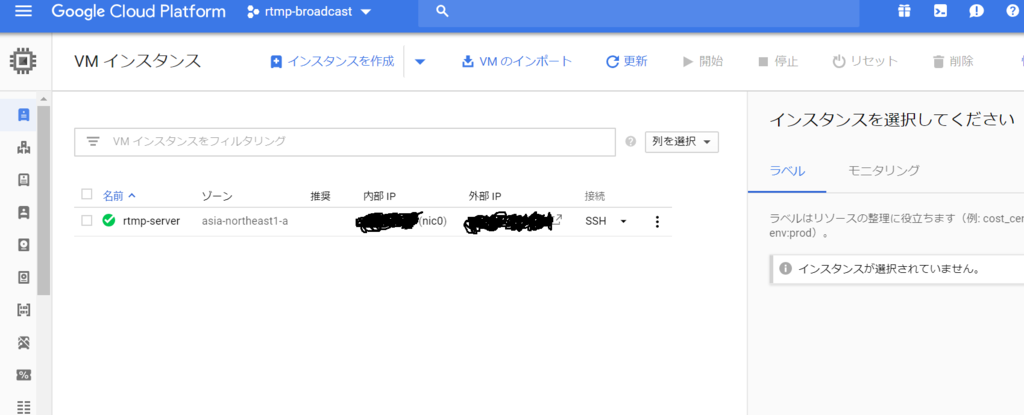
つくったらこうなります
ssh接続できるようにする
windowsの場合
C:\Users\ticktackclock\.ssh>ssh-keygen
Generating public/private rsa key pair.
Enter file in which to save the key (C:\Users\ticktackclock/.ssh/id_rsa): rtmp
Enter passphrase (empty for no passphrase):
Enter same passphrase again:
Your identification has been saved in rtmp.
Your public key has been saved in rtmp.pub.
The key fingerprint is:
SHA256:******************** ticktackclock@**************
The key's randomart image is:
+---[RSA 2048]----+
|*****************|
|*****************|
|*****************|
|*****************|
|*****************|
|*****************|
|*****************|
|*****************|
|*****************|
+----[SHA256]-----+
こんな感じでssh接続します。-i rtmpというのは先ほど作成した鍵情報を利用してssh接続しますよ、という意味ですね。
※IPはVMの外部IPを指定します。
ssh接続時、パスワードを求められます。(sshkey-genで鍵を作成した時に指定したパスワードです)
The authenticity of host 'xxx.xxx.xxx.xxx (xxx.xxx.xxx.xxx)' can't be established.
ECDSA key fingerprint is SHA256:xxxxxxxxxxxxxxxxxxxxxxxxxxxxxxxxxxxxxx.
Are you sure you want to continue connecting (yes/no)? yes
Warning: Permanently added '***.***.***.***' (ECDSA) to the list of known hosts.
Enter passphrase for key 'rtmp':
Welcome to Ubuntu 18.04.1 LTS (GNU/Linux 4.15.0-1018-gcp x86_64)

 * Documentation:  https://help.ubuntu.com
 * Management:     https://landscape.canonical.com
 * Support:        https://ubuntu.com/advantage

  System information as of Sun Sep  9 12:53:03 UTC 2018

  System load:  0.0               Processes:           96
  Usage of /:   2.3% of 48.29GB   Users logged in:     0
  Memory usage: 3%                IP address for ens4: ***.***.***.***
  Swap usage:   0%

 * Read about Ubuntu updates for L1 Terminal Fault Vulnerabilities
   (L1TF).

   - https://ubu.one/L1TF

 * Want to make a highly secure kiosk, smart display or touchscreen?
   Here's a step-by-step tutorial for a rainy weekend, or a startup.

   - https://bit.ly/secure-kiosk


  Get cloud support with Ubuntu Advantage Cloud Guest:
    http://www.ubuntu.com/business/services/cloud

0 packages can be updated.
0 updates are security updates.


The programs included with the Ubuntu system are free software;
the exact distribution terms for each program are described in the
individual files in /usr/share/doc/*/copyright.

Ubuntu comes with ABSOLUTELY NO WARRANTY, to the extent permitted by
applicable law.

ticktackclock@rtmp-server:~$
nginxをインストールする
先ほど立てた仮想マシンにnginxをインストールしていきます。
nginxとは?
OSSのwebサーバーのこと。 1対多(アクセス)の同時処理が得意。 消費メモリが少ない。 動画配信するような1対多アクセスの構成ならnginxの方がよさそうということで採用。
インストール方法
方法はいくつかあるようですが、 rtmpモジュールがデフォルトのnginxに入っていない為、ソースからコンパイルの方法で自分でビルドする必要があるようです。
必要なもの
# 必要なものインストール
$sudo apt-get install build-essential libpcre3 libpcre3-dev libssl-dev unzip zlib1g-dev

# nginxのソースコードダウンロード
$wget http://nginx.org/download/nginx-1.14.0.tar.gz

# rtmpモジュールをダウンロード
$wget https://github.com/arut/nginx-rtmp-module/archive/master.zip

# それぞれ解凍
$tar xvzf nginx-1.14.0.tar.gz
$unzip master.zip

# 解凍できたかlsで確認
$ls
master.zip  nginx-1.14.0  nginx-1.14.0.tar.gz  nginx-rtmp-module-master

# nginxソースコードディレクトリでビルド
$cd nginx-1.14.0/
$./configure --with-http_ssl_module --add-module=../nginx-rtmp-module-master
$make
$sudo make install
※私の場合、zlib1g-devをインストールしおらず、./configureするところでエラー吐きました。zlib1g-devをapt-get installしてもう一度./configureすると成功しました。
configureの結果以下のようなものが出力されます。この辺にnginxが入るんだなぁと思ってもらえれば良いかと。
Configuration summary
  + using system PCRE library
  + using system OpenSSL library
  + using system zlib library

  nginx path prefix: "/usr/local/nginx"
  nginx binary file: "/usr/local/nginx/sbin/nginx"
  nginx modules path: "/usr/local/nginx/modules"
  nginx configuration prefix: "/usr/local/nginx/conf"
  nginx configuration file: "/usr/local/nginx/conf/nginx.conf"
  nginx pid file: "/usr/local/nginx/logs/nginx.pid"
  nginx error log file: "/usr/local/nginx/logs/error.log"
  nginx http access log file: "/usr/local/nginx/logs/access.log"
  nginx http client request body temporary files: "client_body_temp"
  nginx http proxy temporary files: "proxy_temp"
  nginx http fastcgi temporary files: "fastcgi_temp"
  nginx http uwsgi temporary files: "uwsgi_temp"
  nginx http scgi temporary files: "scgi_temp"
(超余談)公式nginxをリポジトリに追加してapt-getする方法
この項目は「そうなんだ~」で読み飛ばしてください。
ubuntuの初期リポジトリにあるnginxはバージョンが古いらしい(?)ので公式のリポジトリからインストールする必要があります。
調べてもらえれば一通り手順は出てくるのですが、備忘録のため記載しておきます。
# nginxサイトが配布するPGPキーを追加
$curl http://nginx.org/keys/nginx_signing.key | sudo apt-key add -

# リポジトリを一覧に追加
$VCNAME=`cat /etc/lsb-release | grep DISTRIB_CODENAME | cut -d= -f2` && sudo -E sh -c "echo \"deb http://nginx.org/packages/ubuntu/ $VCNAME nginx\" >> /etc/apt/sources.list"
$VCNAME=`cat /etc/lsb-release | grep DISTRIB_CODENAME | cut -d= -f2` && sudo -E sh -c "echo \"deb-src http://nginx.org/packages/ubuntu/ $VCNAME nginx\" >> /etc/apt/sources.list"

# updateしてからnginxをインストール
$sudo apt-get update
$sudo apt-get install nginx
起動確認
余談はさておいて、nginxがinstallできたはずなので起動確認です。
# nginx起動
$sudo /usr/local/nginx/sbin/nginx

# nginxが起動しているか確認
$ps aux | grep nginx
root     14331  0.0  0.0  32876   820 ?        Ss   13:02   0:00 nginx: master process nginx
nginx    14332  0.0  0.0  37700  4388 ?        S    13:02   0:00 nginx: worker process
ticktackclock    15004  0.0  0.0  14856  1096 pts/0    R+   14:53   0:00 grep --color=auto nginx
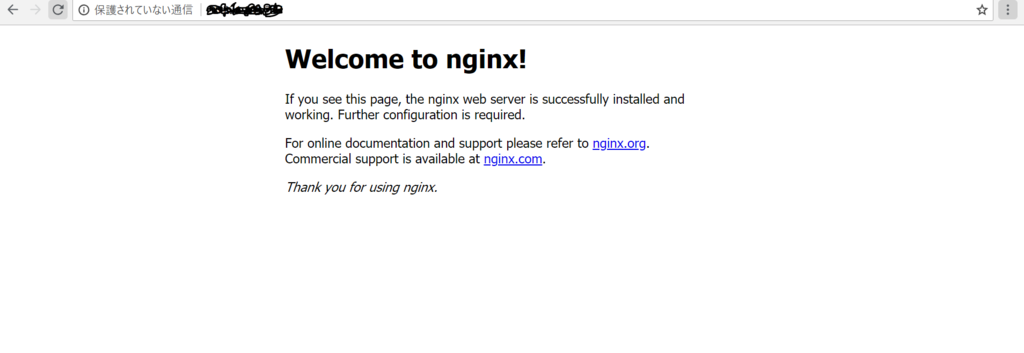
ブラウザからも見てみましょう。
/usr/local/nginx/html/
なおここで表示されているhtmlは上記のパスに入っています。 ただの静的なページを載せたいだけならこのディレクトリ直下にindex.html置けば自分のwebサイトを公開できるということですね。
GCPにrtmp通信用のport:1935を開ける
GCPのデフォルトではこのポートはファイアウォールの設定をしておらず、rtmp通信しても為はじかれてしまうのでちゃんとポート開けましょう。
ファイアウォールルールの設定
メニューより
ルールの命名規則は以下のような感じらしいですが、ガン無視してしまいました・・・
- 名前:
allow-{{port}} - ターゲット:
allow{{port}}-server
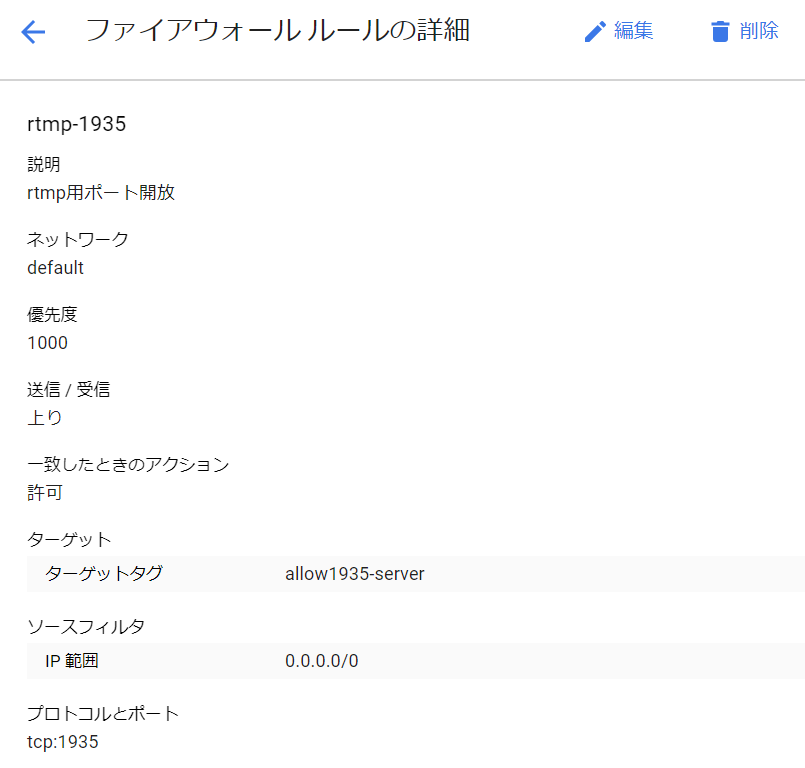
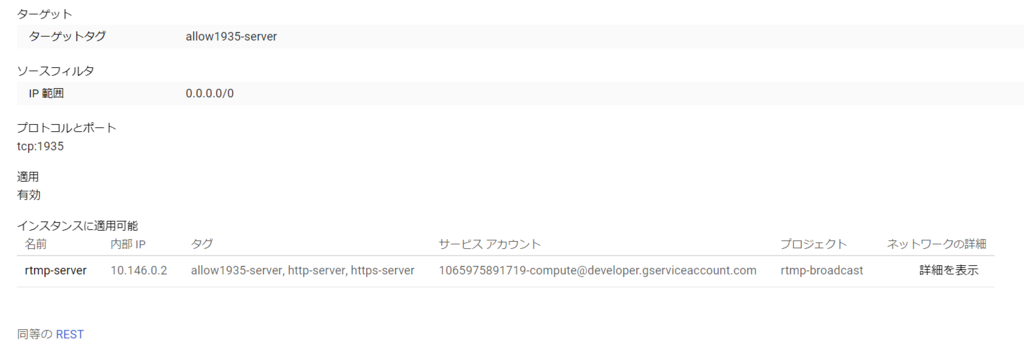
作成できると以下のようにルールのリストに表示されます。
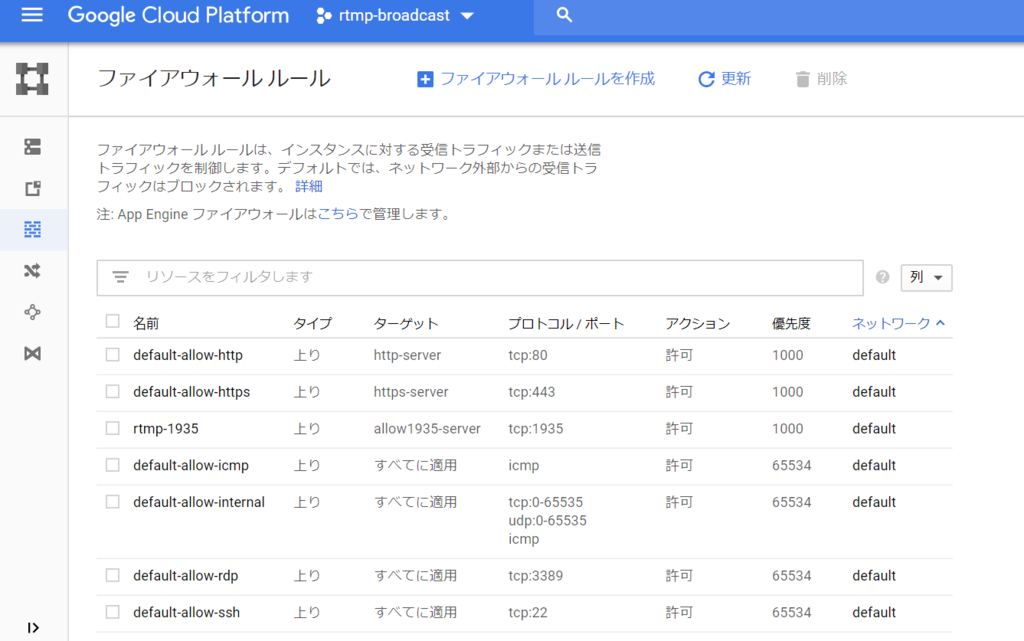
※名前間違えると編集では変更できず、もう一度作り直しになるの地味にめんどいです
VMインスタンスにルール適用
これだけで満足しては実はいけないんですよね。
作成したルールをVMインスタンスに適用して初めて作業完了となります。
メニューより
ネットワークタグはファイアウォールルールで設定したターゲットタグを指定します(今回の場合allow1935-server)
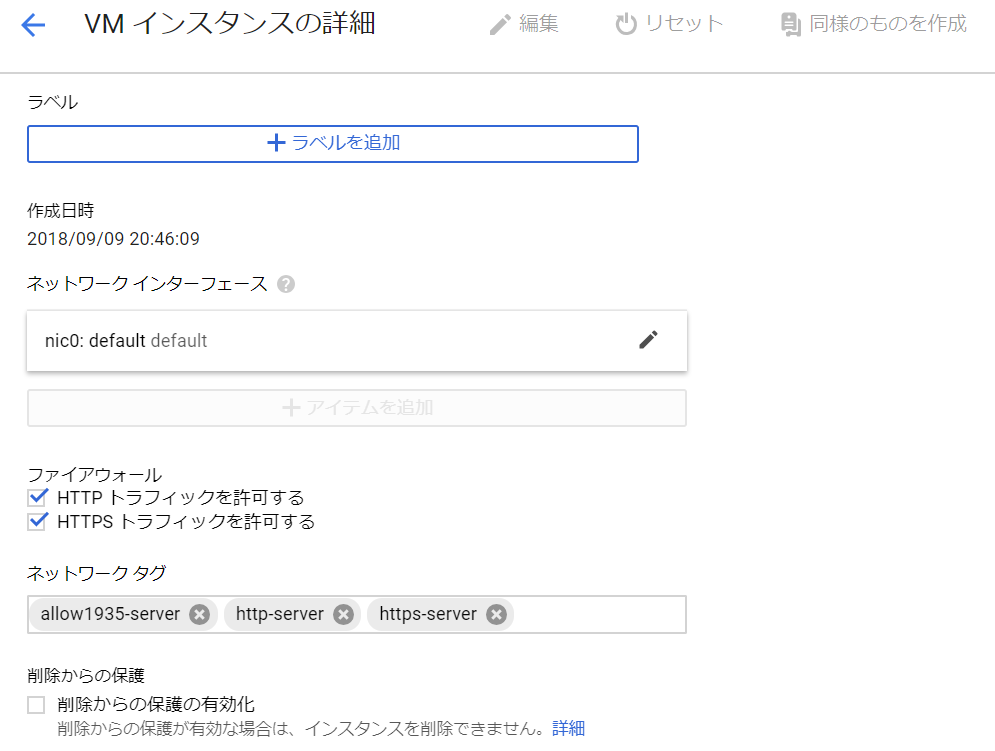
nginxにrtmpの設定をする
$sudo vim /usr/local/nginx/conf/nginx.conf
rtmp_auto_push on;

rtmp {
  server {
    listen 1935;
    chunk_size 4096;

    application live {
      live on;
      hls on;
      # 録画しないならoffとする
      record all;
      record_path /usr/local/nginx/html/record/hls;
      record_unique on;

      # hlsデータをどこに置くか
      hls_path /usr/local/nginx/html/live/hls;

      # hlsの分割単位
      hls_fragment 5s;
      hls_type live;
    }
  }
}
confで指定したディレクトリは事前に作成しておきましょう。
$sudo mkdir -p /usr/local/nginx/html/record/hls
$sudo mkdir -p /usr/local/nginx/html/live/hls
再起動する
$sudo /usr/local/nginx/sbin/nginx -s stop
$sudo /usr/local/nginx/sbin/nginx
なぜか-s reloadでは再起動してくれず、上記の方法で再起動させました。
$sudo /usr/local/nginx/sbin/nginx -s reload //この方法では再起動しなかった
※ちなみにrtmpモジュールが入っていないnginxではこのエラーがでるので、ちゃんとソースコードビルドしましょう。 nginx: [emerg] unknown directive "rtmp" in /etc/nginx/conf.d/default.conf:45
配信確認
これでサーバ側の準備が整ったことになります。自分のPCから配信してみます。
ライブ配信サイトに対して使用できる無料の配信ツールです。インストールしてください。
配信サーバ単体のテストやAndroidなどのモバイル端末から配信した時の問題の切り分けなどに役立ちました。
URLとストリームキー
URLとストリームキーを設定します。
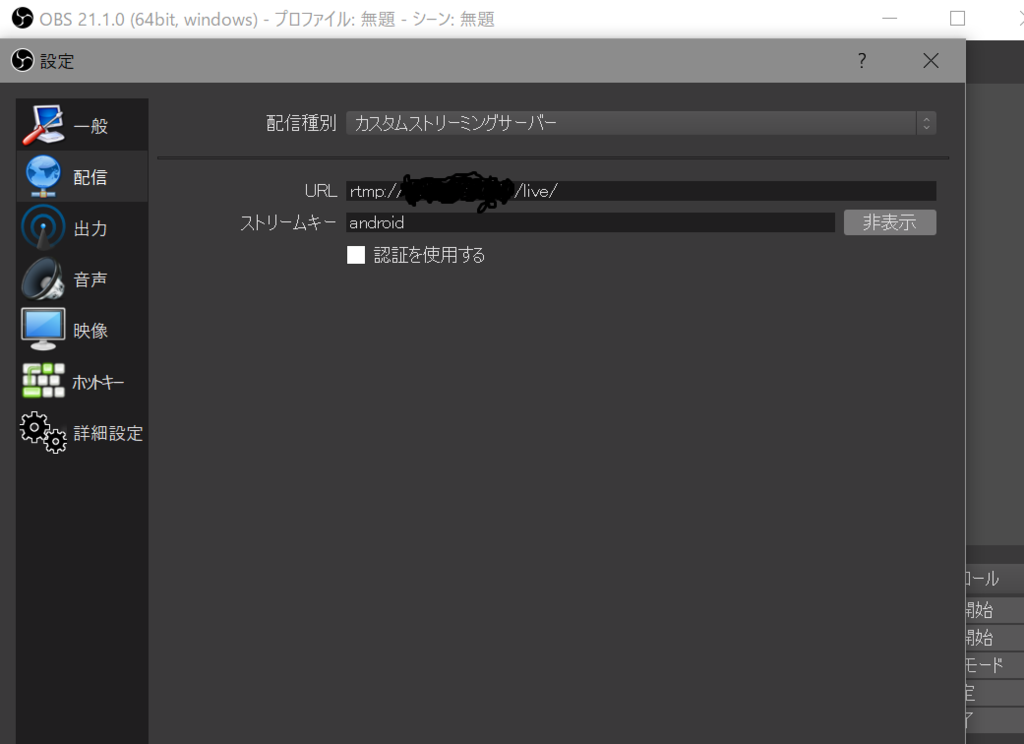
設定出来たら配信開始!!!
- [x] URL:
rtmp://xx.xx.xx.xx/live - [x] ストリームキー:
android
URL末尾のliveってなんぞや
nginxのconfで設定したapplication名のことです
rtmp {
・・・
    # ここで設定したliveが「rtmp://xx.xx.xx.xx/live」という配信URLになる
    application live {
      ・・・
    }
・・・
}
ストリームキーってなんぞや
ライブ配信するときの固有IDとなるもの。ユーザIDをストリームキーとかにするとAさんの配信、Bさんの配信という考え方が作れそうですね。
rtmpアプリケーション単位で一意である必要があるので、ユーザIDでも良さそうですが、実際はサーバ側で一意のストリームキー(ハッシュとか)を生成して、配信者(クライアント側)でそれを使ってもらうという運用がよさそうです。
※実際にサービス運用でどうやってストリームキーを作成しているのか気になりますね。
VLCで配信出来ているか確認する
メニューからネットワークストリームを開く
メディア(M) > ネットワークストリームを開く(N)
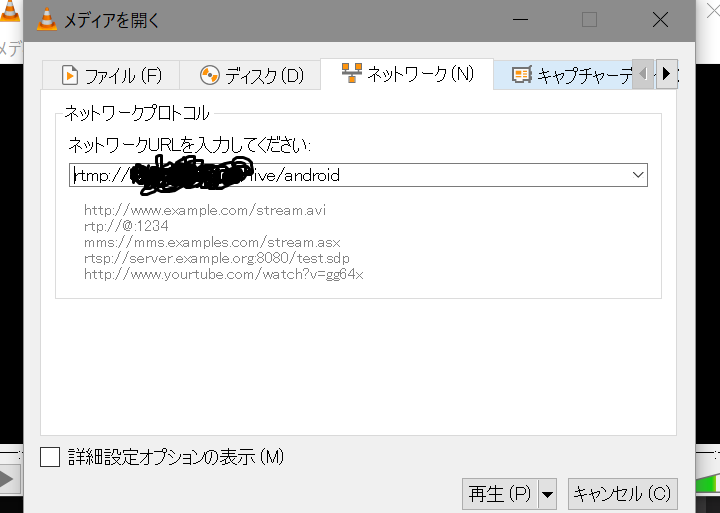
ネットワークURLにはOBSで設定したURLとストリームキーをくっつけたものを指定して再生!!!
2~3秒くらいの遅延後、VLCで再生されているのが何となくわかりました。
仮想環境上の見え方
OBSで配信している間、サーバ上でどんなファイルができているのか見てみます。
$cd /usr/local/nginx/html/live/hls
$ls
android-0.ts  android-2.ts  android-1.ts  s  android.m3u8
5秒(nginxのconfでhls_fragment 5s;で設定した為)に1つずつtsが追加されていくのが確認できました。
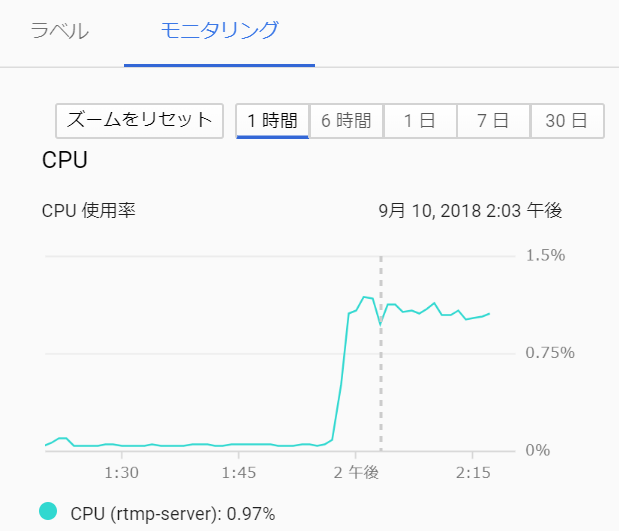
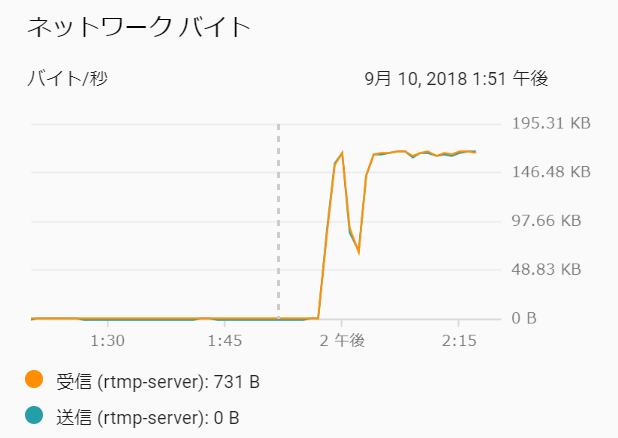
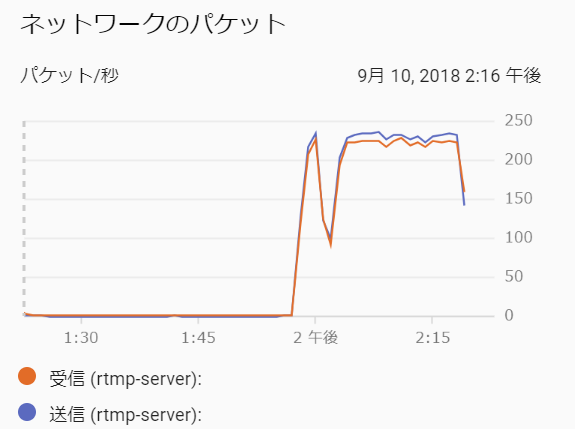
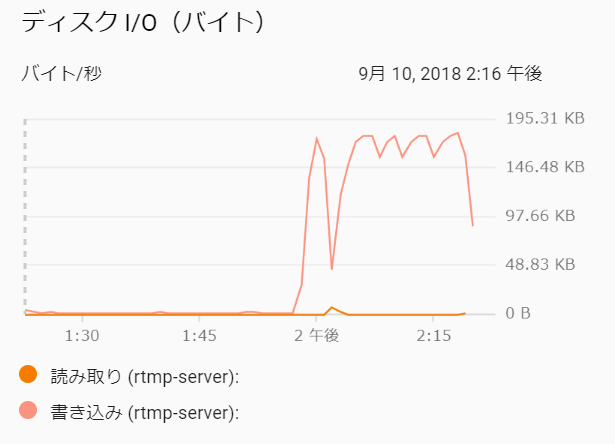
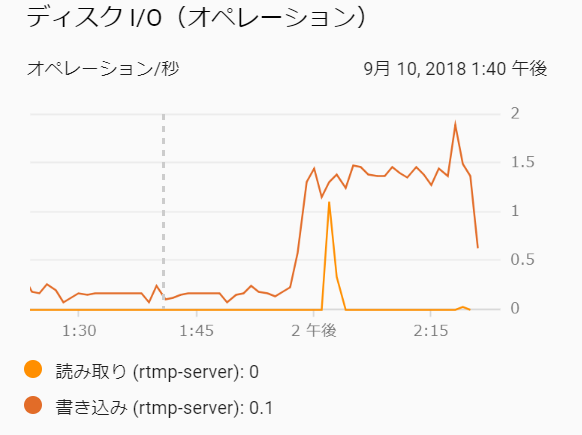
配信時のインスタンス負荷状況
折角GCP使ってモニタリングできるので確認してみましょう。
こんな感じです。1つの配信、1つの視聴だけならCPU1%ほど。
まとめ
次回はAndroidアプリからこのサーバに対して配信及び受信をしてみたいと思います!
next:Androidで動画配信アプリを作成する
参考文献
様々なサイトを活用させていただきました。感謝です!!
https://qiita.com/sparkgene/items/c3ac042f30cc5d0fe324