Navigation SafeArgsを使って画面遷移でパラメータを渡す
こんにちは、tkyです。
前回はBottomNavigationとNavigationをあわせた画面遷移を作りましたが、パラメータを渡せないと実務では利用しづらいケースが多いと思います。
↓前回記事↓ ticktakclock.hatenablog.com
今回はSafe Argsの機能を使って次の画面にパラメータを渡すような実装を試してみたいと思います。
Home画面、Dashboard画面という単語が出てきますが、前回作ったアプリの画面をそのまま利用しているので前回記事を一読しておくと理解しやすいと思います。
今回の実装は前回のGitHubに追記しています。
Safe Argsできて何が嬉しいのか
ここで解決できることは、今までFragmentにnewInstance()でFragmentのインスタンスを作っていた関数が不要になり
companion object{
    fun newInstance(editName: String): DashboardFragment {
        val bundle = Bundle()
        bundle.putString("DETAIL_NAME", editName)
        return DashboardFragment().apply {
            arguments = bundle
        }
    }
}
このように記述できることにあると思います。
引数を含めたDestinationが型になるためActivityとFragmentを意識する必要がなくなる、contextも不要になることが大きなメリットです。
// 引数を含めたDestination
val destination =
    HomeFragmentDirections.actionNavigationHomeToNavigationDashboard(textValue)
findNavController().navigate(destination)
gradleへ追記
Safe Argsを利用するためにはNavigationの依存追加の他に、Project.gradleに以下を追加する必要があります。
    buildscript {
        repositories {
            google()
        }
        dependencies {
            def nav_version = "2.1.0"
            classpath "androidx.navigation:navigation-safe-args-gradle-plugin:$nav_version"
        }
    }
また、app.gradleに以下のプラグインを追加します。Kotlinだけのプロジェクトの場合の例です。
apply plugin: "androidx.navigation.safeargs.kotlin"
Java/Kotin混合プロジェクトの場合 apply plugin: "androidx.navigation.safeargs" となります。
Argumentの定義
Navigation Design上で確認していきましょう。HOME画面→Dashboard画面の遷移でDashboard画面でパラメータを受け取りたい場合、
DashboardのDestinationをクリックしてAttributesの中にあるArgumentsの+ボタンをクリックします。
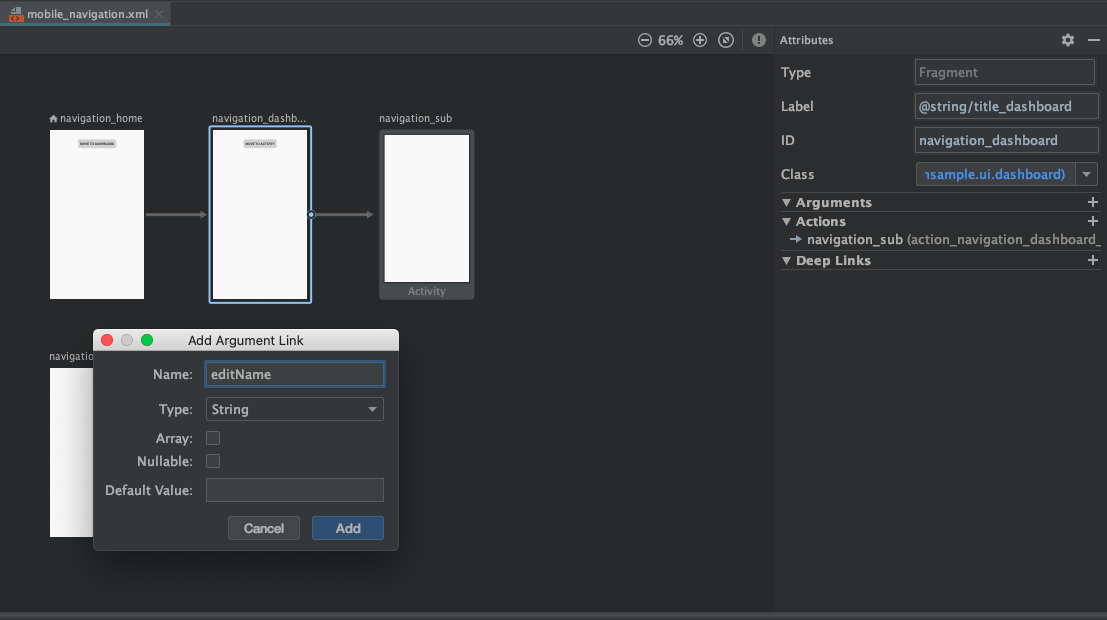
するとどのような引数を追加するか入力するダイアログが出てきますので、NameとTypeだけ入力してあとは何もせずでAddします。
- Name: editName
- Type: String
- Array: non checked
- Nullable: non checked
- Default Value: empty
これで完了です。xml上でも引数が追加されていることが確認できます。
<fragment
    android:id="@+id/navigation_dashboard"
    android:name="com.github.ticktakclock.bottomnavigationsample.ui.dashboard.DashboardFragment"
    android:label="@string/title_dashboard"
    tools:layout="@layout/fragment_dashboard">
    <!-- 中略 -->
    <argument
        android:name="editName"
        app:argType="string" />
</fragment>
argTypeについてはSerializableやParcelableなどの型も対応しているので独自データクラスなども対応できそうですね。良かったです。
詳細はこのページを見るとより深く理解できそうです。
遷移元処理
home画面にテキスト入力できるようにレイアウトを変更して、画面遷移時テキストの内容を遷移先に渡してみましょう。
HomeFragmentDirections.actionNavigationHomeToNavigationDashboard(editName: String) という遷移情報が自動で作られていることがわかります。
ここで作られたDestinationで画面遷移することになります。
val button: Button = root.findViewById(R.id.button)
button.setOnClickListener {
    val editText: EditText = root.findViewById(R.id.editText)
    val textValue = editText.text.toString()
    // 以前はリソースIDを直接指定していたが今回は引数を含めたDestinationを指定
    val destination =
        HomeFragmentDirections.actionNavigationHomeToNavigationDashboard(textValue)
    findNavController().navigate(destination)
//            findNavController().navigate(R.id.action_navigation_home_to_navigation_dashboard)
}
遷移先処理
Home画面から送った引数をDashboard画面で受け取ってみましょう。2種類方法があります(やってることは同じです)。
1つめは DashboardFragmentArgs.fromBundle()を使ってargumentsからDashboardFragmentArgsインスタンスを取得するやり方です。
arguments?.let {
    val args = DashboardFragmentArgs.fromBundle(it)
    val argsText: TextView = root.findViewById(R.id.text_args)
    argsText.text = args.editName
}
2つめは by navArgs() プロパティデリゲートを使ってDashboardFragmentArgsインスタンスを取得するやり方です。
private val args: DashboardFragmentArgs by navArgs()

override fun onCreateView(
    inflater: LayoutInflater,
    container: ViewGroup?,
    savedInstanceState: Bundle?
): View? {

val argsText: TextView = root.findViewById(R.id.text_args)
argsText.text = args.editName
    return root
}
1つ目はargumentsがBundle?型なので一度Nullチェックをする必要があります。nullだったときのことを考える必要があります。 この場合引数は必ず存在することが前提なのでBundleの状態不正としてIllegalStateExceptionをThrowして実装者に気づかせるのが最善かと思われます。
2つ目の方が公式ドキュメントでも解説されていたやり方となります。nullチェックする必要がなく、こちらのほうが記述量も少なくなって楽ですね。
navArgs()は何をしているのか
実は navArgs() デリゲートの中を見ると1つ目とやっていることは何も変わりませんでした。ライブラリ側にチェック処理を任せられるので実装ミスもなくなる観点からnavArgs()を使ったほうがメリットが大きそうです。
@MainThread
inline fun <reified Args : NavArgs> Fragment.navArgs() = NavArgsLazy(Args::class) {
    arguments ?: throw IllegalStateException("Fragment $this has null arguments")
}
この状態でHomeFragmentで findNavController().navigate(R.id.action_navigation_home_to_navigation_dashboard) で引数を与えないリソースIDのみで画面遷移しようとすると想定通り IllegalStateException が吐かれました
E/AndroidRuntime: FATAL EXCEPTION: main
    Process: com.github.ticktakclock.bottomnavigationsample, PID: 9503
    java.lang.IllegalStateException: Fragment DashboardFragment{d5e17c6 #1 id=0x7f08006c} has null arguments
        at com.github.ticktakclock.bottomnavigationsample.ui.dashboard.DashboardFragment$$special$$inlined$navArgs$1.invoke(FragmentNavArgsLazy.kt:42)
        at com.github.ticktakclock.bottomnavigationsample.ui.dashboard.DashboardFragment$$special$$inlined$navArgs$1.invoke(Unknown Source:0)
        at androidx.navigation.NavArgsLazy.getValue(NavArgsLazy.kt:44)
        at androidx.navigation.NavArgsLazy.getValue(NavArgsLazy.kt:34)
まとめ
- Safe Argsでを使うと Activity.createIntent(), Fragment.newInstance() といった関数が不要になる
- arg typsはSerializable, Parcelableも渡せるので独自クラスでも対応できる
navArgs()を使ってパラメータ取得すべし
Navigationでスマートな画面遷移を実現していきましょう〜!
あとは公式Doc見るのがよいです
Android Jetpack Navigationで画面遷移する
こんにちは、tkyです。
下タブ(BottomNavigation)とNavigationをあわせて画面遷移とアニメーションを実現するところまで実装してみようと思います。
Navigationがわからない人が
- AtivityとFragmentの画面遷移ができる
- アニメーションに必要なパラメータがわかる
なんとなくNavigationわかってきたくらいを目標に記事を書いています。
作ったプロジェクトはこちら
Navigation
公式ドキュメントも合わせて確認しながら理解していこうと思います。
Androidアプリ内の「目的地」間を移動するためのフレームワーク、とのことです。目的地はActivityでもFragmentでもどちらでも問題なく、一貫した呼び方ができるのが特徴のようです。
今まで画面遷移は activity.startActivity(Intent(this, FooDetailActivity::class.java)) だったり fragmentTransaction.replace(R.id.container, BarDetailFragment.newInstance() のように呼び方がActivity/Fragmentで異なりましたが、
Navigationを使用するとActivity/Fragment遷移関係なくfindNavController().navigate(R.id.navigation_home) のように統一されたIFなるみたいです。
AndroidStudioのプロジェクトテンプレート
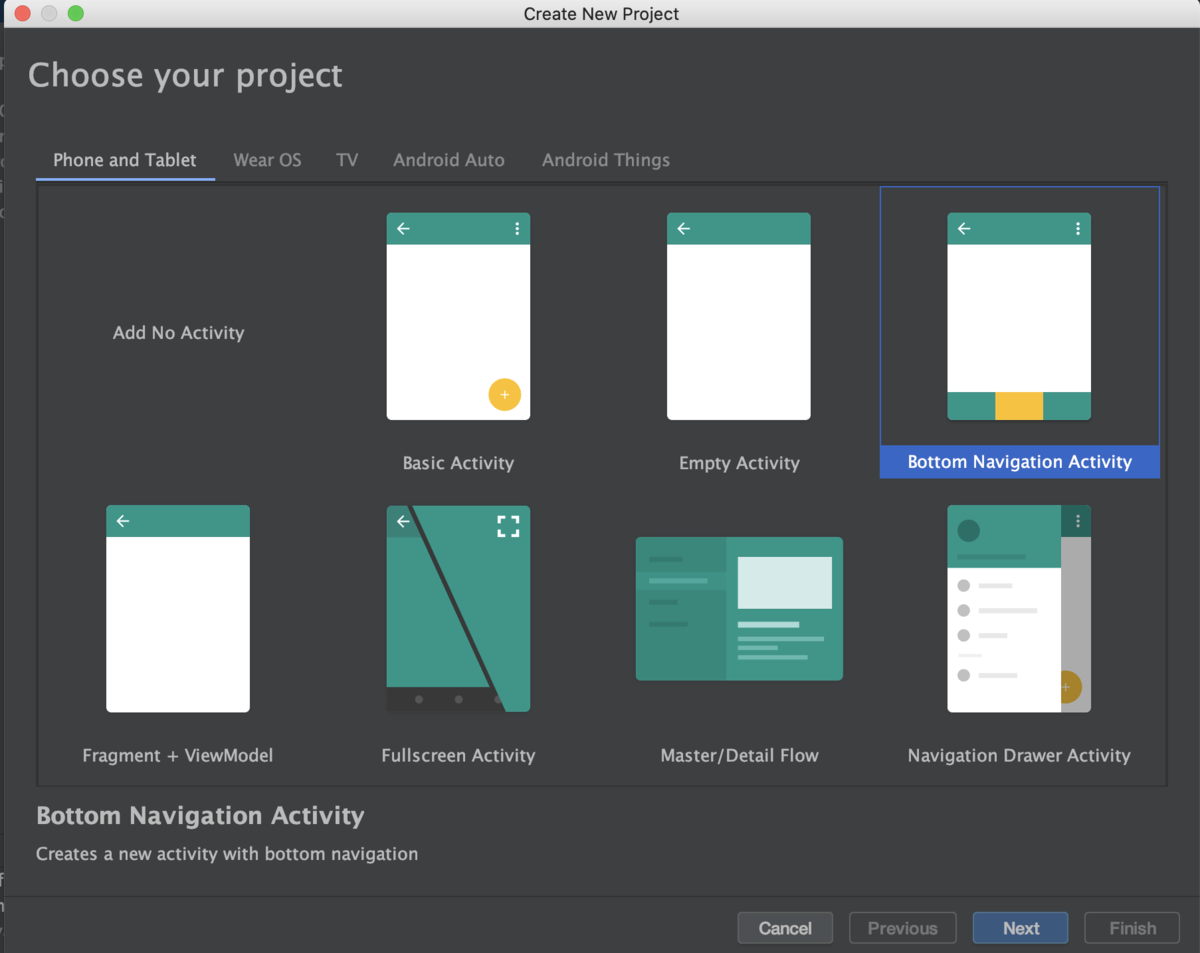
実はプロジェクトテンプレートでBottomNavigationActivityを選択すれば手早くサンプルアプリが構築できるので使わない手はありません。早速作ってみます
デフォルトでふわっとしたフェードアニメーションが付与されているのが確認できます。
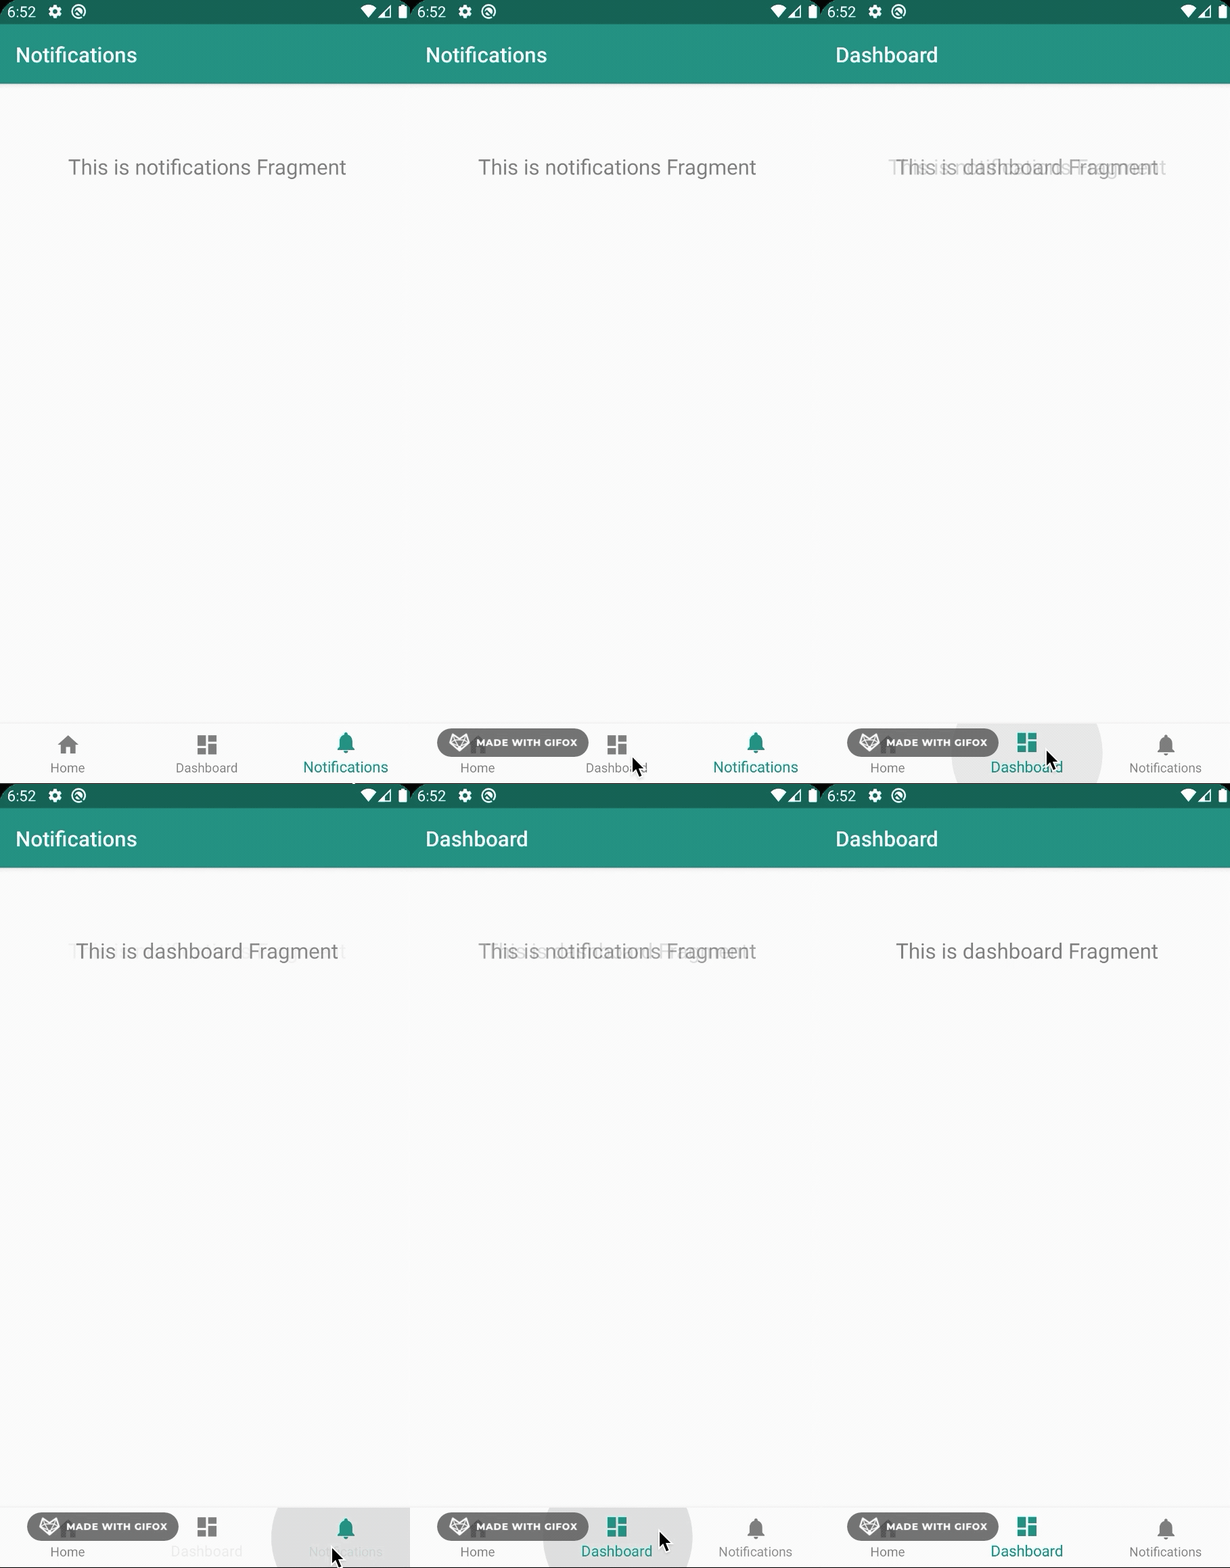
更に嬉しいのがViewModelまで作っておいてくれている親切設計。ありがたいですね
class NotificationsFragment : Fragment() {

    private lateinit var notificationsViewModel: NotificationsViewModel

    override fun onCreateView(
        inflater: LayoutInflater,
        container: ViewGroup?,
        savedInstanceState: Bundle?
    ): View? {
        notificationsViewModel =
            ViewModelProviders.of(this).get(NotificationsViewModel::class.java)
        val root = inflater.inflate(R.layout.fragment_notifications, container, false)
        val textView: TextView = root.findViewById(R.id.text_notifications)
        notificationsViewModel.text.observe(this, Observer {
            textView.text = it
        })
        return root
    }
}
class NotificationsViewModel : ViewModel() {

    private val _text = MutableLiveData<String>().apply {
        value = "This is notifications Fragment"
    }
    val text: LiveData<String> = _text
}
activity_main.xml
まずはActivityから理解を深めます。
BottomNavigationが配置されています。メニューは@menu/bottom_nav_menuで定義しています。Home,Dashboard,Notificationsが定義されているだけです。
    <com.google.android.material.bottomnavigation.BottomNavigationView
        android:id="@+id/nav_view"
        android:layout_width="0dp"
        android:layout_height="wrap_content"
        android:layout_marginStart="0dp"
        android:layout_marginEnd="0dp"
        android:background="?android:attr/windowBackground"
        app:layout_constraintBottom_toBottomOf="parent"
        app:layout_constraintLeft_toLeftOf="parent"
        app:layout_constraintRight_toRightOf="parent"
        app:menu="@menu/bottom_nav_menu" />

    <fragment
        android:id="@+id/nav_host_fragment"
        android:name="androidx.navigation.fragment.NavHostFragment"
        android:layout_width="match_parent"
        android:layout_height="match_parent"
        app:defaultNavHost="true"
        app:layout_constraintBottom_toTopOf="@id/nav_view"
        app:layout_constraintLeft_toLeftOf="parent"
        app:layout_constraintRight_toRightOf="parent"
        app:layout_constraintTop_toTopOf="parent"
        app:navGraph="@navigation/mobile_navigation" />
次に nav_host_fragment というFragment領域が定義されています。 androidx.navigation.fragment.NavHostFragment が実体のようです。
ドキュメントによると「NavHostはナビゲーション グラフからの宛先を表示する空のコンテナ。」ということらしいです。NavHostFragmentはNavHostインターフェースの実装クラスということですね。
一番下には app:navGraph="@navigation/mobile_navigation" の記述があります。ナビゲーショングラフと呼ばれ、ユーザが遷移可能なすべてのデスティネーション(遷移先/宛先)を指定します。
これでNavHostとナビゲーションを紐付けているわけですね。
MainActivity
        val navView: BottomNavigationView = findViewById(R.id.nav_view)

        val navController = findNavController(R.id.nav_host_fragment)
        // Passing each menu ID as a set of Ids because each
        // menu should be considered as top level destinations.
        val appBarConfiguration = AppBarConfiguration(
            setOf(
                R.id.navigation_home, R.id.navigation_dashboard, R.id.navigation_notifications
            )
        )
        setupActionBarWithNavController(navController, appBarConfiguration)
        navView.setupWithNavController(navController)
findNavController() は拡張関数です、ですのでJavaから呼ぶ場合は Navigation.findNavController(Activity, @IdRes int viewId) で呼ぶ必要があります。
続いてAppBarConfigurationですが表示している画面に合わせてAppBarの表示タイトルを変更するのに使っているぽいです。
コメントによると「メニューIDとナビゲーションのIDを一致させる必要がある」というような記述があります。 確認するとたしかにxml上でIDが一致していました。ここは知らないとハマりそうなポイントです。
MenuIdとNavigationIdが一致していれば、画面と画面名をAppBarと連携する必要がないならAppBarConfigurationの記述は省いても問題なさそうです。
後はメニューとNavitgationを関連付ける処理が入っている感じです。 メニューとNavigationを紐付けているのでドロワーメニューなどでも同様のやり方で画面遷移実現できそうです。
<?xml version="1.0" encoding="utf-8"?>
<navigation xmlns:android="http://schemas.android.com/apk/res/android"
    xmlns:app="http://schemas.android.com/apk/res-auto"
    xmlns:tools="http://schemas.android.com/tools"
    android:id="@+id/mobile_navigation"
    app:startDestination="@+id/navigation_home">

    <fragment
        android:id="@+id/navigation_home"   ★★★ここと★★★
        android:name="com.github.ticktakclock.bottomnavigationsample.ui.home.HomeFragment"
        android:label="@string/title_home"
        tools:layout="@layout/fragment_home" />

    <fragment
        android:id="@+id/navigation_dashboard"
        android:name="com.github.ticktakclock.bottomnavigationsample.ui.dashboard.DashboardFragment"
        android:label="@string/title_dashboard"
        tools:layout="@layout/fragment_dashboard" />

    <fragment
        android:id="@+id/navigation_notifications"
        android:name="com.github.ticktakclock.bottomnavigationsample.ui.notifications.NotificationsFragment"
        android:label="@string/title_notifications"
        tools:layout="@layout/fragment_notifications" />
</navigation>
<?xml version="1.0" encoding="utf-8"?>
<menu xmlns:android="http://schemas.android.com/apk/res/android">

    <item
        android:id="@+id/navigation_home"   ★★★ここのIDを一致させる必要がある★★★
        android:icon="@drawable/ic_home_black_24dp"
        android:title="@string/title_home" />

    <item
        android:id="@+id/navigation_dashboard"
        android:icon="@drawable/ic_dashboard_black_24dp"
        android:title="@string/title_dashboard" />

    <item
        android:id="@+id/navigation_notifications"
        android:icon="@drawable/ic_notifications_black_24dp"
        android:title="@string/title_notifications" />

</menu>
mobile_navigation.xml
先程登場したナビゲーションのxmlですがデザインモードというのがあって、グラフィカルに画面が表示されるモードがあります。
ここでnavigation_homeをクリックしたまま→navigation_dashboardにドラッグして線を引いてみます。 するとxml側にアクションが追加されます。アクションIDから「HomeはDashboardへの遷移アクションを持っている」というような文脈が想定できます
    <fragment
        android:id="@+id/navigation_home"
        android:name="com.github.ticktakclock.bottomnavigationsample.ui.home.HomeFragment"
        android:label="@string/title_home"
        tools:layout="@layout/fragment_home" >
        <action
            android:id="@+id/action_navigation_home_to_navigation_dashboard"
            app:destination="@+id/navigation_dashboard" />
    </fragment>
せっかくなのでHomeFragmentにButtonを追加して遷移してみましょう。
findNavController().navigate()はActionかDestinationのリソースIDを受けて画面遷移します。
class HomeFragment : Fragment() {

    private lateinit var homeViewModel: HomeViewModel

    override fun onCreateView(
        inflater: LayoutInflater,
        container: ViewGroup?,
        savedInstanceState: Bundle?
    ): View? {
        // 〜中略〜
        val button: Button = root.findViewById(R.id.button)
        button.setOnClickListener {
            findNavController().navigate(R.id.action_navigation_home_to_navigation_dashboard)
        }
        return root
    }
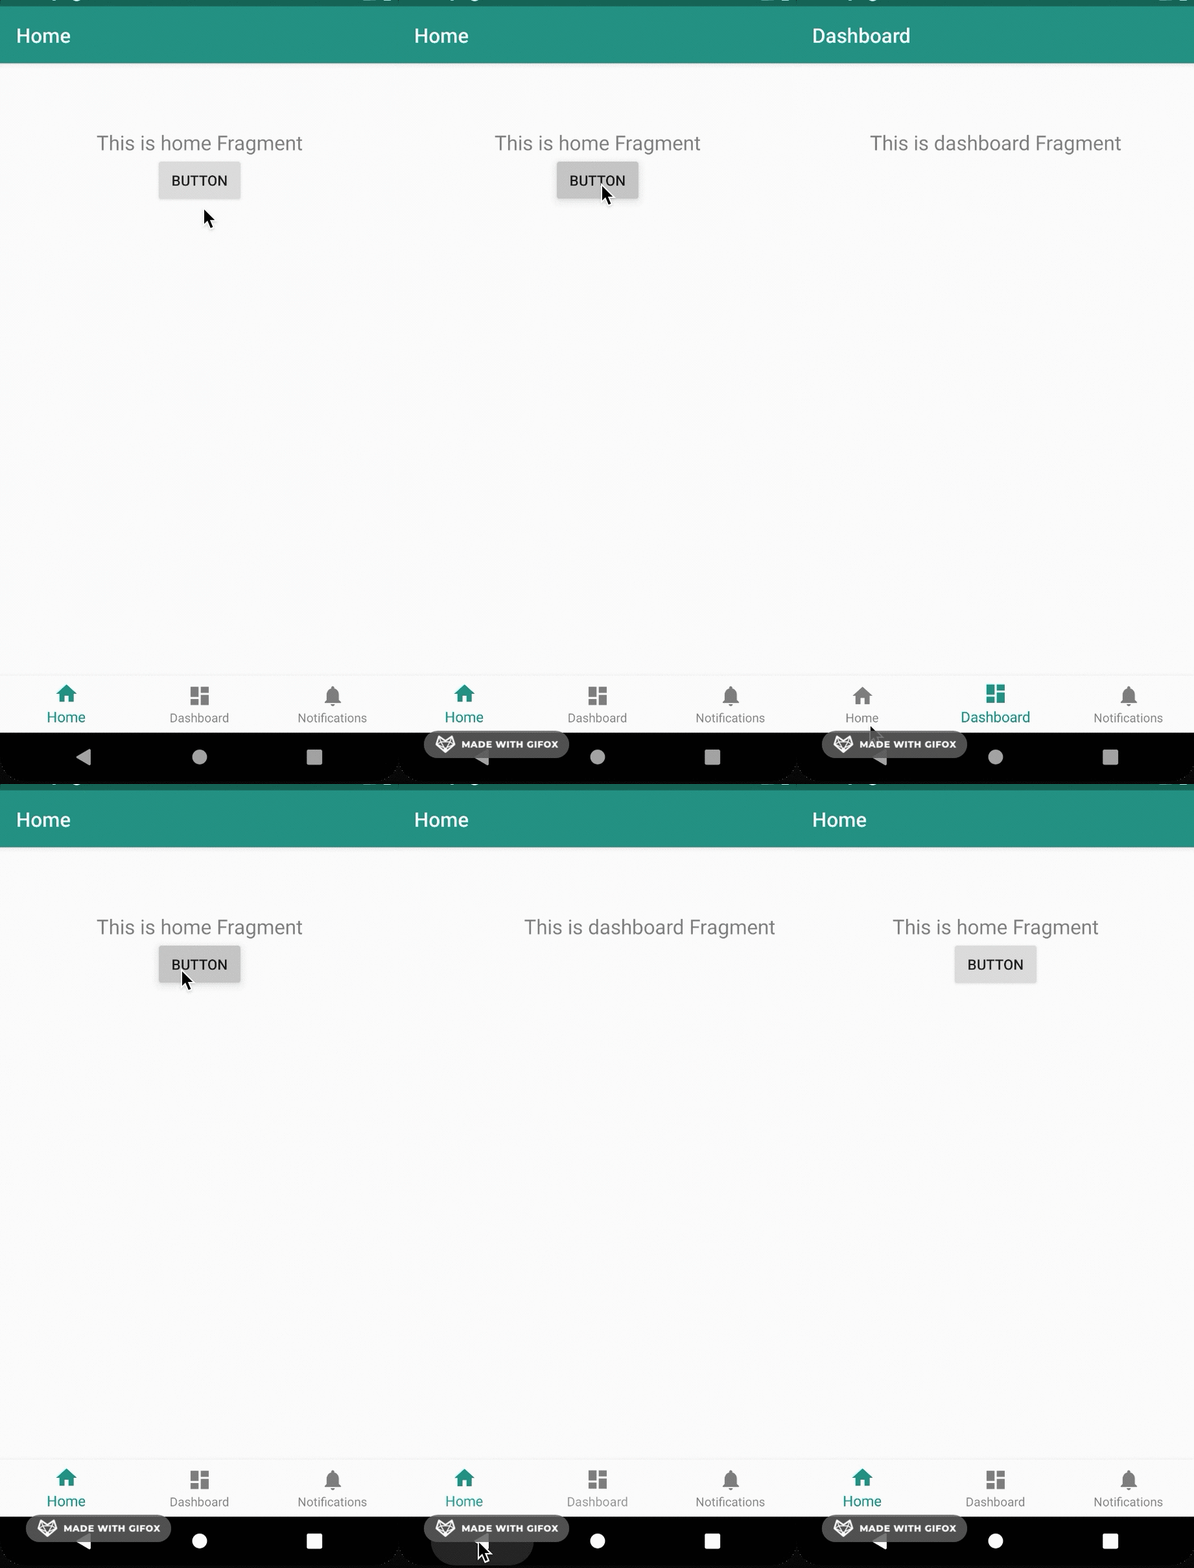
ボタンを押すとぱっと画面が切り替わることが確認できました。ここにはデフォルトのアニメーションは適用されないようです。
独自のアニメーションを実現するにはAnimationsを修正します。
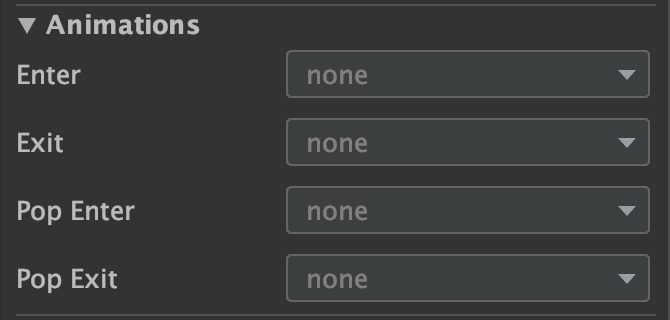
Home->Dashboardへの画面遷移の場合の各アニメーションの役割です
それぞれ
nav_side_enter.xml
<?xml version="1.0" encoding="utf-8"?>
<set xmlns:android="http://schemas.android.com/apk/res/android">
    <translate
        android:duration="@android:integer/config_mediumAnimTime"
        android:fromXDelta="100%p"
        android:toXDelta="0" />
</set>
nav_side_exit.xml
<set xmlns:android="http://schemas.android.com/apk/res/android">
    <translate
        android:duration="@android:integer/config_mediumAnimTime"
        android:fromXDelta="0"
        android:toXDelta="-100%p" />
</set>
nav_side_pop_enter.xml
<?xml version="1.0" encoding="utf-8"?>
<set xmlns:android="http://schemas.android.com/apk/res/android">
    <translate
        android:duration="@android:integer/config_mediumAnimTime"
        android:fromXDelta="-100%p"
        android:toXDelta="0" />
</set>
nav_side_pop_exit.xml
<?xml version="1.0" encoding="utf-8"?>
<set xmlns:android="http://schemas.android.com/apk/res/android">
    <translate
        android:duration="@android:integer/config_mediumAnimTime"
        android:fromXDelta="0"
        android:toXDelta="100%p" />
</set>
またナビゲーションは先程定義したアニメーションのIDを指定していきます。
    <fragment
        android:id="@+id/navigation_home"
        android:name="com.github.ticktakclock.bottomnavigationsample.ui.home.HomeFragment"
        android:label="@string/title_home"
        tools:layout="@layout/fragment_home" >
        <action
            android:id="@+id/action_navigation_home_to_navigation_dashboard"
            app:destination="@+id/navigation_dashboard"
            app:enterAnim="@anim/nav_side_enter"
            app:exitAnim="@anim/nav_side_exit"
            app:popEnterAnim="@anim/nav_side_pop_enter"
            app:popExitAnim="@anim/nav_side_pop_exit"/>
    </fragment>
こんな感じに動きました
Activityに遷移する
DashboardFragmentにボタンを追加してSubActivityに遷移するように作ってみます。

先ほどと同様にmobile_navigation.xmlには
    <fragment
        android:id="@+id/navigation_dashboard"
        android:name="com.github.ticktakclock.bottomnavigationsample.ui.dashboard.DashboardFragment"
        android:label="@string/title_dashboard"
        tools:layout="@layout/fragment_dashboard" >
        <action
            android:id="@+id/action_navigation_dashboard_to_navigation_sub"
            app:destination="@id/navigation_sub"
            app:enterAnim="@anim/nav_default_enter_anim"
            app:exitAnim="@anim/nav_default_exit_anim"
            app:popEnterAnim="@anim/nav_default_pop_enter_anim"
            app:popExitAnim="@anim/nav_default_pop_exit_anim" />
    </fragment>

    <activity
        android:id="@+id/navigation_sub"
        android:name="com.github.ticktakclock.bottomnavigationsample.SubActivity"
        android:label="@string/title_sub"
        tools:layout="@layout/activity_sub" />
FragmentでもActivityでも Action として画面遷移を定義しているのでActivitiyは遷移先がActivity/Fragmentどちらなのか意識することなく画面遷移できていることがわかります。
class DashboardFragment : Fragment() {

    private lateinit var dashboardViewModel: DashboardViewModel

    override fun onCreateView(
        inflater: LayoutInflater,
        container: ViewGroup?,
        savedInstanceState: Bundle?
    ): View? {
        // 〜中略〜
        val button: Button = root.findViewById(R.id.button)
        button.setOnClickListener {
            findNavController().navigate(R.id.action_navigation_dashboard_to_navigation_sub)
        }
        return root
    }
}
まとめ
- Navigationを使うと画面遷移を定義できる
- 画面遷移はActivity/Fragment意識することなく同じインターフェースで実現できる
- 遷移はActionを使い、遷移時のアニメーションも定義できる
次はSafeArgsを試してみようと思います。
→Next article ticktakclock.hatenablog.com
CoordinatorLayoutでMotionLayoutアニメーションを実現する(Android)
こんにちは、tkyです。
前回はMotionLayoutを使って実践で使えそうなアニメーションを実装しました。
今回も実践で使えそうなアニメーションを実装してみようと思います。
こちら

画面スクロール時にタイトルのテキストがアニメーションするようなMotionLayoutです。
前回同様のGitHubリポジトリとなります。 Sample10 をご確認ください。
レイアウト
CoordinatorLayoutなのでここは特に変わらずです。AppBarのレイアウト(layout/motion_10_header)が今回MotionLayoutに対応させることになります。
body側はただのTextViewなので特に触れません。GitHub参照ということで。。。
layout/motion_10.xml
<?xml version="1.0" encoding="utf-8"?>
<androidx.coordinatorlayout.widget.CoordinatorLayout xmlns:android="http://schemas.android.com/apk/res/android"
    android:id="@+id/content"
    android:layout_width="match_parent"
    android:layout_height="match_parent"
    android:fitsSystemWindows="false">

    <com.google.android.material.appbar.AppBarLayout
        android:id="@+id/app_bar"
        android:layout_width="match_parent"
        android:layout_height="180dp"
        android:theme="@style/AppTheme.AppBarOverlay">

        <include layout="@layout/motion_10_header" />

    </com.google.android.material.appbar.AppBarLayout>

    <include layout="@layout/motion_10_body" />

</androidx.coordinatorlayout.widget.CoordinatorLayout>
AppBar
これがMotionLayoutのレイアウトになりますが、ポイントは Sample10MotionLayout というMotionLayoutを継承したカスタムMotionLayoutクラスを使っているというところです。
Sample10MotionLayout については後述します。
あとは表示したいUIを配置していきます。今回の場合、
- 背景に使うImageView(写真は適当に準備しています)
- タイトルTextView
- サブタイトルTextView
<?xml version="1.0" encoding="utf-8"?>
<com.github.ticktakclock.motionlayoutsample.Sample10MotionLayout
    xmlns:android="http://schemas.android.com/apk/res/android"
    xmlns:app="http://schemas.android.com/apk/res-auto"
    xmlns:tools="http://schemas.android.com/tools"
    tools:showPaths="true"
    android:id="@+id/motionLayout"
    android:layout_width="match_parent"
    android:layout_height="match_parent"
    android:minHeight="50dp"
    app:layoutDescription="@xml/scene_10"
    app:layout_scrollFlags="scroll|enterAlways|snap|exitUntilCollapsed">


    <ImageView
        android:id="@+id/background"
        android:layout_width="wrap_content"
        android:layout_height="wrap_content"
        android:scaleType="centerCrop"
        app:srcCompat="@drawable/public_domain_photo_2"
        tools:layout_editor_absoluteX="0dp"
        tools:layout_editor_absoluteY="0dp" />

    <TextView
        android:id="@+id/title"
        android:layout_width="wrap_content"
        android:layout_height="wrap_content"
        android:text="@string/sample_10_title"
        android:textColor="@android:color/white"
        android:textSize="24sp"
        tools:layout_editor_absoluteX="173dp"
        tools:layout_editor_absoluteY="263dp" />

    <TextView
        android:id="@+id/title_sub"
        android:layout_width="wrap_content"
        android:layout_height="wrap_content"
        android:text="@string/sample_10_sub_title"
        android:textColor="@android:color/white"
        tools:layout_editor_absoluteX="184dp"
        tools:layout_editor_absoluteY="348dp" />
</com.github.ticktakclock.motionlayoutsample.Sample10MotionLayout>
トリガー
やりたいことは「スクロールしたときにTextViewの位置を変更する」です。
スクロールは”縦のスワイプ”になるので motion:dragDirection="dragUp" でスクロールを実装します。ターゲットは背景画像にしておきます。
    <Transition
        motion:constraintSetEnd="@id/end"
        motion:constraintSetStart="@id/start"
        motion:duration="200"
        motion:motionInterpolator="linear">
        <OnSwipe
            motion:dragDirection="dragUp"
            motion:targetId="@id/background"
            motion:touchAnchorSide="bottom" />
    </Transition>
開始
@startにはAppBarが開いている状態の成約を指定していきます。
背景画像は見せておきたいので android:alpha="1" で表示状態にしておきます。
あとは通常通りタイトルTextViewは中央に来るように、サブタイトルTextViewはタイトルの下に来るように成約を設定します。
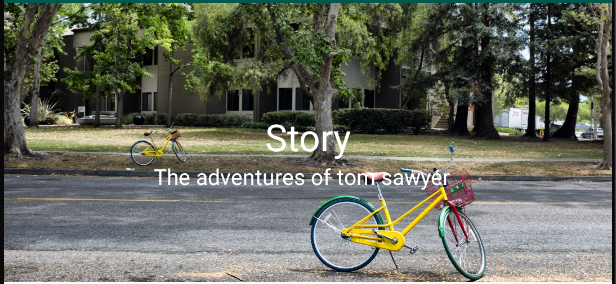
    <ConstraintSet android:id="@+id/start">
        <Constraint
            android:id="@id/background"
            android:alpha="1">
            <Layout
                android:layout_width="wrap_content"
                android:layout_height="wrap_content"
                motion:layout_constraintBottom_toBottomOf="parent"
                motion:layout_constraintEnd_toEndOf="parent"
                motion:layout_constraintStart_toStartOf="parent" />
        </Constraint>
        <Constraint android:id="@id/title">
            <Layout
                android:layout_width="wrap_content"
                android:layout_height="wrap_content"
                android:layout_marginBottom="8dp"
                motion:layout_constraintBottom_toBottomOf="@id/background"
                motion:layout_constraintEnd_toEndOf="parent"
                motion:layout_constraintStart_toStartOf="parent"
                motion:layout_constraintTop_toTopOf="@id/background" />
        </Constraint>
        <Constraint android:id="@id/title_sub">
            <Layout
                android:layout_width="wrap_content"
                android:layout_height="wrap_content"
                android:layout_marginEnd="8dp"
                motion:layout_constraintEnd_toEndOf="parent"
                motion:layout_constraintStart_toStartOf="parent"
                motion:layout_constraintTop_toBottomOf="@id/title" />
        </Constraint>
    </ConstraintSet>
終了
@endにはAppBarが閉じている状態の成約を指定していきます。
背景画像は見せなくて良いので android:alpha="0" で表示状態にしておきます。
スクロールした時にタイトルTextViewは左下、サブタイトルTextViewはタイトルの右横に配置します。

    <ConstraintSet android:id="@+id/end">
        <Constraint
            android:id="@id/background"
            android:alpha="0">
            <Layout
                android:layout_width="wrap_content"
                android:layout_height="wrap_content"
                motion:layout_constraintBottom_toBottomOf="parent" />
        </Constraint>
        <Constraint android:id="@id/title">
            <Layout
                android:layout_width="wrap_content"
                android:layout_height="wrap_content"
                android:layout_marginStart="8dp"
                android:layout_marginBottom="8dp"
                motion:layout_constraintBottom_toBottomOf="@id/background"
                motion:layout_constraintStart_toStartOf="parent" />
        </Constraint>
        <Constraint android:id="@id/title_sub">
            <Layout
                android:layout_width="wrap_content"
                android:layout_height="wrap_content"
                android:layout_marginStart="8dp"
                motion:layout_constraintBottom_toBottomOf="@id/title"
                motion:layout_constraintStart_toEndOf="@id/title"
                motion:layout_constraintTop_toTopOf="@id/title" />
        </Constraint>
    </ConstraintSet>
カスタムMotionLayoutについて
ここまでやれば普通であればスクロールでアニメーションできるのですが、残念ながらMotionLayoutクラスではアニメーションできませんでした。
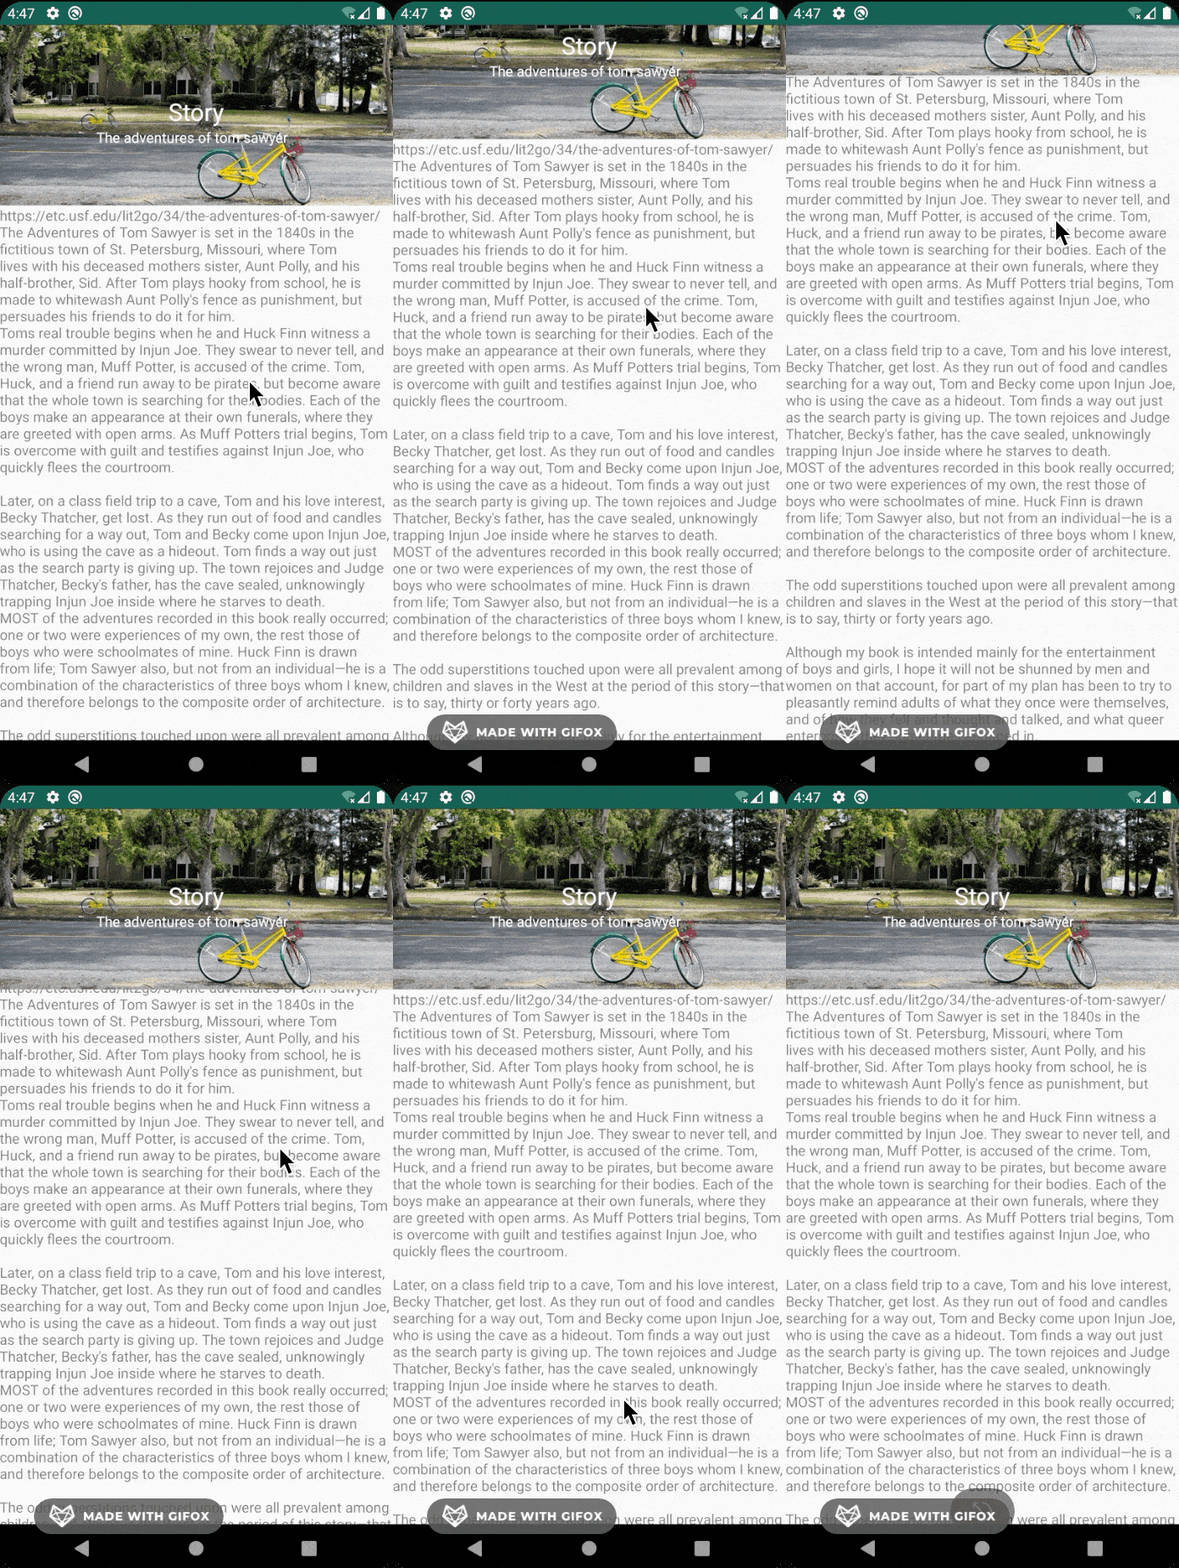
アニメーションする際、MotionLayoutの progress 値が変化することでTransition発生することになりますが、AppBarのレイアウトの縦移動だけではMotionLayoutのこの値が変化することはないようです。
ということでMotionLayoutに AppBarLayout.OnOffsetChangedListener を実装してAppbarLayout で発生するoffsetをMotionLayoutのprogressに適用させることでTransitionの発生を促すようにチャレンジします。
class Sample10MotionLayout @JvmOverloads constructor(
    context: Context, attrs: AttributeSet? = null, defStyleAttr: Int = 0
) : MotionLayout(context, attrs, defStyleAttr), AppBarLayout.OnOffsetChangedListener {

    override fun onOffsetChanged(appBarLayout: AppBarLayout?, offset: Int) {
        val scrolled = appBarLayout?.totalScrollRange?.toFloat()
        progress = -offset / (appBarLayout?.totalScrollRange?.toFloat() ?: 0f)
    }

    override fun onAttachedToWindow() {
        super.onAttachedToWindow()
        (parent as? AppBarLayout)?.addOnOffsetChangedListener(this)
    }
}
これでスクロールでMotionLayoutのTransitionを効かせる事ができたのですが、もっと良い方法がないか模索したいところです。
まとめ
CoordinatorLayoutとMotionLayoutを組み合わせたアニメーションを実装してみました。
MotionLayoutを拡張してAppBarのoffsetをMotionLayoutのprogressに適用させることでアニメーションを実現しました。
どうしてもカスタムMotionLayoutが必要なのかはわかりませんが、もっと良い方法があれば是非教えていただきたいです。
発展
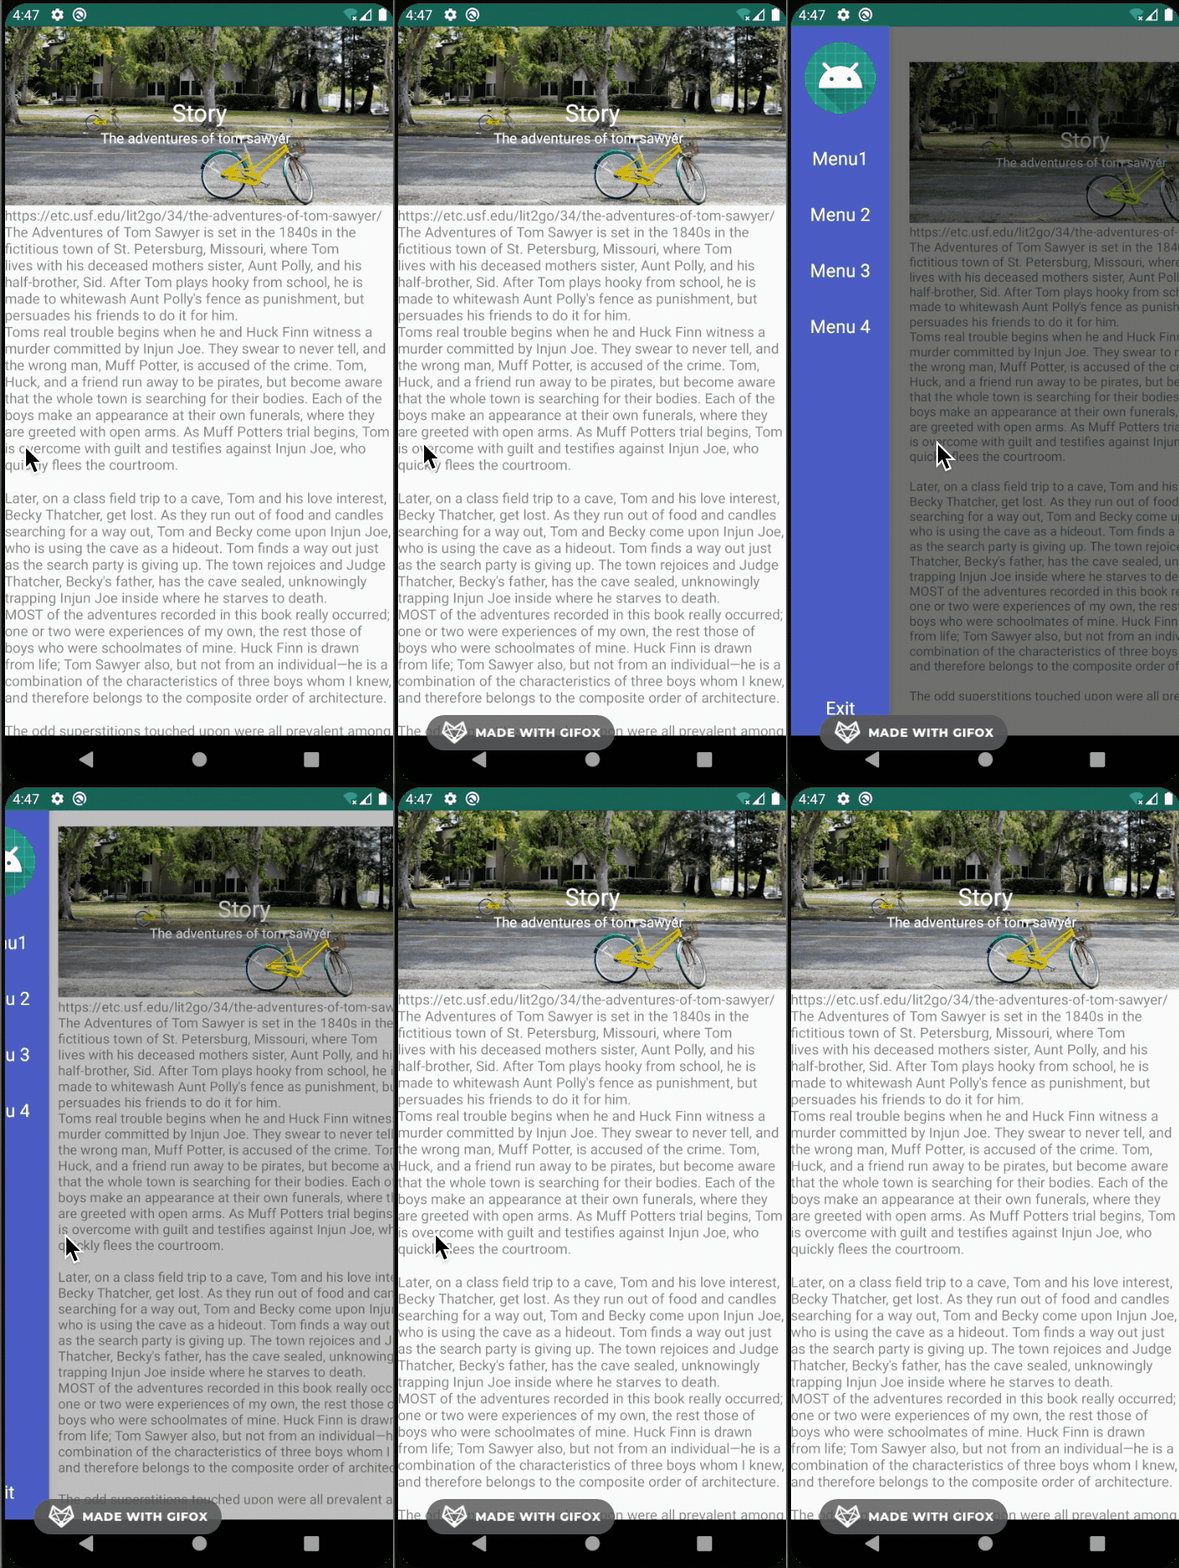
カスタムMotionLayoutのprogressをうまく使えば様々なケースでMotionLayoutを使えそうなことがわかったのでDrawerLayoutでも適用可能かと思われます。
詳しくはGitHubの Sample11 をご確認ください。
class Sample11MotionLayout @JvmOverloads constructor(
    context: Context, attrs: AttributeSet? = null, defStyleAttr: Int = 0
) : MotionLayout(context, attrs, defStyleAttr), DrawerLayout.DrawerListener {

    override fun onDrawerSlide(drawerView: View, slideOffset: Float) {
        progress = slideOffset
    }

    override fun onDrawerClosed(drawerView: View) {

    }

    override fun onDrawerOpened(drawerView: View) {

    }

    override fun onDrawerStateChanged(newState: Int) {

    }

    override fun onAttachedToWindow() {
        super.onAttachedToWindow()
        (parent as? DrawerLayout)?.addDrawerListener(this)
    }
}
MotionLayoutでFAB Speed dialを実現する
こんにちはtkyです。
前回 、MotionLayoutでアニメーションさせる(Android) - ticktakclockの日記にてMotionLayoutについて学習しました。
今回はこのMotionLayoutを利用してFABメニューにおけるスピードダイアル(Speed dial)を実現してみたいと思います。
これですね。
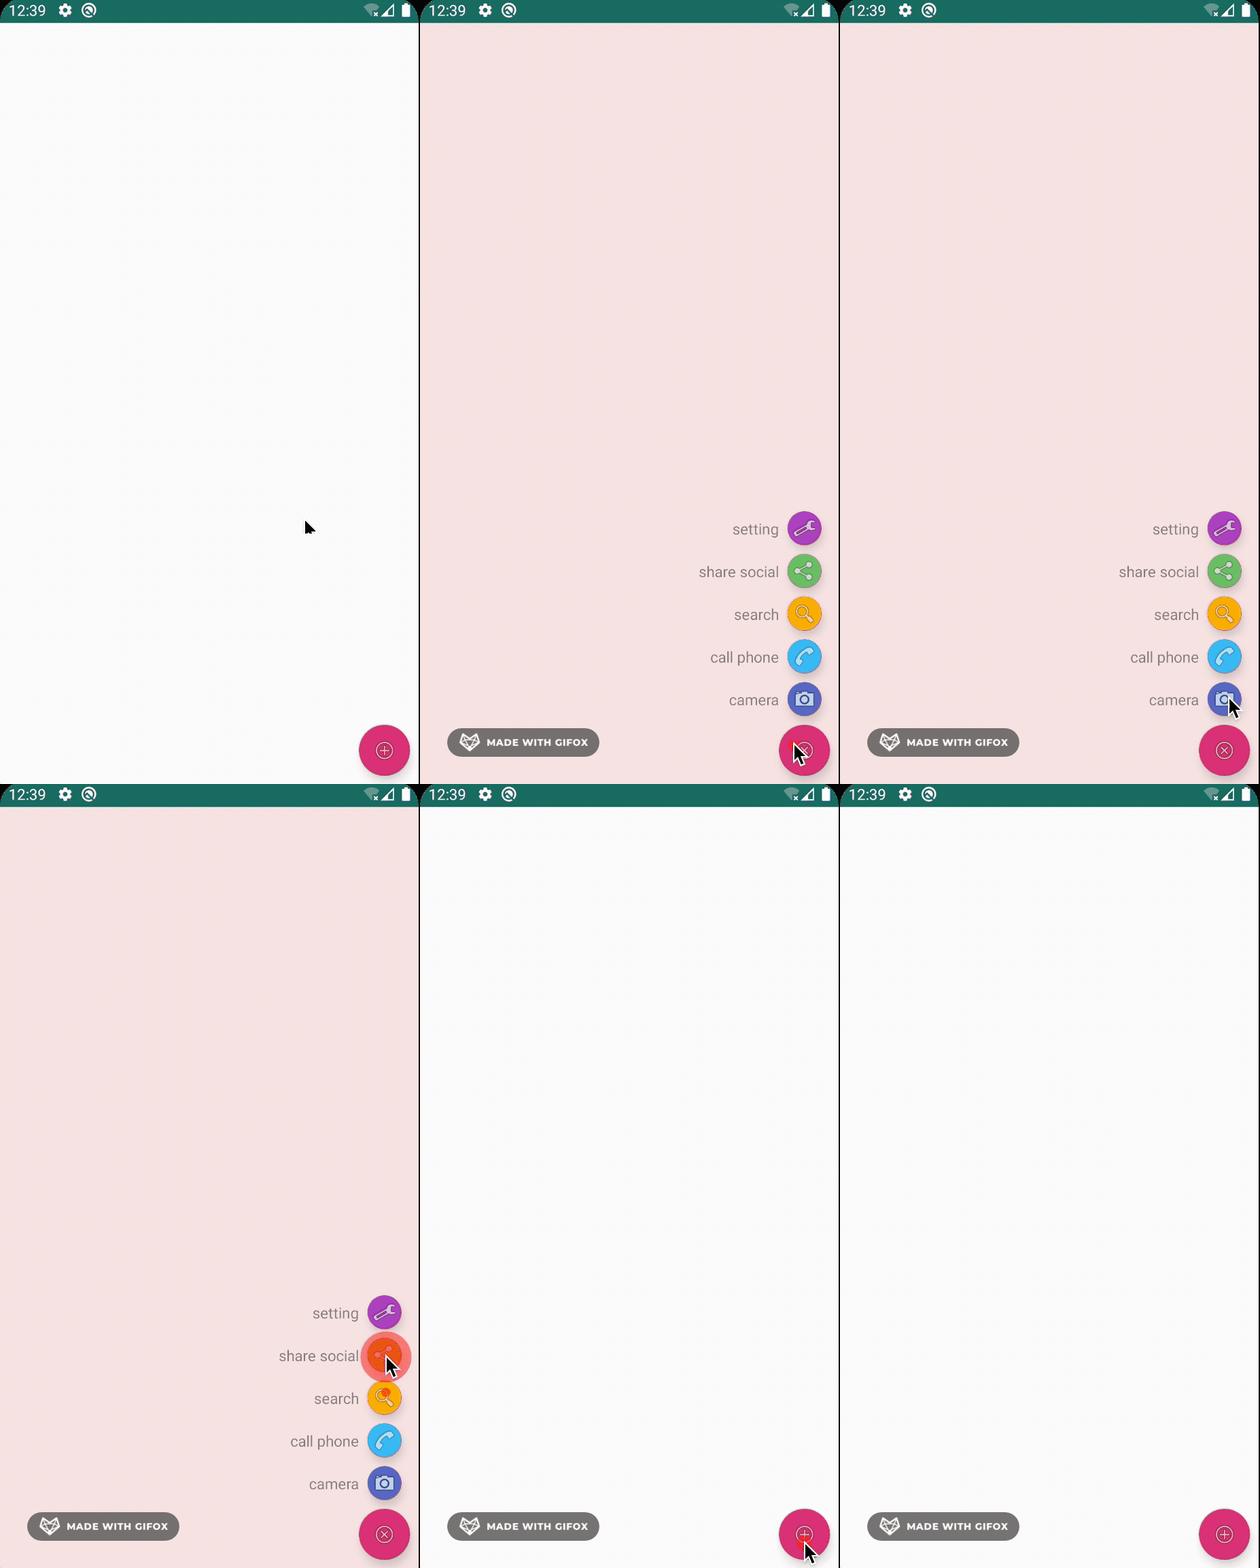
実際のコードは前回のGitHubと同じです。 Sample9 をご確認ください。
レイアウト
まずはlayout.xmlにパーツを定義していきます。ツリー的にはこのようにになります。
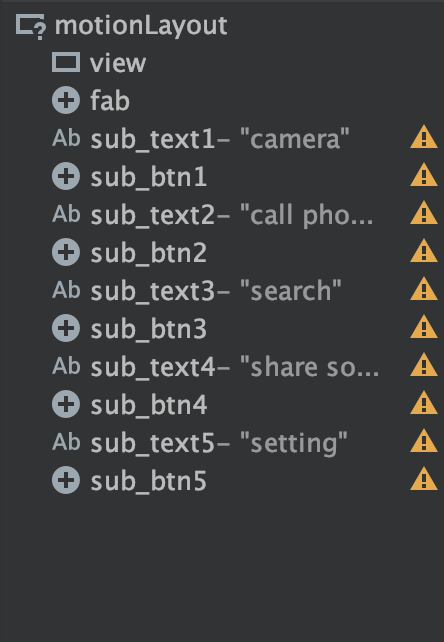
1つViewを設置(@+id/viewのこと)していますが、これは背景をつけるために配置しています。Gif上で赤色の背景にあたる部分です。
layout/motion_09.xml
<?xml version="1.0" encoding="utf-8"?>
<androidx.constraintlayout.motion.widget.MotionLayout
    xmlns:android="http://schemas.android.com/apk/res/android"
    xmlns:app="http://schemas.android.com/apk/res-auto"
    xmlns:tools="http://schemas.android.com/tools"
    tools:showPaths="true"
    android:id="@+id/motionLayout"
    android:layout_width="match_parent"
    android:layout_height="match_parent"
    app:layoutDescription="@xml/scene_09">

    <View
        android:id="@+id/view"
        android:layout_width="wrap_content"
        android:layout_height="wrap_content"
        tools:layout_editor_absoluteX="0dp"
        tools:layout_editor_absoluteY="0dp" />

    <com.google.android.material.floatingactionbutton.FloatingActionButton
        android:id="@+id/fab"
        android:layout_width="wrap_content"
        android:layout_height="wrap_content"
        android:src="@android:drawable/ic_menu_add"
        app:fabCustomSize="48dp"
        tools:layout_editor_absoluteX="339dp"
        tools:layout_editor_absoluteY="659dp" />

    <TextView
        android:id="@+id/sub_text1"
        android:layout_width="wrap_content"
        android:layout_height="wrap_content"
        android:text="camera"
        tools:layout_editor_absoluteX="200dp"
        tools:layout_editor_absoluteY="553dp" />

    <com.google.android.material.floatingactionbutton.FloatingActionButton
        android:id="@+id/sub_btn1"
        android:layout_width="wrap_content"
        android:layout_height="wrap_content"
        android:backgroundTint="#3F51B5"
        android:clickable="true"
        android:src="@android:drawable/ic_menu_camera"
        app:fabCustomSize="32dp"
        tools:layout_editor_absoluteX="332dp"
        tools:layout_editor_absoluteY="560dp" />

    <TextView
        android:id="@+id/sub_text2"
        android:layout_width="wrap_content"
        android:layout_height="wrap_content"
        android:text="call phone"
        tools:layout_editor_absoluteX="297dp"
        tools:layout_editor_absoluteY="714dp" />

    <com.google.android.material.floatingactionbutton.FloatingActionButton
        android:id="@+id/sub_btn2"
        android:layout_width="wrap_content"
        android:layout_height="wrap_content"
        android:backgroundTint="#03A9F4"
        android:clickable="true"
        android:src="@android:drawable/ic_menu_call"
        app:fabCustomSize="32dp"
        tools:layout_editor_absoluteX="363dp"
        tools:layout_editor_absoluteY="723dp" />

    <TextView
        android:id="@+id/sub_text3"
        android:layout_width="wrap_content"
        android:layout_height="wrap_content"
        android:text="search"
        tools:layout_editor_absoluteX="297dp"
        tools:layout_editor_absoluteY="698dp" />

    <com.google.android.material.floatingactionbutton.FloatingActionButton
        android:id="@+id/sub_btn3"
        android:layout_width="wrap_content"
        android:layout_height="wrap_content"
        android:backgroundTint="#FF9800"
        android:clickable="true"
        android:src="@android:drawable/ic_menu_search"
        app:fabCustomSize="32dp"
        tools:layout_editor_absoluteX="368dp"
        tools:layout_editor_absoluteY="691dp" />

    <TextView
        android:id="@+id/sub_text4"
        android:layout_width="wrap_content"
        android:layout_height="wrap_content"
        android:text="share social"
        tools:layout_editor_absoluteX="297dp"
        tools:layout_editor_absoluteY="698dp" />

    <com.google.android.material.floatingactionbutton.FloatingActionButton
        android:id="@+id/sub_btn4"
        android:layout_width="wrap_content"
        android:layout_height="wrap_content"
        android:backgroundTint="#4CAF50"
        android:clickable="true"
        android:src="@android:drawable/ic_menu_share"
        app:fabCustomSize="32dp"
        tools:layout_editor_absoluteX="368dp"
        tools:layout_editor_absoluteY="691dp" />

    <TextView
        android:id="@+id/sub_text5"
        android:layout_width="wrap_content"
        android:layout_height="wrap_content"
        android:text="setting"
        tools:layout_editor_absoluteX="297dp"
        tools:layout_editor_absoluteY="698dp" />

    <com.google.android.material.floatingactionbutton.FloatingActionButton
        android:id="@+id/sub_btn5"
        android:layout_width="wrap_content"
        android:layout_height="wrap_content"
        android:backgroundTint="#9C27B0"
        android:clickable="true"
        android:src="@android:drawable/ic_menu_manage"
        app:fabCustomSize="32dp"
        tools:layout_editor_absoluteX="368dp"
        tools:layout_editor_absoluteY="691dp" />

</androidx.constraintlayout.motion.widget.MotionLayout>
量は多いですが、1つ1つはただのButtonとTextViewです。パーツを定義したので xml/scene_09.xml に開始/終了の成約を設定してどのようにアニメーションするかを定義していきましょう。
トリガー、開始成約、終了成約の順にポイントを解説していきます。
今回すべて1つのxml内に記述していますが、開始と終了成約については別xmlで定義したほうが可読性が上がるので本番投入する際は分けると良いのではないかと思われます。
トリガー
やりたいことは「FABボタンが押された時にメニューを開く/閉じる」です。 Transitionにはfabがクリックされた時に成約をトグルできるようにOnClickを配置します。
    <Transition
        motion:constraintSetStart="@id/start"
        motion:constraintSetEnd="@id/end"
        motion:duration="200">
        <OnClick
            motion:targetId="@id/fab"
            motion:clickAction="toggle"
            />
    </Transition>
開始
@startにはメニューが閉じている状態の成約を指定していきます。
- 背景の@viewは特にすることはないので透過させておきます
- メニューの各ボタンも表示する必要はないので
android:visibility="invisible"を指定して非表示状態とします - アニメーション自体は上下のみで、メニューのFAB(@sub_btn1~@sub_btn5)の下の成約を
motion:layout_constraintBottom_toBottomOf="parent"で親につけておきます
    <ConstraintSet
        android:id="@+id/start">
        <Constraint android:id="@id/view">
            <Layout
                android:layout_width="0dp"
                android:layout_height="0dp"
                motion:layout_constraintTop_toTopOf="parent"
                motion:layout_constraintBottom_toBottomOf="parent"
                motion:layout_constraintStart_toStartOf="parent"
                motion:layout_constraintEnd_toEndOf="parent"
                />
            <CustomAttribute
                motion:attributeName="BackgroundColor"
                motion:customColorValue="#00FFFFFF"
                />
        </Constraint>
        <Constraint android:id="@id/fab">
            <Layout
                android:layout_width="48dp"
                android:layout_height="48dp"
                android:layout_marginBottom="8dp"
                android:layout_marginEnd="8dp"
                motion:layout_constraintEnd_toEndOf="parent"
                motion:layout_constraintBottom_toBottomOf="parent"
                />
            <CustomAttribute
                motion:attributeName="Rotation"
                motion:customFloatValue="0"
                />
        </Constraint>
        <Constraint
            android:id="@id/sub_btn1"
            android:visibility="invisible">
            <Layout
                android:layout_width="32dp"
                android:layout_height="32dp"
                android:layout_marginBottom="8dp"
                motion:layout_constraintStart_toStartOf="@id/fab"
                motion:layout_constraintEnd_toEndOf="@id/fab"
                motion:layout_constraintBottom_toBottomOf="parent"
                />
        </Constraint>
        <Constraint
            android:id="@id/sub_text1"
            android:visibility="invisible">
            <Layout
                android:layout_width="wrap_content"
                android:layout_height="wrap_content"
                android:layout_marginEnd="8dp"
                motion:layout_constraintEnd_toStartOf="@id/sub_btn1"
                motion:layout_constraintBottom_toBottomOf="@id/sub_btn1"
                motion:layout_constraintTop_toTopOf="@id/sub_btn1"
                />
        </Constraint>
        <Constraint
            android:id="@id/sub_btn2"
            android:visibility="invisible">
            <Layout
                android:layout_marginBottom="8dp"
                motion:layout_constraintStart_toStartOf="@id/sub_btn1"
                motion:layout_constraintEnd_toEndOf="@id/sub_btn1"
                motion:layout_constraintBottom_toBottomOf="parent"
                />
        </Constraint>
        <Constraint
            android:id="@id/sub_text2"
            android:visibility="invisible">
            <Layout
                android:layout_width="wrap_content"
                android:layout_height="wrap_content"
                android:layout_marginEnd="8dp"
                motion:layout_constraintEnd_toStartOf="@id/sub_btn2"
                motion:layout_constraintBottom_toBottomOf="@id/sub_btn2"
                motion:layout_constraintTop_toTopOf="@id/sub_btn2"
                />
        </Constraint>
        <Constraint
            android:id="@id/sub_btn3"
            android:visibility="invisible">
            <Layout
                android:layout_width="32dp"
                android:layout_height="32dp"
                android:layout_marginBottom="8dp"
                motion:layout_constraintStart_toStartOf="@id/sub_btn2"
                motion:layout_constraintEnd_toEndOf="@id/sub_btn2"
                motion:layout_constraintBottom_toBottomOf="parent"
                />
        </Constraint>
        <Constraint
            android:id="@id/sub_text3"
            android:visibility="invisible">
            <Layout
                android:layout_width="wrap_content"
                android:layout_height="wrap_content"
                android:layout_marginEnd="8dp"
                motion:layout_constraintEnd_toStartOf="@id/sub_btn3"
                motion:layout_constraintBottom_toBottomOf="@id/sub_btn3"
                motion:layout_constraintTop_toTopOf="@id/sub_btn3"
                />
        </Constraint>
        <Constraint
            android:id="@id/sub_btn4"
            android:visibility="invisible">
            <Layout
                android:layout_width="32dp"
                android:layout_height="32dp"
                android:layout_marginBottom="8dp"
                motion:layout_constraintStart_toStartOf="@id/sub_btn3"
                motion:layout_constraintEnd_toEndOf="@id/sub_btn3"
                motion:layout_constraintBottom_toBottomOf="parent"
                />
        </Constraint>
        <Constraint
            android:id="@id/sub_text4"
            android:visibility="invisible">
            <Layout
                android:layout_width="wrap_content"
                android:layout_height="wrap_content"
                android:layout_marginEnd="8dp"
                motion:layout_constraintEnd_toStartOf="@id/sub_btn4"
                motion:layout_constraintBottom_toBottomOf="@id/sub_btn4"
                motion:layout_constraintTop_toTopOf="@id/sub_btn4"
                />
        </Constraint>
        <Constraint
            android:id="@id/sub_btn5"
            android:visibility="invisible">
            <Layout
                android:layout_width="32dp"
                android:layout_height="32dp"
                android:layout_marginBottom="8dp"
                motion:layout_constraintStart_toStartOf="@id/sub_btn4"
                motion:layout_constraintEnd_toEndOf="@id/sub_btn4"
                motion:layout_constraintBottom_toBottomOf="parent"
                />
        </Constraint>
        <Constraint
            android:id="@id/sub_text5"
            android:visibility="invisible">
            <Layout
                android:layout_width="wrap_content"
                android:layout_height="wrap_content"
                android:layout_marginEnd="8dp"
                motion:layout_constraintEnd_toStartOf="@id/sub_btn5"
                motion:layout_constraintBottom_toBottomOf="@id/sub_btn5"
                motion:layout_constraintTop_toTopOf="@id/sub_btn5"
                />
        </Constraint>
    </ConstraintSet>
終了
@endにはメニューが開いている状態の成約を指定していきます。
- 背景はViewのBackgroundColor属性を変更するためにCustomAttributeで色を指定します
- メニューのボタンたちは今度は表示する必要があるので
android:visibility="visible"を指定して表示状態とします - メニューの各FABは例えば@sub_btn5(一番上のFAB)では
motion:layout_constraintBottom_toTopOf="@id/sub_btn4"というように1つ下のFABの上に配置するように指定します

    <ConstraintSet
        android:id="@+id/end">
        <Constraint android:id="@id/view">
            <Layout
                android:layout_width="0dp"
                android:layout_height="0dp"
                motion:layout_constraintTop_toTopOf="parent"
                motion:layout_constraintBottom_toBottomOf="parent"
                motion:layout_constraintStart_toStartOf="parent"
                motion:layout_constraintEnd_toEndOf="parent"
                />
            <CustomAttribute
                motion:attributeName="BackgroundColor"
                motion:customColorValue="#5CEC9D9D"
                />
        </Constraint>
        <Constraint android:id="@id/fab">
            <Layout
                android:layout_width="48dp"
                android:layout_height="48dp"
                android:layout_marginBottom="8dp"
                android:layout_marginEnd="8dp"
                motion:layout_constraintEnd_toEndOf="parent"
                motion:layout_constraintBottom_toBottomOf="parent"
                />
            <CustomAttribute
                motion:attributeName="Rotation"
                motion:customFloatValue="45"
                />
        </Constraint>
        <Constraint
            android:id="@id/sub_btn1"
            android:visibility="visible">
            <Layout
                android:layout_width="32dp"
                android:layout_height="32dp"
                android:layout_marginBottom="8dp"
                motion:layout_constraintStart_toStartOf="@id/fab"
                motion:layout_constraintEnd_toEndOf="@id/fab"
                motion:layout_constraintBottom_toTopOf="@id/fab"
                />
        </Constraint>
        <Constraint
            android:id="@id/sub_text1"
            android:visibility="visible">
            <Layout
                android:layout_width="wrap_content"
                android:layout_height="wrap_content"
                android:layout_marginEnd="8dp"
                motion:layout_constraintEnd_toStartOf="@id/sub_btn1"
                motion:layout_constraintBottom_toBottomOf="@id/sub_btn1"
                motion:layout_constraintTop_toTopOf="@id/sub_btn1"
                />
        </Constraint>
        <Constraint
            android:id="@id/sub_btn2"
            android:visibility="visible">
            <Layout
                android:layout_width="32dp"
                android:layout_height="32dp"
                android:layout_marginBottom="8dp"
                motion:layout_constraintStart_toStartOf="@id/sub_btn1"
                motion:layout_constraintEnd_toEndOf="@id/sub_btn1"
                motion:layout_constraintBottom_toTopOf="@id/sub_btn1"
                />
        </Constraint>
        <Constraint
            android:id="@id/sub_text2"
            android:visibility="visible">
            <Layout
                android:layout_width="wrap_content"
                android:layout_height="wrap_content"
                android:layout_marginEnd="8dp"
                motion:layout_constraintEnd_toStartOf="@id/sub_btn2"
                motion:layout_constraintBottom_toBottomOf="@id/sub_btn2"
                motion:layout_constraintTop_toTopOf="@id/sub_btn2"
                />
        </Constraint>
        <Constraint
            android:id="@id/sub_btn3"
            android:visibility="visible">
            <Layout
                android:layout_width="32dp"
                android:layout_height="32dp"
                android:layout_marginBottom="8dp"
                motion:layout_constraintStart_toStartOf="@id/sub_btn2"
                motion:layout_constraintEnd_toEndOf="@id/sub_btn2"
                motion:layout_constraintBottom_toTopOf="@id/sub_btn2"
                />
        </Constraint>
        <Constraint
            android:id="@id/sub_text3"
            android:visibility="visible">
            <Layout
                android:layout_width="wrap_content"
                android:layout_height="wrap_content"
                android:layout_marginEnd="8dp"
                motion:layout_constraintEnd_toStartOf="@id/sub_btn3"
                motion:layout_constraintBottom_toBottomOf="@id/sub_btn3"
                motion:layout_constraintTop_toTopOf="@id/sub_btn3"
                />
        </Constraint>
        <Constraint
            android:id="@id/sub_btn4"
            android:visibility="visible">
            <Layout
                android:layout_width="32dp"
                android:layout_height="32dp"
                android:layout_marginBottom="8dp"
                motion:layout_constraintStart_toStartOf="@id/sub_btn3"
                motion:layout_constraintEnd_toEndOf="@id/sub_btn3"
                motion:layout_constraintBottom_toTopOf="@id/sub_btn3"
                />
        </Constraint>
        <Constraint
            android:id="@id/sub_text4"
            android:visibility="visible">
            <Layout
                android:layout_width="wrap_content"
                android:layout_height="wrap_content"
                android:layout_marginEnd="8dp"
                motion:layout_constraintEnd_toStartOf="@id/sub_btn4"
                motion:layout_constraintBottom_toBottomOf="@id/sub_btn4"
                motion:layout_constraintTop_toTopOf="@id/sub_btn4"
                />
        </Constraint>
        <Constraint
            android:id="@id/sub_btn5"
            android:visibility="visible">
            <Layout
                android:layout_width="32dp"
                android:layout_height="32dp"
                android:layout_marginBottom="8dp"
                motion:layout_constraintStart_toStartOf="@id/sub_btn4"
                motion:layout_constraintEnd_toEndOf="@id/sub_btn4"
                motion:layout_constraintBottom_toTopOf="@id/sub_btn4"
                />
        </Constraint>
        <Constraint
            android:id="@id/sub_text5"
            android:visibility="visible">
            <Layout
                android:layout_width="wrap_content"
                android:layout_height="wrap_content"
                android:layout_marginEnd="8dp"
                motion:layout_constraintEnd_toStartOf="@id/sub_btn5"
                motion:layout_constraintBottom_toBottomOf="@id/sub_btn5"
                motion:layout_constraintTop_toTopOf="@id/sub_btn5"
                />
        </Constraint>
    </ConstraintSet>
全体
長いのでここを見てください。
https://github.com/ticktakclock/MotionLayoutSamaple/blob/master/app/src/main/res/xml/scene_09.xml
まとめ
MotionLayoutを使ってxmlのみでアニメーションを実現しました。
MotionLayoutのポイントはボタンクリック時のアニメーションも含めてxmlで定義して実現できるのが良いかな、と思います。
このようにすることでボタンクリック時に本当にやりたい処理のみktファイルに記述することができて全体的に見通しの良いコードになりそうです。
次はCoordinatorLayoutと組み合わせてMotionLayoutアニメーションを実装してみようと思います。
次回
参考:ありがとうございます!
GitHub Actionsのワークフロー個人的逆引き
こんにちはtkyです。
GitHub Actionsを使い始めて1ヶ月位が経過したのでやったことなどを忘れないようにまとめていこうと思います。
思いつき次第更新してこうと思いますが、大体ドキュメントに書いてあるので基本ドキュメント参考にするのが良いのかと思われます。
とりあえずパッと試してみたい人へ
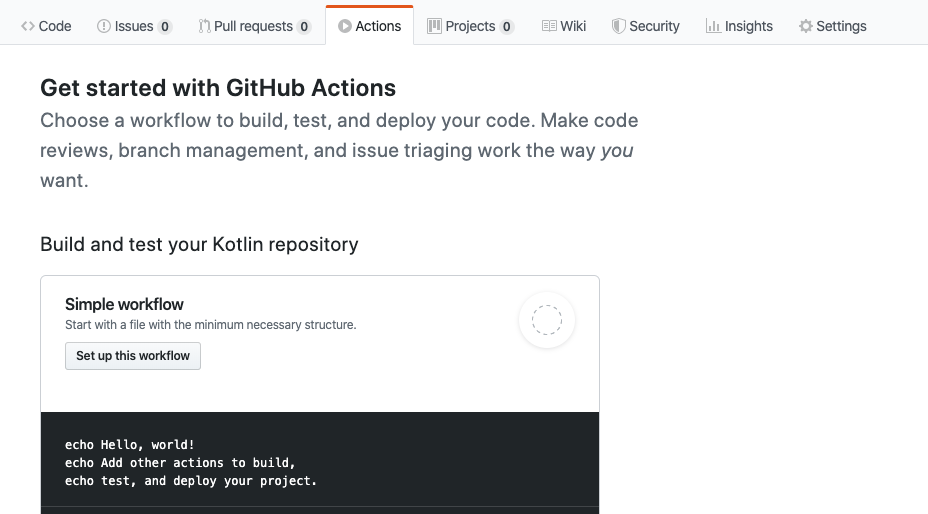
GitHubのactionタブからポチポチするだけでとりあえずなにかは作れるので雰囲気を理解したい場合一度ブラウザ上で動かしてみると良いです。
逆引き辞典
できる限りコピペで使えるようにしています。
作業ディレクトを指定したい
cd foo && ( sample.sh args1) みたいなことやりたくないですよね。
.
├── .github
│   └── workflows
│       └── pr-check.yml
└── foo
    └── sample.sh
    steps:
      - name: exec sample.sh
        working-directory: ./foo
        run: sample.sh args1
ワークフローを実行するコンテナを指定したい
通常ubuntu-latest上で動きますが、コンテナを指定したいときがある・・・?はず・・・?
jobs:
  samplejob:
    name: sample job
    runs-on: ubuntu-latest
    container:
      image: node:10.16.0-alpine # Nodeコンテナ上でsteps実行する
    steps:
      - name: Checkout
        uses: actions/checkout@v1
      - run: npm install
PRのIssueにコメントする
github apiを使います。tokenは secrets.GITHUB_TOKEN に格納されているので便利です。
if: failure() で直前のstepが失敗していたとき(=exit status 0以外)に実行という条件分岐が可能になります。
APIたたいたあとに&& exit 1 で失敗に落として次のsuccess()に進まないようにしますが、もっといいやり方があれば教えて下さい。。。
テストにコケたときにIssueにコメントする
    steps:
      - name: Checkout
        uses: actions/checkout@v1
      - name: uint test
         run: .exec_test.sh  # 各プロジェクトのテストを実行してください
      - name: post result if test failure
        if: failure()
        run: |
          curl \
            -X POST \
            ${{ github.event.pull_request.comments_url }} \
            -H 'authorization: Bearer ${{ secrets.GITHUB_TOKEN }}' \
            -H 'content-type: application/json' \
            -d "{ \"body\": \"👮<200d>♂️UnitTestでエラーが発生しています🚧内容を確認してください👮<200d>♂️\" }" \
          && exit 1
      - name: post result if test success
        if: success()
        run: |
          curl \
            -X POST \
            ${{ github.event.pull_request.comments_url }} \
            -H 'authorization: Bearer ${{ secrets.GITHUB_TOKEN }}' \
            -H 'content-type: application/json' \
            -d "{ \"body\": \"おめでとうございます🎉UnitTestは無事通過しました🥳\" }" \
こんな感じで出てきます

どんな環境変数が使えるのか
ワークフロー上の${{ secrets.github_token }} (小文字でもいけます)などどんなものが使えるのか
ざっくり3つくらいリストアップ。
| 変数 | 説明 |
|---|---|
| ${{ secrets.github_token }} | トークン |
| ${{ secrets.github_sha }} | コミットハッシュ |
| ${{ secrets. github_repository }} | オーナーとリポジトリ(ower/repo) |
${{ github.event.payload }} にも色々と情報が入っています。GitHubAPIのEvent typeと同じものが入るようです。
PRの時に入るイベントは以下を見ると良いです。
PRにコメントするときは ${{ github.event.pull_request.comments_url }} にPOSTするとコメントできます。
カスタムアクションが必要になるケース
自分のリポジトリだけで使うプライベートなアクションの作成が必要になるケースは、自分で使ってみて以下のような感じでした。
- 特殊なDocker環境を使っている
- shellをぶん回しながら色々と細かいことをやりたい
- yamlのRUNでかけなくもないけどごちゃるので・・・
DBも絡めたテストがしたい
大体のケースで当てはまるであろうケース。以下のように書くと localhost:portでアクセスできるようになる
  samplejob:
    name: sample job
    runs-on: ubuntu-latest
    services:
      mysql:
        image: mysql:5.7 # dockerhubのイメージを指定する
        env:
          MYSQL_ROOT_PASSWORD: root
          MYSQL_DATABASE: testdb
          MYSQL_USER: docker
          MYSQL_PASSWORD: docker
          TZ: Asia/Tokyo
    steps:
      - name: Checkout
        uses: actions/checkout@v1
      # you can access to localhost:3306
以下のように実行コンテナを指定するとdocker-composeと同じような状況下で動作させることができます。
この時コンテナ間アクセスでは mysql:3066 のようにサービス名でアクセスできるようになります。
  samplejob:
    name: sample job
    runs-on: ubuntu-latest
    container:
      image: php:7.2-fpm # 実行コンテナを指定する
    services:
      mysql:
        image: mysql:5.7 # dockerhubのイメージを指定する
        env:
          MYSQL_ROOT_PASSWORD: root
          MYSQL_DATABASE: testdb
          MYSQL_USER: docker
          MYSQL_PASSWORD: docker
    steps:
      - name: Checkout
        uses: actions/checkout@v1
      # you can access to mysql:3306
その他わかったこと
躓いたところなど記載していきます。
github actionはpublicのみ対応だった
どういうことかというと
カスタムアクションで ticktakclock/actions-test@v1 のようなリポジトリをPrivateで作ると、他のリポジトリでこのアクションにアクセスできません(当たり前ですよね)
会社でGithubを使っていて、会社用のアクションを共通で利用できるようにリポジトリを作ってもPrivateなのでアクセスできない事象になるので困る・・・
同一Organization内のリポジトリはアクセスできるようにしてほしい・・・と思いながらも今はリポジトリごとに個別でコピペして入れてます。
ワークフローはgithubにデプロイしてみるしか確認できない
どうしようもない気がしますがなにか手がないか・・・ローカルで確認した後にgit push したいのですが。。。
僕はテスト用にリポジトリ作ってそっちにPushしまくって確認した後 コミットをきれいにしてから開発リポジトリに導入しました。
※Slack等にイベント通知しているので最初は開発リポジトリにpushしまくってタイムラインが一瞬荒れました・・・w
MotionLayoutでアニメーションさせる(Android)
こんにちはtkyです。
今日はかねてから気になっていたAndroidでにおけるconstraintlayout2.0のβ3版で追加されているMotionLayoutを使ってアニメーションを試してみたいと思います。
まだベータ版(2019/12/06執筆現在)であり、2.0が正式になった時にどうなるかは不明ですので予めご了承ください。
(2020/10/24 追記)
constraintlayout2.0のstableが出ているのでプロジェクト内のライブラリバージョンを更新しました。
一応すべてのサンプルはちゃんと動いているようでした。
(2020/10/24 追記)
今回試したリポジトリはこちらになります。
MotionLayout is 何
まずは公式ドキュメントを見に行きましょう。
冒頭部分を日訳でピックアップすると
- MotionLayoutはConstraintLayoutのサブクラスでライブラリバージョン2.0から追加されています。
MotionScenes内に定義したconstraint(以降、制約)間の遷移をサポートします。- API level 18 (JellyBean MR2)以降で利用可能です。
- MotionLayoutはMotionSceneファイルが必要で、 MotionScene内トップレベルに
LayoutDescriptionを含みます- StateSet (Optional) ・・・システムの状態(selected, focused, enabled, 等)
- ConstraintSet ・・・制約群
- Transition ・・・制約か状態間の遷移
※StateSetについてはよくわからず、詳しく知っている方がいれば教えていただきたいです。
android.util.StateSet のことであっているんでしょうか・・・
また2019/12/06現在はベータ3となっており、以下のようにapp.gradleに追記することで利用可能となります。
dependencies {
    // 中略
    implementation 'androidx.constraintlayout:constraintlayout:2.0.0-beta3'
    // 中略
}
どうやって学習するか
公式にサンプルがあるのでこれで使い方を学習するのが一番手っ取り早いです。 私のリポジトリもこのサンプルを写経しながら色々と試していきました。
ざっくり解説
以下のような簡単なアニメーションの実現を考えます。
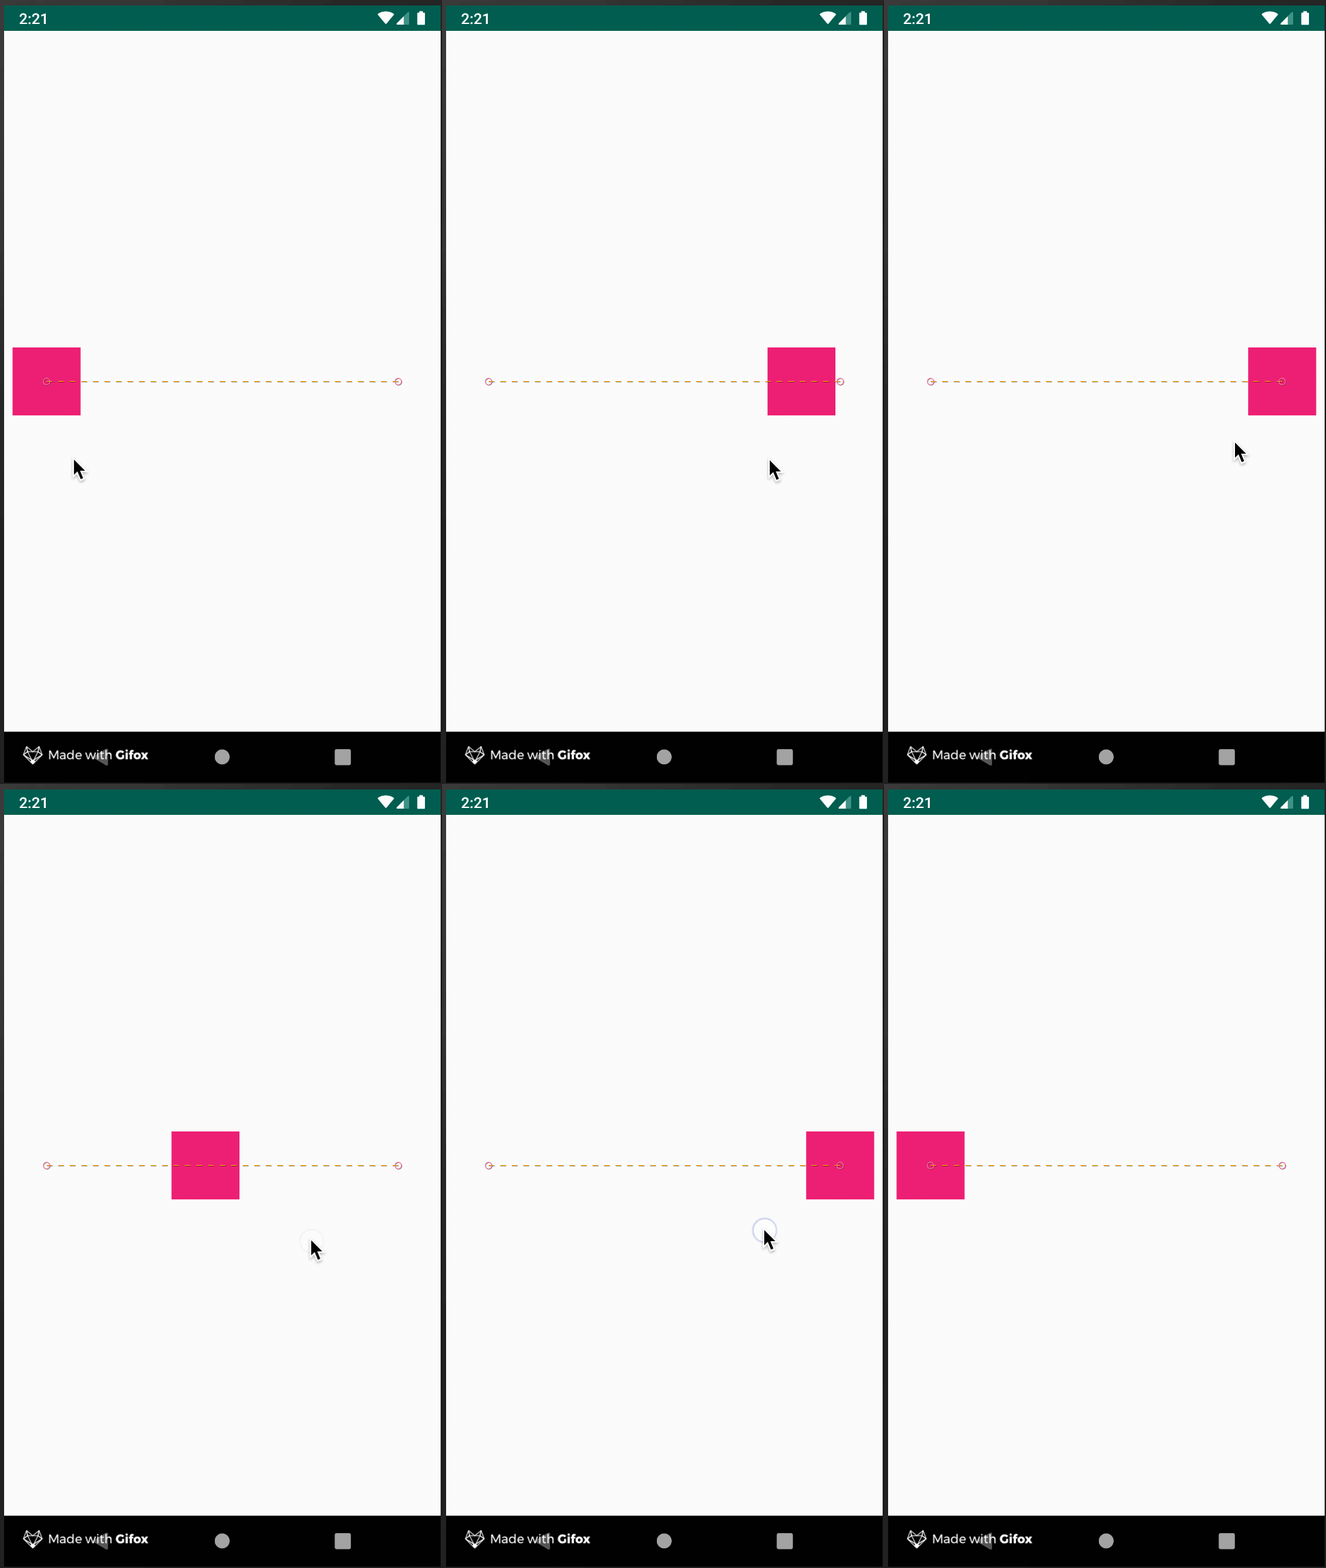
MotionLayoutを使ったアニメーションはやることを列挙したらきりこんな感じかと思いますが、2〜4は 1つのxml内に定義することになります。
- アニメーションさせたいレイアウトを
MotionLayoutタグで囲う - 遷移の仕方(Transition)を決める
- 遷移前の制約(ConstraintSet)を決める
- 遷移後の制約(ConstraintSet)を決める
アニメーションさせたいレイアウトを MotionLayout タグで囲う
アニメーションさせたい場合、
これを
<?xml version="1.0" encoding="utf-8"?>
<androidx.constraintlayout.widget.ConstraintLayout xmlns:android="http://schemas.android.com/apk/res/android"
    xmlns:app="http://schemas.android.com/apk/res-auto"
    android:layout_width="match_parent"
    android:layout_height="match_parent">

    <View
        android:id="@+id/button"
        android:background="@color/colorAccent"
        android:layout_width="64dp"
        android:layout_height="64dp"
        android:layout_marginStart="8dp"
        app:layout_constraintBottom_toBottomOf="parent"
        app:layout_constraintStart_toStartOf="parent"
        app:layout_constraintTop_toTopOf="parent" />

</androidx.constraintlayout.widget.ConstraintLayout>
こうする。
tools:layout_editor_absoluteXとtools:layout_editor_absoluteYは記述しても無視されます。
<?xml version="1.0" encoding="utf-8"?>
<androidx.constraintlayout.motion.widget.MotionLayout
    xmlns:android="http://schemas.android.com/apk/res/android"
    xmlns:app="http://schemas.android.com/apk/res-auto"
    xmlns:tools="http://schemas.android.com/tools"
    android:id="@+id/motionLayout"
    android:layout_width="match_parent"
    android:layout_height="match_parent"
    app:layoutDescription="@xml/scene_01"
    tools:showPaths="true"
    >

    <View
        android:id="@+id/button"
        android:layout_width="128dp"
        android:layout_height="128dp"
        android:background="@color/colorAccent"
        android:text="Button"
        tools:layout_editor_absoluteX="267dp"
        tools:layout_editor_absoluteY="333dp" />

</androidx.constraintlayout.motion.widget.MotionLayout>
前述の通りMotionLayoutはConstraintLayoutのサブクラスなのでConstraintLayoutを囲う必要はありません。
android:id="@+id/button"
また、今まで app:layout_constraintXXXX_toYYYYOf="parent" のようにlayout側で定義していた制約は不要となります。
app:layoutDescription="@xml/scene_01"
layout側で定義するidはMotionSenceに定義するトリガーや制約で使用する為layout側に定義する必要があります。
このscene_01.xmlに遷移の仕方と制約を定義していきます。先に示しておきます。
<?xml version="1.0" encoding="utf-8"?>
<MotionScene xmlns:motion="http://schemas.android.com/apk/res-auto"
    xmlns:android="http://schemas.android.com/apk/res/android">

    <Transition
        motion:constraintSetStart="@id/start"
        motion:constraintSetEnd="@id/end"
        motion:duration="1000">
        <OnSwipe
            motion:touchAnchorId="@id/button"
            motion:touchAnchorSide="right"
            motion:dragDirection="dragRight" />
    </Transition>

    <ConstraintSet
        android:id="@+id/start">
        <Constraint android:id="@id/button">
            <Layout
                android:layout_width="64dp"
                android:layout_height="64dp"
                android:layout_marginStart="8dp"
                motion:layout_constraintBottom_toBottomOf="parent"
                motion:layout_constraintStart_toStartOf="parent"
                motion:layout_constraintTop_toTopOf="parent"
                />
        </Constraint>
    </ConstraintSet>

    <ConstraintSet
        android:id="@+id/end">
        <Constraint android:id="@id/button">
            <Layout
                android:layout_width="64dp"
                android:layout_height="64dp"
                android:layout_marginEnd="8dp"
                motion:layout_constraintBottom_toBottomOf="parent"
                motion:layout_constraintTop_toTopOf="parent"
                motion:layout_constraintEnd_toEndOf="parent"
                />
        </Constraint>
    </ConstraintSet>
</MotionScene>
遷移の仕方を決める
上記のscene_01.xmlでやっていることは、
- 特定のIDに対して
- スワイプ/クリックした時の
- 開始ConstraintSetと終了 ConstrainntSetを定義した
<Transition>タグをMotionSence内に設置する
です。遷移の仕方の部分は以下のところになります。
    <Transition
        motion:constraintSetStart="@id/start"
        motion:constraintSetEnd="@id/end"
        motion:duration="1000">
        <OnSwipe
            motion:touchAnchorId="@id/button"
            motion:touchAnchorSide="right"
            motion:dragDirection="dragRight" />
    </Transition>
遷移前/遷移後の制約(ConstraintSet)を決める
以下の部分ですね。書きっぷりはおおよそConstraintLayoutと一緒です。
これと
    <ConstraintSet
        android:id="@+id/start">
        <Constraint android:id="@id/button">
            <Layout
                android:layout_width="64dp"
                android:layout_height="64dp"
                android:layout_marginStart="8dp"
                motion:layout_constraintBottom_toBottomOf="parent"
                motion:layout_constraintStart_toStartOf="parent"
                motion:layout_constraintTop_toTopOf="parent"
                />
        </Constraint>
    </ConstraintSet>
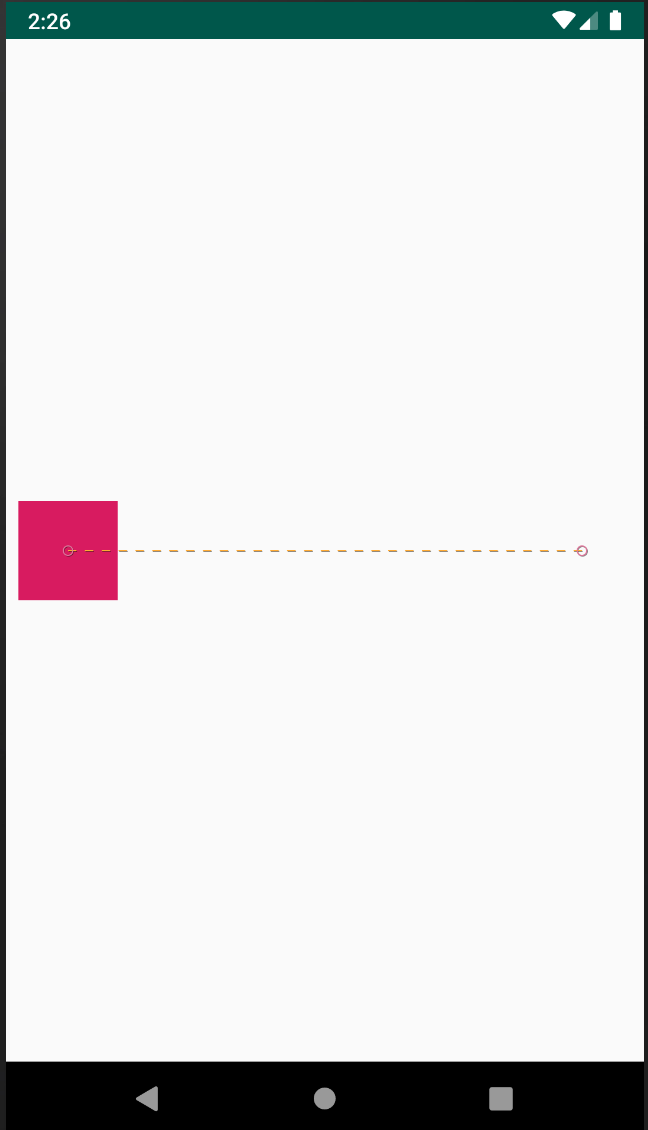
これです
    <ConstraintSet
        android:id="@+id/end">
        <Constraint android:id="@id/button">
            <Layout
                android:layout_width="64dp"
                android:layout_height="64dp"
                android:layout_marginEnd="8dp"
                motion:layout_constraintBottom_toBottomOf="parent"
                motion:layout_constraintTop_toTopOf="parent"
                motion:layout_constraintEnd_toEndOf="parent"
                />
        </Constraint>
    </ConstraintSet>
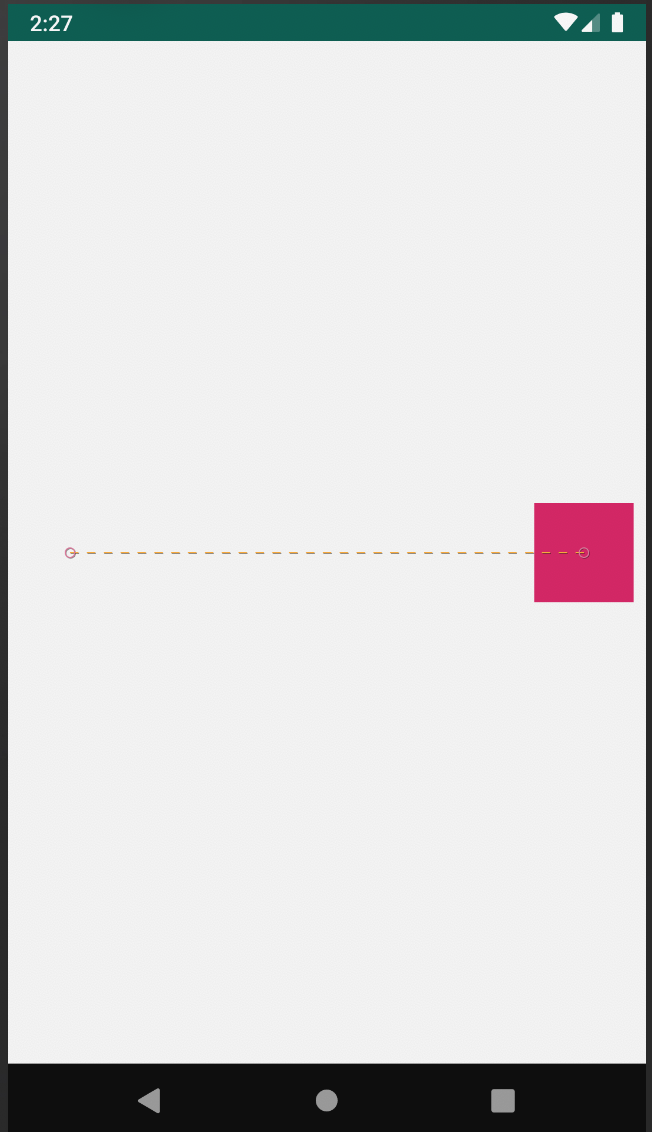
scene.xmlが長くなる問題
上記のようにConstraintSetを書いていると必然的にsence.xmlが長くなって見通しが悪くなりますが、xmlを分けて次のようにも記載することができます。
制約部分はいつもどおり、layout/xmlに記載してしまって motion:constraintSetStart="@layout/motion_01_start" のように参照するだけにすると、役割も明確になって良いかもしれません。
layout/scene_01_start.xml
<?xml version="1.0" encoding="utf-8"?>
<androidx.constraintlayout.widget.ConstraintLayout xmlns:android="http://schemas.android.com/apk/res/android"
    xmlns:app="http://schemas.android.com/apk/res-auto"
    android:layout_width="match_parent"
    android:layout_height="match_parent">

    <View
        android:id="@+id/button"
        android:background="@color/colorAccent"
        android:layout_width="64dp"
        android:layout_height="64dp"
        android:layout_marginStart="8dp"
        app:layout_constraintBottom_toBottomOf="parent"
        app:layout_constraintStart_toStartOf="parent"
        app:layout_constraintTop_toTopOf="parent" />

</androidx.constraintlayout.widget.ConstraintLayout>
layout/scene_01_end.xml
<?xml version="1.0" encoding="utf-8"?>
<androidx.constraintlayout.widget.ConstraintLayout xmlns:android="http://schemas.android.com/apk/res/android"
    xmlns:app="http://schemas.android.com/apk/res-auto"
    android:layout_width="match_parent"
    android:layout_height="match_parent">

    <View
        android:id="@+id/button"
        android:background="@color/colorAccent"
        android:layout_width="64dp"
        android:layout_height="64dp"
        android:layout_marginEnd="8dp"
        app:layout_constraintBottom_toBottomOf="parent"
        app:layout_constraintEnd_toEndOf="parent"
        app:layout_constraintTop_toTopOf="parent" />

</androidx.constraintlayout.widget.ConstraintLayout>
<?xml version="1.0" encoding="utf-8"?>
<MotionScene
    xmlns:motion="http://schemas.android.com/apk/res-auto">

    <Transition
        motion:constraintSetStart="@layout/motion_01_start"
        motion:constraintSetEnd="@layout/motion_01_end"
        motion:duration="1000">
        <OnSwipe
            motion:touchAnchorId="@+id/button"
            motion:touchAnchorSide="right"
            motion:dragDirection="dragRight" />
    </Transition>

</MotionScene>
CustomAttributeについて
CostomAttributeは例えば backgroundColor や ratation といった viewの セッターを呼んだりできます。
ドキュメントに書いてありますが motion:attributeName="BackgroundColor" とした場合 setBackgroundColor を呼ぶことになるので、パスカルケースで記述するところがポイントですね。
また、customAttributeValueは int/float/boolean/stringが指定できて、色は"@color/colorAccent"のようにリソースIDで定義する感じです。
以下のように複数指定することで『左から右に赤から緑に変化しながら90度回転する』みたいなアニメーションが実現できることになります。
    <ConstraintSet
        android:id="@+id/start">
        <Constraint android:id="@id/button">
            <Layout
                android:layout_width="64dp"
                android:layout_height="64dp"
                android:layout_marginStart="8dp"
                motion:layout_constraintBottom_toBottomOf="parent"
                motion:layout_constraintStart_toStartOf="parent"
                motion:layout_constraintTop_toTopOf="parent"
                />
            <CustomAttribute
                motion:attributeName="BackgroundColor"
                motion:customColorValue="@color/colorAccent"
                />
            <CustomAttribute
                motion:attributeName="Rotation"
                motion:customFloatValue="0"
                />
        </Constraint>
    </ConstraintSet>

    <ConstraintSet
        android:id="@+id/end">
        <Constraint android:id="@id/button">
            <Layout
                android:layout_width="64dp"
                android:layout_height="64dp"
                android:layout_marginEnd="8dp"
                motion:layout_constraintBottom_toBottomOf="parent"
                motion:layout_constraintTop_toTopOf="parent"
                motion:layout_constraintEnd_toEndOf="parent"
                />
            <CustomAttribute
                motion:attributeName="BackgroundColor"
                motion:customColorValue="@color/colorPrimary"
                />
            <CustomAttribute
                motion:attributeName="Rotation"
                motion:customFloatValue="90"
                />
        </Constraint>
    </ConstraintSet>
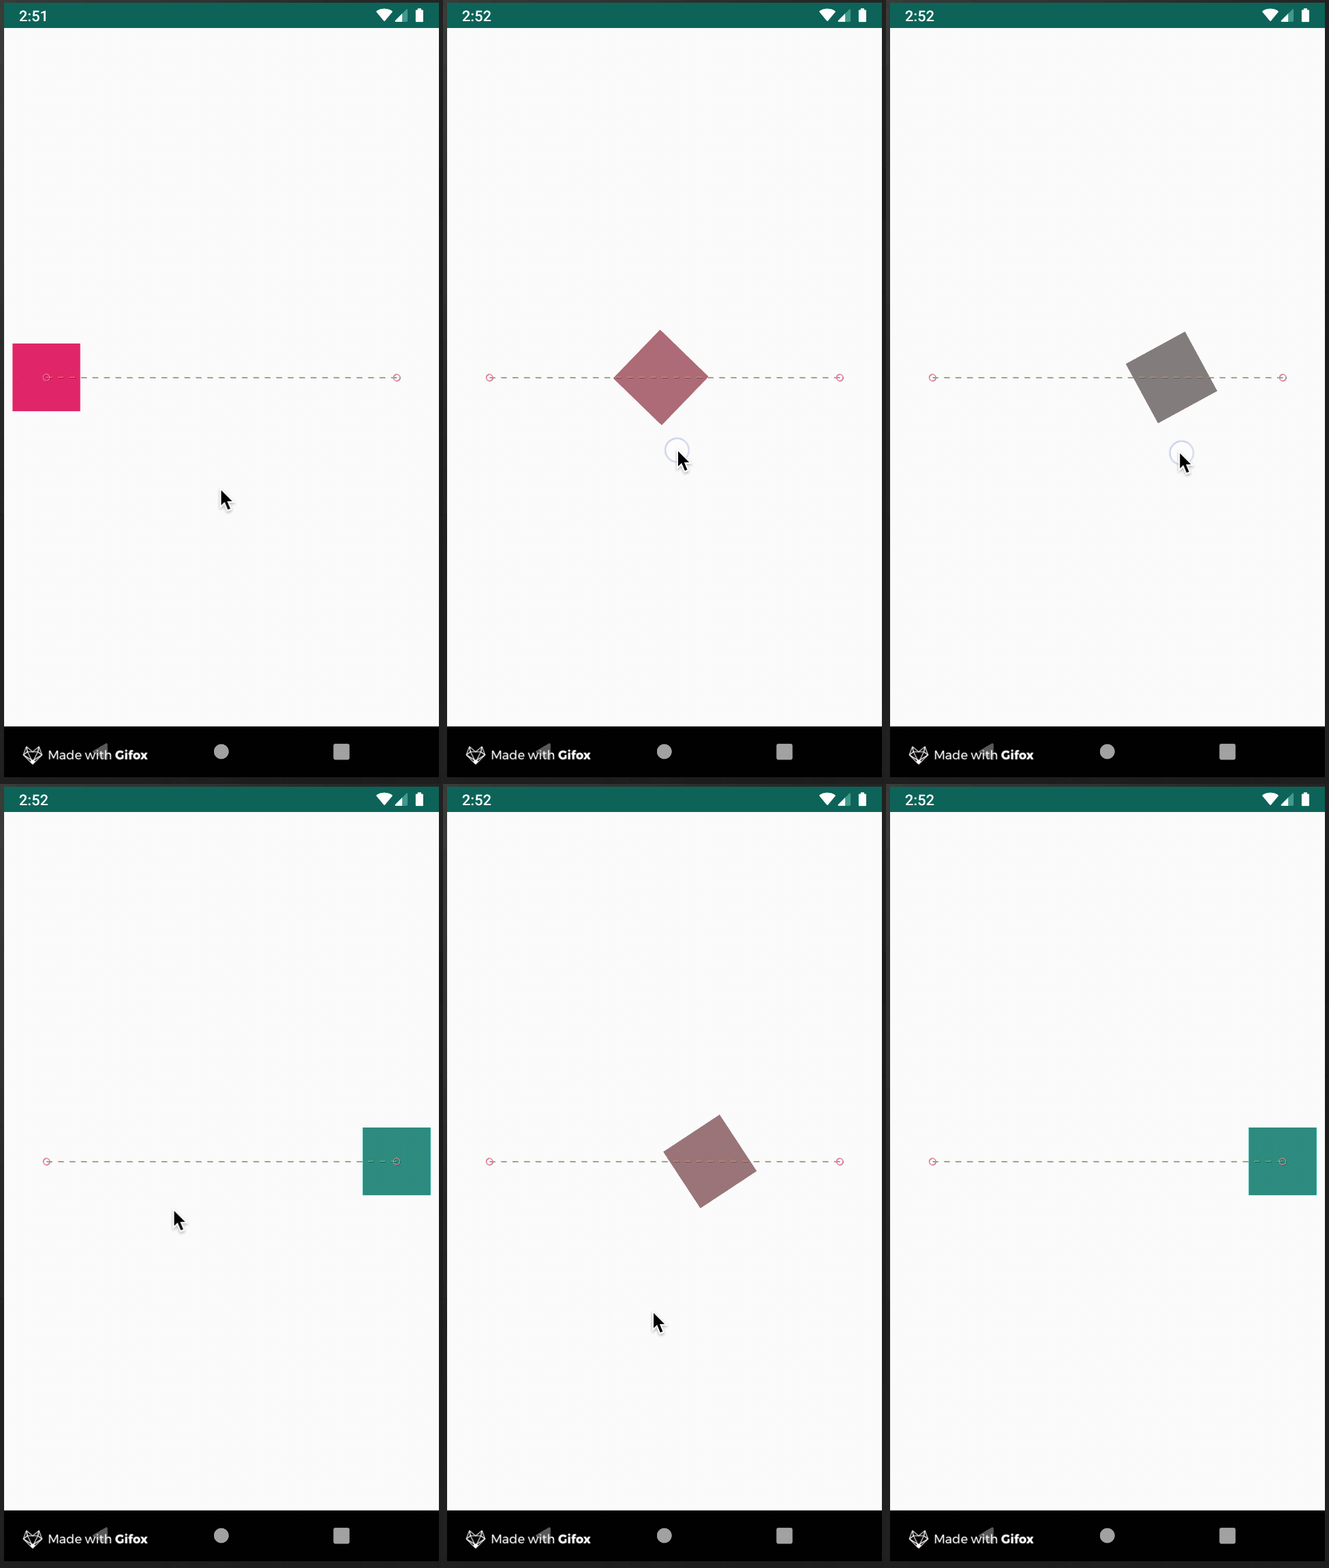
KeyFrameSetについて
今まで指定してきたアニメーションは開始地点と終了地点のみ定義してきました。
A ----------------------> B
KeyFrameSetを使用すると、このAとBの間に中継地点Pを設けをその間(A->P, P->B)の移動方法、を定義できるようになります。
A ---------->P-----------> B
コードで説明すると
KeyPosition以外にはKeyAttribute、KeyCycle、KeyTimeCycle、KeyTriggerを指定することができますが、 まだKeyPositionしか理解していないのでKeyPositionで説明したいと思います。
この場合、『アニメーションのちょうど真ん中に来た時にY軸に25%移動(マイナスがついているので上に移動します)』となります。
    <Transition
        motion:constraintSetStart="@id/start"
        motion:constraintSetEnd="@id/end"
        motion:duration="1000">
        <OnSwipe
            motion:touchAnchorId="@id/button"
            motion:touchAnchorSide="right"
            motion:dragDirection="dragRight" />
        <KeyFrameSet>
            <KeyPosition
                motion:keyPositionType="pathRelative"
                motion:percentY="-0.25"
                motion:framePosition="50"
                motion:motionTarget="@id/button"/>
        </KeyFrameSet>
    </Transition>
先程のCustomAttributeと組み合わせるとこのようになります。
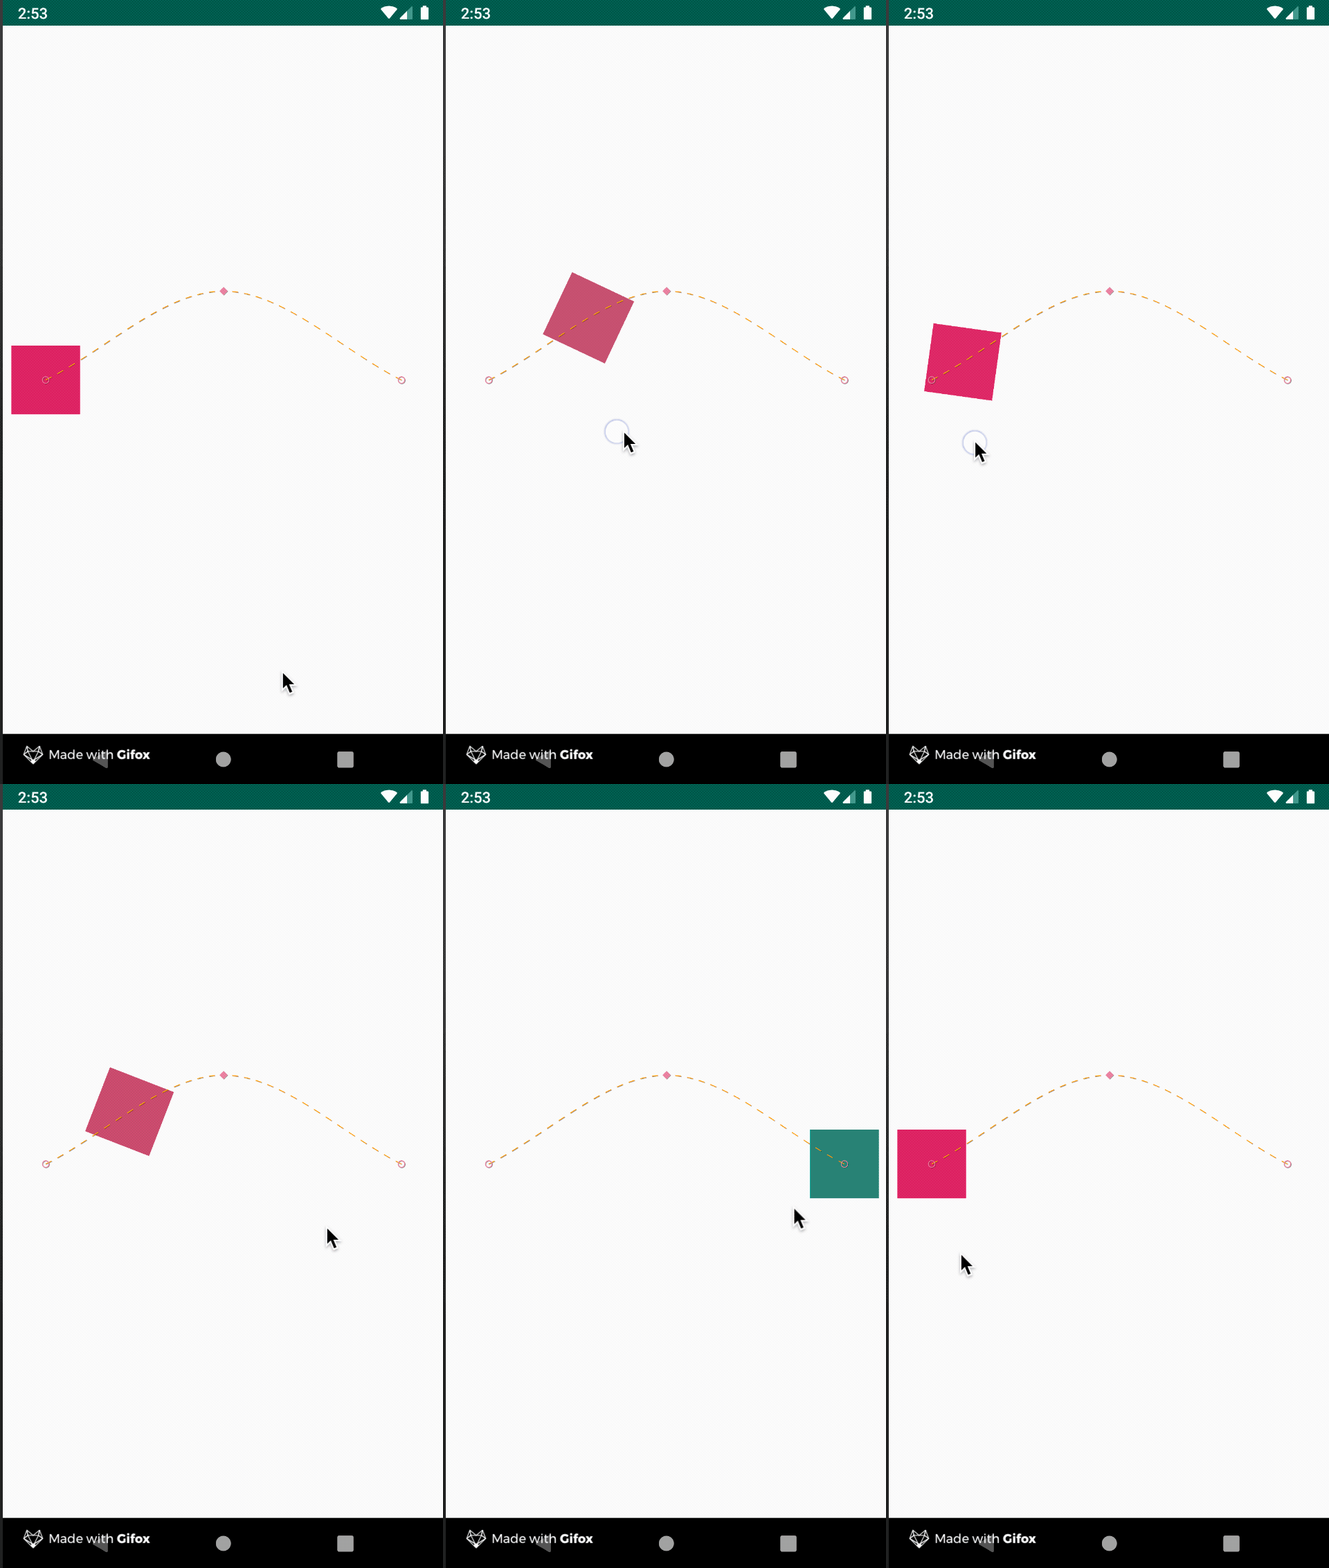
デバッグについて
xmlでMotionLayoutのattributeに tools:showPaths="true" を追加すると AndroidStudioのデザインビューで --- でアニメーションが描く線が表示されます。
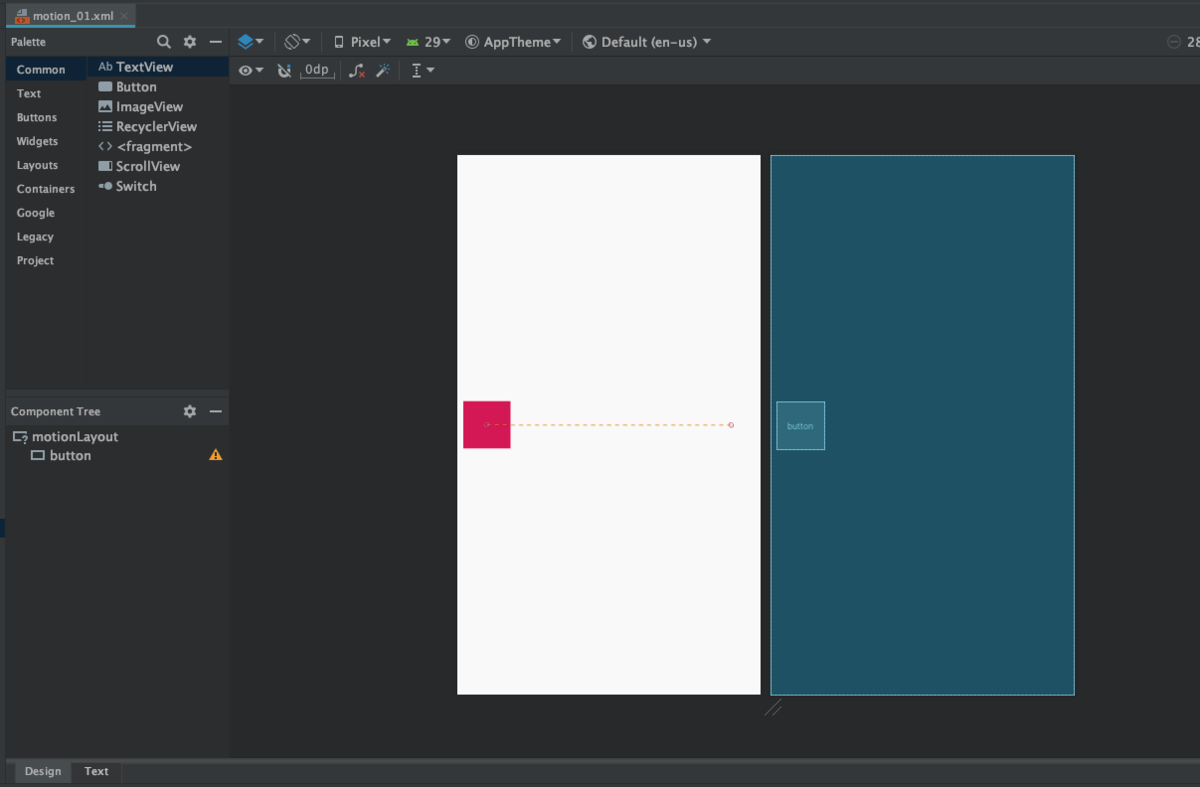
しかし実機やエミュレータでは線は描かれません。
コード上で motionLayout.setDebugMode(MotionLayout.DEBUG_SHOW_PATH) とすると出てくるようになります。
val motionLayout = findViewById<MotionLayout>(R.id.motionLayout)
motionLayout.setDebugMode(MotionLayout.DEBUG_SHOW_PATH)
まとめ
アニメーション自体は昔から存在する仕組みですが、MotionLayoutを使うことでコードを書かないで、xmlで挙動を定義できるようになりました。
これによりViewのレイアウトと業務ロジックを分離して管理できるので見通しが良くなりそうです。
次はもう少し実践向きなレイアウトとアニメーションを試してみたいと思います。
次回Part1
次回Part2
参考記事
理解の助けになりました。ありがとうございます。
Developers.IO 2019に行ってきました
こんにちは、tkyです。
本日はClassmethodさんのDevelopers.IO 2019に参加してきたレポートブログとなります。 とは言え本家ブログ側に各レポートブログがあるのでこちらではサマリと感想などを綴ることにします。
Developers.IOについてはこちら dev.classmethod.jp
各セッションのレポートはこちら dev.classmethod.jp
ハッシュタグは #cmdevio のようでした。
twitter.com
ブルボン総選挙もやってました。
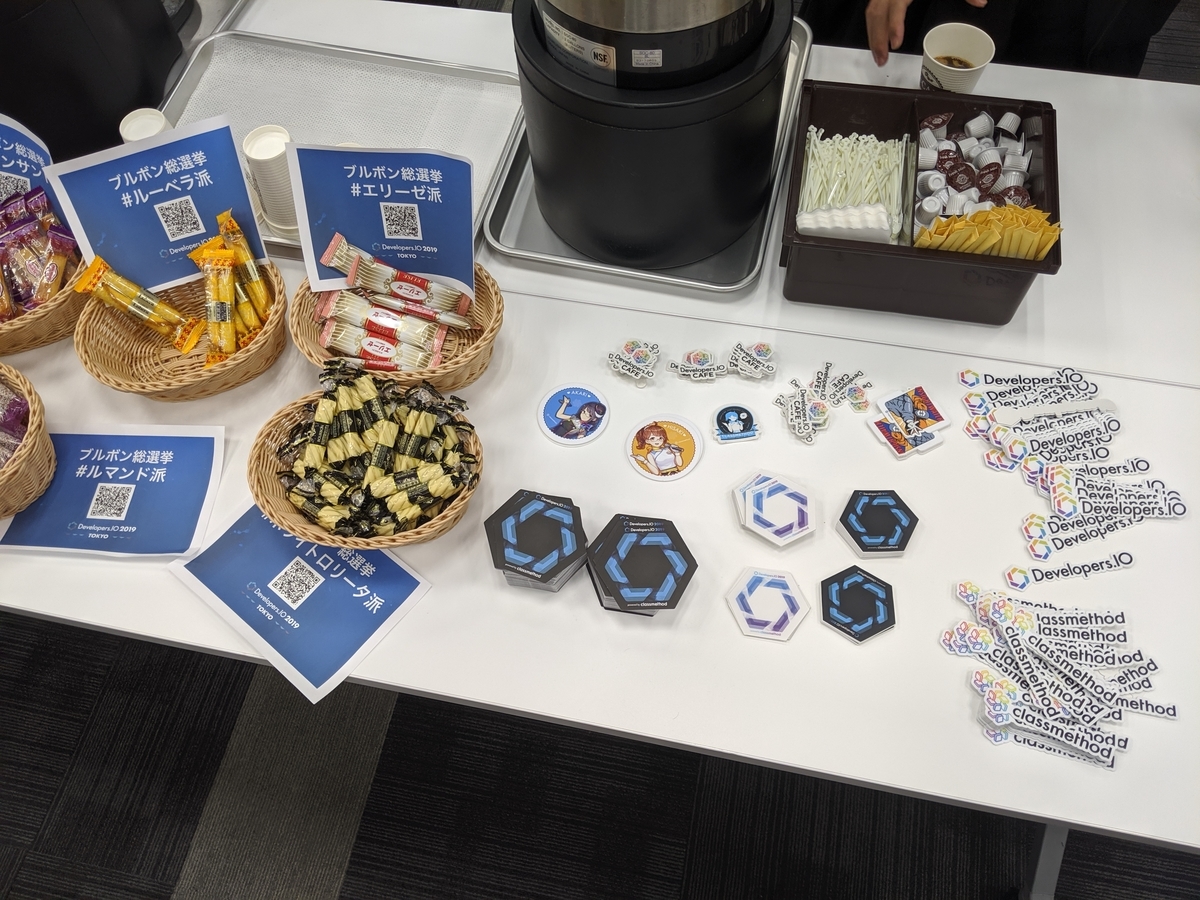
濃密なスケジュールの中見てきたセッションはこちらになります。
| 時間 | Room | タイトル | 発表者 |
|---|---|---|---|
| 10:30~11:15 | Room2 | 認証の標準的な方法は分かった。では認可はどう管理するんだい? | 都元ダイスケ 氏 |
| 10:30~11:15 | Room H | claspではじめるサーバーレス開発 Google Apps Scriptで簡単自動化 | 武田隆志 氏 |
| 12:24~13:30 | 昼食休憩してました | ||
| 13:45~14:30 | Room3 | サーバーレスの基本とCI/CD構築 & 運用 〜システムは動いてからが本番だ〜 | 藤井元貴 氏 |
| 14:45~15:30 | Room3 | エンジニアも知っておくと得する、デザイン組織とデザイナーマネジメント | ベイジ 枌谷力 氏 |
| 15:45~15:30 | Room3 | サービスを爆速で立ち上げるためのSaaSの活用 | 諏訪悠紀 氏 |
| 16:45~15:30 | Room5 | 障害に備えたアーキテクチャを考える「あのとき何が起こった!?」 | 坂巻一義 氏 / 吉井亮 氏 |
| 17:45~15:30 | Room5 | Amazon ECSを活用したAWS運用自動化サービスの裏側を包み隠さず解説 | 伊藤祥 氏 |
| 18:45~ | Room11 | 懇親会 |
認証の標準的な方法は分かった。では認可はどう管理するんだい?
公式レポート
感想
通常APIを設計するときにほぼ必ず考慮するであろうアクセス制御、 例えば「一般ユーザ」「管理者ユーザ」で取得できるデータの内容が異なったり、 更新できるデータの範囲が異なったりしますが、実際そのような要件に対して設計アプローチしていくのか、という話となります。
ISO 10181-3で Access Control Framework という名称で標準化されている模様で、この考え方に基づきながら解説されていて非常にすんなりと理解できた気がします。
理解しやすくするために以下のワードが出てきました。
- 操作する人・・・ユーザ
- 操作されるもの・・・・リソース
- 何かの操作・・・アクション
そして上記の『「一般ユーザ」「管理者ユーザ」で取得できるデータの内容が異なったり』これがまさにアンチパターンとなりうる状況だったようです。 前提としてユースケースが異なるのでそもそも同じアクションで管理しては ~ダメ~ (複雑になるので推奨しない)そうです。 別々のAPIで設計することで、余計な条件分岐もなくなりテストしやすくなりそうです。 確かに、不具合が発生したときにその状況を再現しづらくなったり、原因特定に時間がかかるう要因になりかねないですし、なるほどと思いました。私の中ではここが一番収穫でした。
P34に書いてありますが、重要です。 - ユースケースとアクションをちゃんと定義して - 誰が何にアクセスできるのかきっちり決める
アクションがわかったところで、何を以てそのAPIを叩いてOK/NGなのか、 ですが、いろいろあるんですよね。
- ユーザが持つ権限(どのAPIと叩いて良いのか)
- オーナー権限
- 役職、リーダー
アクセス権は ユーザ 自身に紐づくものと その役職(Role) に紐づくものがあって、これまでの話はユーザ側のものでした。
ここでユーザには関係ない役職という軸も出てきます。もうそろそろ脳のキャパシティを超えてきました。
で、このあたりをじっくり観察するとAWSのIAMによるアクセス制御がまさにこのことだそうで、きれいに締めくくられ 後味の良いスッキリとした気持ちでセッションが終了しました。
claspではじめるサーバーレス開発 Google Apps Scriptで簡単自動化
公式レポート
感想
自社でGASおじさんと化しているtkyですが、clasp自体知らなかったため、知識を得るために聴講。 GASができることと、デメリットを解消するためのclaspについて、 クラスメソッド内のGASの活用事例などが聴けました。 ※claspについては既知の人だと「聞いたことある内容だ」という感じの初級者向けセッションとなりそうです。
GAS、Google Chrome上で開発できす素早さとスプレッドシートとの連携が強力で便利なのですが、 - JS 1.6である - コードの差分管理ができない - コードフォーマッタなど活用できない
と言ったデメリットが挙げられる中でclaspというCLIツール(Nodeモジュール)の存在を知って心のなかで大きく盛り上がりました。 TSでかけるのが大きいかもしれませんね。ローカル開発となるのでgitも使えるので楽だと思いました。
メリットしか無いのでは?とも思いますが、セッションでもありました通り - 手軽さが減る - 非開発者には敷居が上がる
などもありますし、エクセルの標準関数でできることも多いので、目的に合わせてGASやclaspを利用していくのが良いなと改めて感じました。
活用事例としては以下のようなケースでGASで定常業務にかかる負担を減らしているようです。なるほど!! 1. スプレッドシートをJSONにしてS3にアップロード 2. GAとMackerel連携。リアルタイムユーザを定期的に送信して可視化する 3. Backlogチケットをスプレッドシート連携(定例時に転機するのに活用) 4. Gsuiteのグループ作成(メーリングリスト)Admin SDK Directory APIを叩いてグループ一括作成 5. Gsuiteのグループ棚卸し、グループ情報をスプレッドシートに出力
クラスメソッド内でのGASの活用事例もしれてとても良いセッションでした。
サーバーレスの基本とCI/CD構築 & 運用 〜システムは動いてからが本番だ〜
公式レポート
感想
入場ギリギリになってしまい立ち見となりました・・・ CI/CDで考慮すべき項目やAWS構成について理解できるセッションとなっていました。
CI/CDにおいて重要なのはセッションにもありましたが以下ですね。 - いつでも動く安心感を手に入れる - デグレに気づける - テストコードでは見つけられない不具合の回避 - オペレーションミスによるデプロイミスの回避
人的ミスをそもそもなくす、仮に発生しても水際回避したり、早期発見できるようになるのがCI/CDの強みだと思います。
テストコードでは見つけられない不具合 についてはピンと来なかったのですが、
AWSサービスを使うにあたり以下のような事象がそれに該当するようですね。なるほど。
- CloudFunctionのスペルミス
- IAMの権限不備
- DBの権限不足
デプロイ時に気をつけるべきポイントとしてのIAMアクセスキーの流出についても興味深かったです。 実際にやってみないとこういった知見にたどり着けないと思うのですごいなぁと思います。(AssumeRoleという機能を考えているAWSもすごい・・・)
最後に監視の話、何を、どのくらい検知したら、いつ、誰にどんな内容を通知するのか、 これをきっちり考えないと、精神的に摩耗してしまいますし、オオカミ少年になってしまいますね。
サービスもリリースして終わりではなく、リリースしてもやることは多くいかに素早く改善していくか、 やはりリリースしてからがやはり本番だ、というタイトル通りのセッションだったと思います。
エンジニアも知っておくと得する、デザイン組織とデザイナーマネジメント
クラスメソッドさんと一緒にお仕事をしている会社さんのセッションでした。 baigie.me
公式レポート
レポートブログはないので資料のみです。
https://baigie.me/download/pdf/devio_191101.pdf
感想
本セッションではデザイナーという職種の細かいジャンルとデザイナーのタイプの紹介がメインとなります。
セッション時、「デザイナー職の人と一緒に仕事をしている/したことがあるか」という質問が上がり 結構な数の手が上がっていました。やはりデザイナーと関わっているエンジニアが日々増えているのだろうと、感じています。 そんな中、エンジニア+デザイナーを含む組織をマネジメントする必要も出てくるのは、そのとおりですね・・・
デザイナータイプについてはエンジニアにも通ずるというか全ジャンルに通ずるところがあると思いました。 そしてお互いが相容れない存在で「混ぜるな危険」の意味も理解できましたw
- 挑戦的⇔保守的
- 感覚的⇔論理的
上記の軸からみる分布 - 理想実現型(先駆者) - 成果追求型(データドリブン) - 共同作業型(調和) - 実務遂行型(ドキュメント命)
MBTI診断を大きく4分割すると上記のタイプに分かれそうだな、という印象を受けました。
皆さんはどんなタイプでしたか?
サービスを爆速で立ち上げるためのSaaSの活用
公式レポート
感想
Auth0、stripe、 CircleCI を使ってサービスを立ち上げた話となります。
それぞれ、認証、決済、CI/CDを司り、これらを使って約2ヶ月でDevelopers.IO Dafeができたとのことで驚きのスピード感(と技術力!!)
stripeについてはテスト用のクレカを利用できたり、いざという時の返金も行えるようになっているということで、まじで便利じゃん(語彙力)と思いました。
本セッションでも伝えていたことですが『プロダクトにとって最も大切なもの(コア機能)はなにか』が重要だという印象を受けました。 実際認証の仕組みやDBなど自前で用意しようとすると車輪の再発明にもなりますし、運用コストがかかってきます。 本来のサービス、プロダクトのあり方を考えて適材適所でSaaSを利用していく判断も必要になってきますね。
最後に、エンジニアさんは実際にDevelopers.IO Cafe内で開発しているらしく、超羨ましい・・・と思った次第です。
障害に備えたアーキテクチャを考える「あのとき何が起こった!?」
公式レポート
感想
2019年8月23日 東京リージョン障害を通じて、どのような対策を取ると良いのか、 実際に稼働率を極限まで高めようとした際の構成及びコスト試算などを共有するセッションで、とても興味深かったです。
障害発生時の実際の調査内容についてもセッション内で共有がありました、こちらも合わせて見るとより流れが把握できそうです。
障害発生時、どのようなシステム構成を取ると良いのかについては Well-Archicted Framework 信頼性 が参考になるそうです。
システム設計運用の大局的な考え方や、設計原則のベストプラクティス、システムの最適化度合いを評価する視点をもてるようになるための資料で、
ちょうど11/1当日?くらいに日本語翻訳版が出たようです。
ドキュメントがいたれりつくせりですごいっすね、AWS・・・
正直このあたりから自分の知識量を超えていて理解が追いつきませんでした。
で、その上で稼働率を極限まで高めるために、99.0%、99.9%、99.99%のようにしていくとどういった構成になるのかをまとめていました。 ここからわかることは、落ちないような構成を取るためには相応のコストが掛かるということ、 また構成だけでは限界があるので、落ちたあとにいかに早く復旧できるかが稼働率を高めるポイントにもなるというところが印象深かったです。
Amazon ECSを活用したAWS運用自動化サービスの裏側を包み隠さず解説
公式レポート
感想
AWS運用自動化サービス「opswitch」のシステム構成や開発環境などの紹介セッションとなります。 こんなところまで見せてしまって良いんですか、、、というくらい濃い内容でした。 運用の自動化に対する課題の解説と、運用を自動化するサービスの説明に分かれています。
昼一のセッションにもありましたが、リリースして終了ではなく、リリースしてからが本番であり、運用は決して逃れることのできない必要作業になりますが、 やはり自動化して極力ヒューマンエラーを避けていきたいところ。
そこでopswitchという運用自動化サービスが登場します。 EC2/RDSインスタンスの起動・停止、バックアップなどのタスクを組み合わせてジョブ実行できる機能などが魅力的です。
内部のアーキテクチャについては、大きく3システムで構成されていて各システムで扱っている技術が異なっているところが面白いなと思います。 また、コア部分のシステムについてはそれぞれ必要なリソース(CPU,メモリ)や役割などが異なるため関心事別にクラスターを分けて構成しているとのことで勉強になります。
かなりディープな話だけあって知識的に置いてけぼりをくらいながらも知らない領域を知る機会を得られてとても良かったです。
懇親会
最後は再演セッションがいくつかあるなか、並行で懇親会がスタートしました。 食事が美味しい・・・ 登壇されていた方をうまく見つけることができずでしたが、数名の方とコミュニケーションを取ることができました。

おわりに
最近AWS等インフラの構築/設計に関わる機会が増えており、自分の知らなかった情報を手に入れることのできた 貴重な体験でした。