MotionLayoutでアニメーションさせる(Android)
こんにちはtkyです。
今日はかねてから気になっていたAndroidでにおけるconstraintlayout2.0のβ3版で追加されているMotionLayoutを使ってアニメーションを試してみたいと思います。
まだベータ版(2019/12/06執筆現在)であり、2.0が正式になった時にどうなるかは不明ですので予めご了承ください。
(2020/10/24 追記)
constraintlayout2.0のstableが出ているのでプロジェクト内のライブラリバージョンを更新しました。
一応すべてのサンプルはちゃんと動いているようでした。
(2020/10/24 追記)
今回試したリポジトリはこちらになります。
MotionLayout is 何
まずは公式ドキュメントを見に行きましょう。
冒頭部分を日訳でピックアップすると
- MotionLayoutはConstraintLayoutのサブクラスでライブラリバージョン2.0から追加されています。
MotionScenes内に定義したconstraint(以降、制約)間の遷移をサポートします。- API level 18 (JellyBean MR2)以降で利用可能です。
- MotionLayoutはMotionSceneファイルが必要で、 MotionScene内トップレベルに
LayoutDescriptionを含みます- StateSet (Optional) ・・・システムの状態(selected, focused, enabled, 等)
- ConstraintSet ・・・制約群
- Transition ・・・制約か状態間の遷移
※StateSetについてはよくわからず、詳しく知っている方がいれば教えていただきたいです。
android.util.StateSet のことであっているんでしょうか・・・
また2019/12/06現在はベータ3となっており、以下のようにapp.gradleに追記することで利用可能となります。
dependencies {
    // 中略
    implementation 'androidx.constraintlayout:constraintlayout:2.0.0-beta3'
    // 中略
}
どうやって学習するか
公式にサンプルがあるのでこれで使い方を学習するのが一番手っ取り早いです。 私のリポジトリもこのサンプルを写経しながら色々と試していきました。
ざっくり解説
以下のような簡単なアニメーションの実現を考えます。
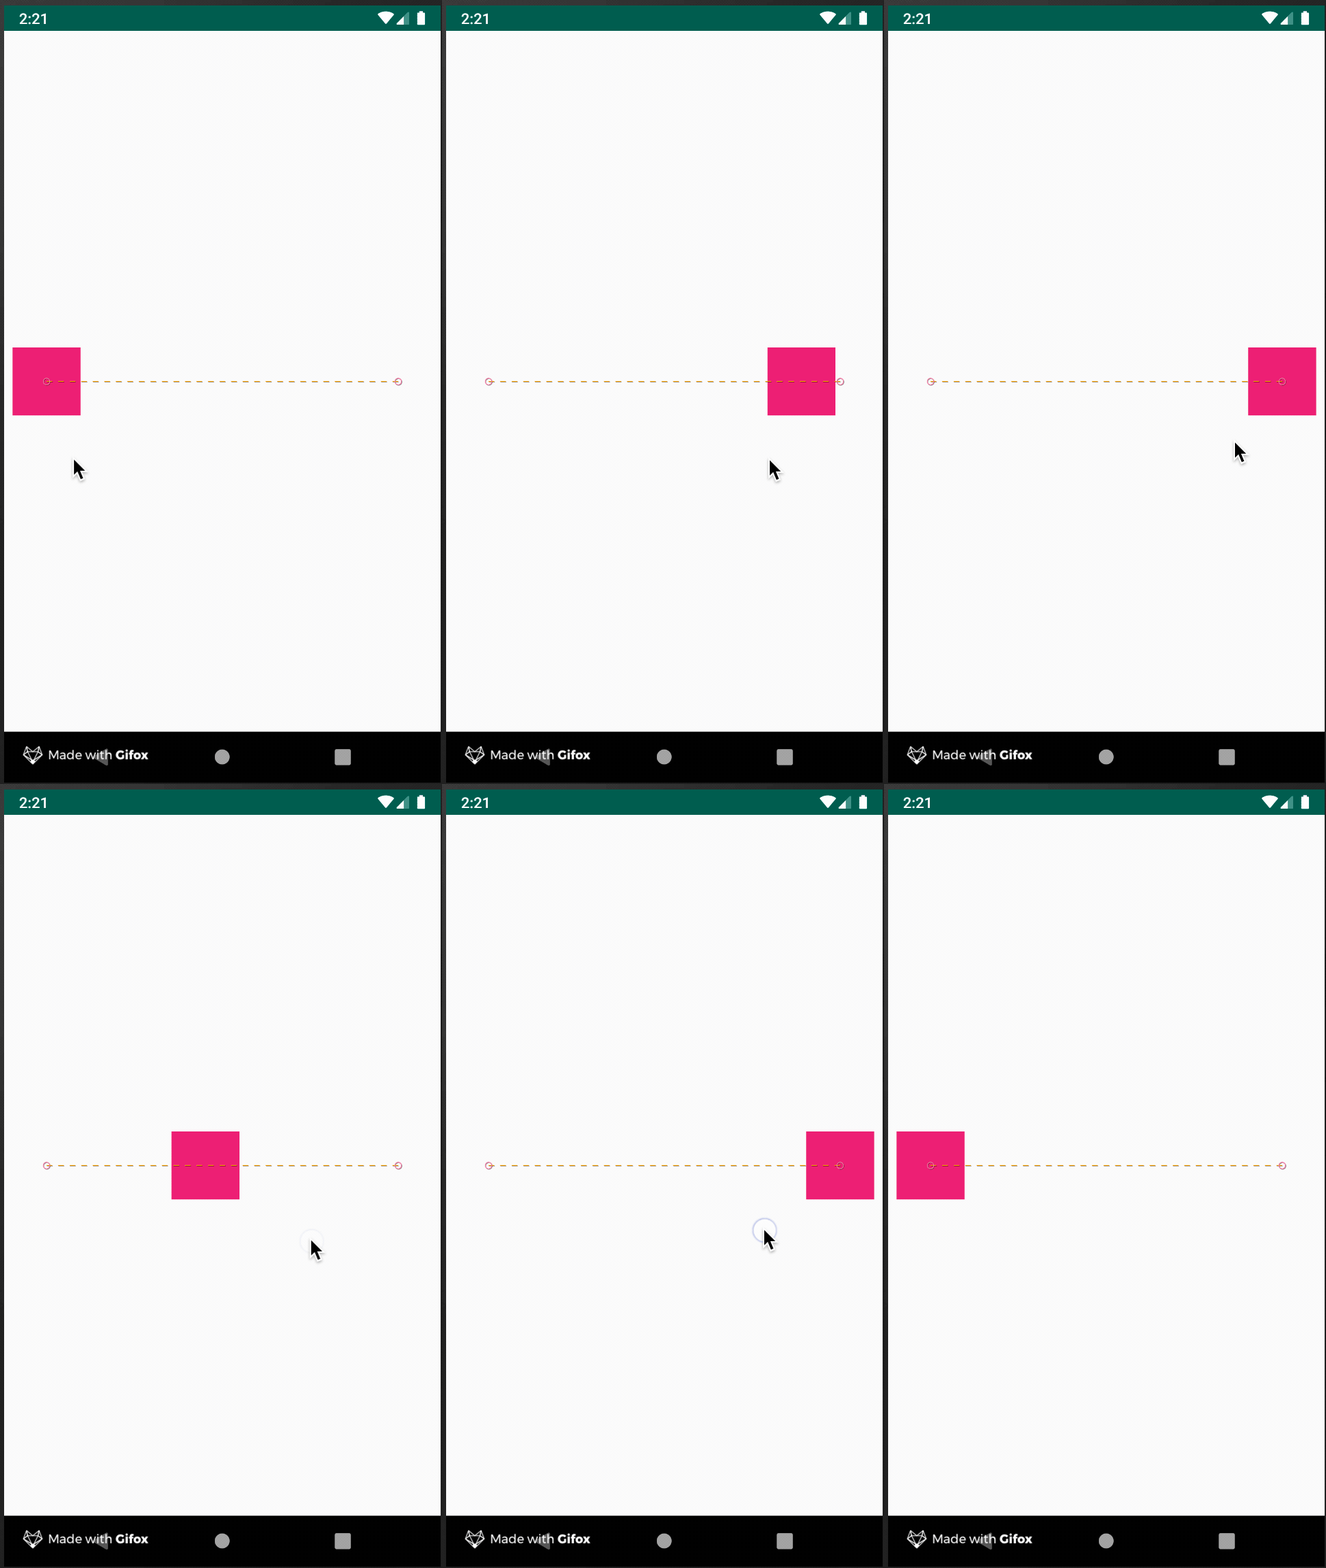
MotionLayoutを使ったアニメーションはやることを列挙したらきりこんな感じかと思いますが、2〜4は 1つのxml内に定義することになります。
- アニメーションさせたいレイアウトを
MotionLayoutタグで囲う - 遷移の仕方(Transition)を決める
- 遷移前の制約(ConstraintSet)を決める
- 遷移後の制約(ConstraintSet)を決める
アニメーションさせたいレイアウトを MotionLayout タグで囲う
アニメーションさせたい場合、
これを
<?xml version="1.0" encoding="utf-8"?>
<androidx.constraintlayout.widget.ConstraintLayout xmlns:android="http://schemas.android.com/apk/res/android"
    xmlns:app="http://schemas.android.com/apk/res-auto"
    android:layout_width="match_parent"
    android:layout_height="match_parent">

    <View
        android:id="@+id/button"
        android:background="@color/colorAccent"
        android:layout_width="64dp"
        android:layout_height="64dp"
        android:layout_marginStart="8dp"
        app:layout_constraintBottom_toBottomOf="parent"
        app:layout_constraintStart_toStartOf="parent"
        app:layout_constraintTop_toTopOf="parent" />

</androidx.constraintlayout.widget.ConstraintLayout>
こうする。
tools:layout_editor_absoluteXとtools:layout_editor_absoluteYは記述しても無視されます。
<?xml version="1.0" encoding="utf-8"?>
<androidx.constraintlayout.motion.widget.MotionLayout
    xmlns:android="http://schemas.android.com/apk/res/android"
    xmlns:app="http://schemas.android.com/apk/res-auto"
    xmlns:tools="http://schemas.android.com/tools"
    android:id="@+id/motionLayout"
    android:layout_width="match_parent"
    android:layout_height="match_parent"
    app:layoutDescription="@xml/scene_01"
    tools:showPaths="true"
    >

    <View
        android:id="@+id/button"
        android:layout_width="128dp"
        android:layout_height="128dp"
        android:background="@color/colorAccent"
        android:text="Button"
        tools:layout_editor_absoluteX="267dp"
        tools:layout_editor_absoluteY="333dp" />

</androidx.constraintlayout.motion.widget.MotionLayout>
前述の通りMotionLayoutはConstraintLayoutのサブクラスなのでConstraintLayoutを囲う必要はありません。
android:id="@+id/button"
また、今まで app:layout_constraintXXXX_toYYYYOf="parent" のようにlayout側で定義していた制約は不要となります。
app:layoutDescription="@xml/scene_01"
layout側で定義するidはMotionSenceに定義するトリガーや制約で使用する為layout側に定義する必要があります。
このscene_01.xmlに遷移の仕方と制約を定義していきます。先に示しておきます。
<?xml version="1.0" encoding="utf-8"?>
<MotionScene xmlns:motion="http://schemas.android.com/apk/res-auto"
    xmlns:android="http://schemas.android.com/apk/res/android">

    <Transition
        motion:constraintSetStart="@id/start"
        motion:constraintSetEnd="@id/end"
        motion:duration="1000">
        <OnSwipe
            motion:touchAnchorId="@id/button"
            motion:touchAnchorSide="right"
            motion:dragDirection="dragRight" />
    </Transition>

    <ConstraintSet
        android:id="@+id/start">
        <Constraint android:id="@id/button">
            <Layout
                android:layout_width="64dp"
                android:layout_height="64dp"
                android:layout_marginStart="8dp"
                motion:layout_constraintBottom_toBottomOf="parent"
                motion:layout_constraintStart_toStartOf="parent"
                motion:layout_constraintTop_toTopOf="parent"
                />
        </Constraint>
    </ConstraintSet>

    <ConstraintSet
        android:id="@+id/end">
        <Constraint android:id="@id/button">
            <Layout
                android:layout_width="64dp"
                android:layout_height="64dp"
                android:layout_marginEnd="8dp"
                motion:layout_constraintBottom_toBottomOf="parent"
                motion:layout_constraintTop_toTopOf="parent"
                motion:layout_constraintEnd_toEndOf="parent"
                />
        </Constraint>
    </ConstraintSet>
</MotionScene>
遷移の仕方を決める
上記のscene_01.xmlでやっていることは、
- 特定のIDに対して
- スワイプ/クリックした時の
- 開始ConstraintSetと終了 ConstrainntSetを定義した
<Transition>タグをMotionSence内に設置する
です。遷移の仕方の部分は以下のところになります。
    <Transition
        motion:constraintSetStart="@id/start"
        motion:constraintSetEnd="@id/end"
        motion:duration="1000">
        <OnSwipe
            motion:touchAnchorId="@id/button"
            motion:touchAnchorSide="right"
            motion:dragDirection="dragRight" />
    </Transition>
遷移前/遷移後の制約(ConstraintSet)を決める
以下の部分ですね。書きっぷりはおおよそConstraintLayoutと一緒です。
これと
    <ConstraintSet
        android:id="@+id/start">
        <Constraint android:id="@id/button">
            <Layout
                android:layout_width="64dp"
                android:layout_height="64dp"
                android:layout_marginStart="8dp"
                motion:layout_constraintBottom_toBottomOf="parent"
                motion:layout_constraintStart_toStartOf="parent"
                motion:layout_constraintTop_toTopOf="parent"
                />
        </Constraint>
    </ConstraintSet>
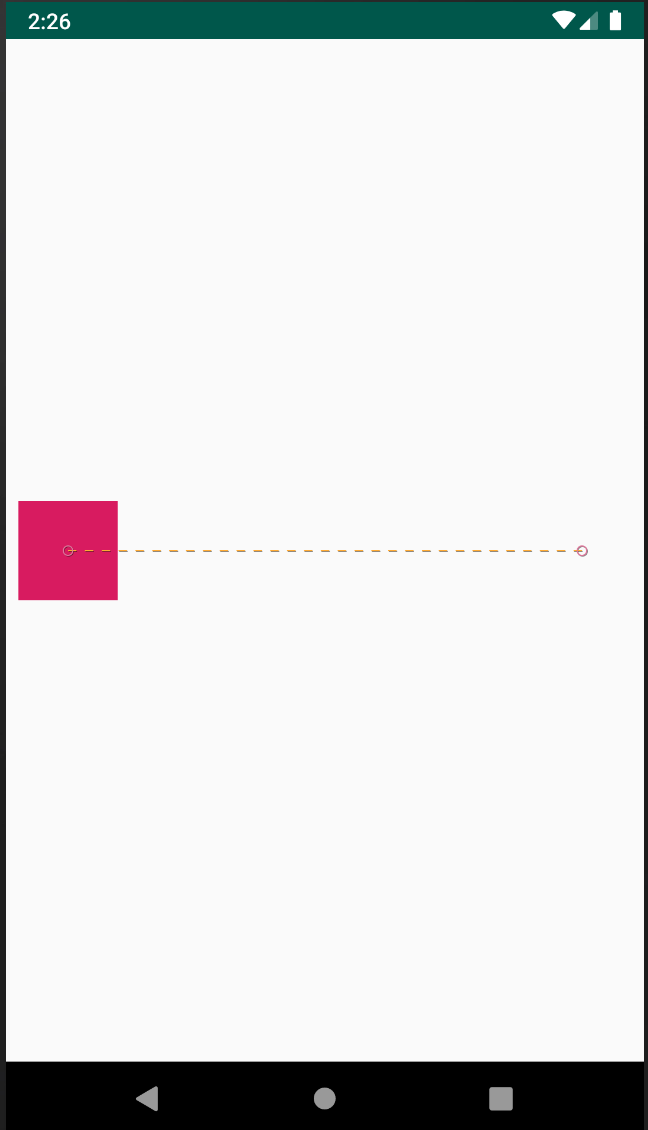
これです
    <ConstraintSet
        android:id="@+id/end">
        <Constraint android:id="@id/button">
            <Layout
                android:layout_width="64dp"
                android:layout_height="64dp"
                android:layout_marginEnd="8dp"
                motion:layout_constraintBottom_toBottomOf="parent"
                motion:layout_constraintTop_toTopOf="parent"
                motion:layout_constraintEnd_toEndOf="parent"
                />
        </Constraint>
    </ConstraintSet>
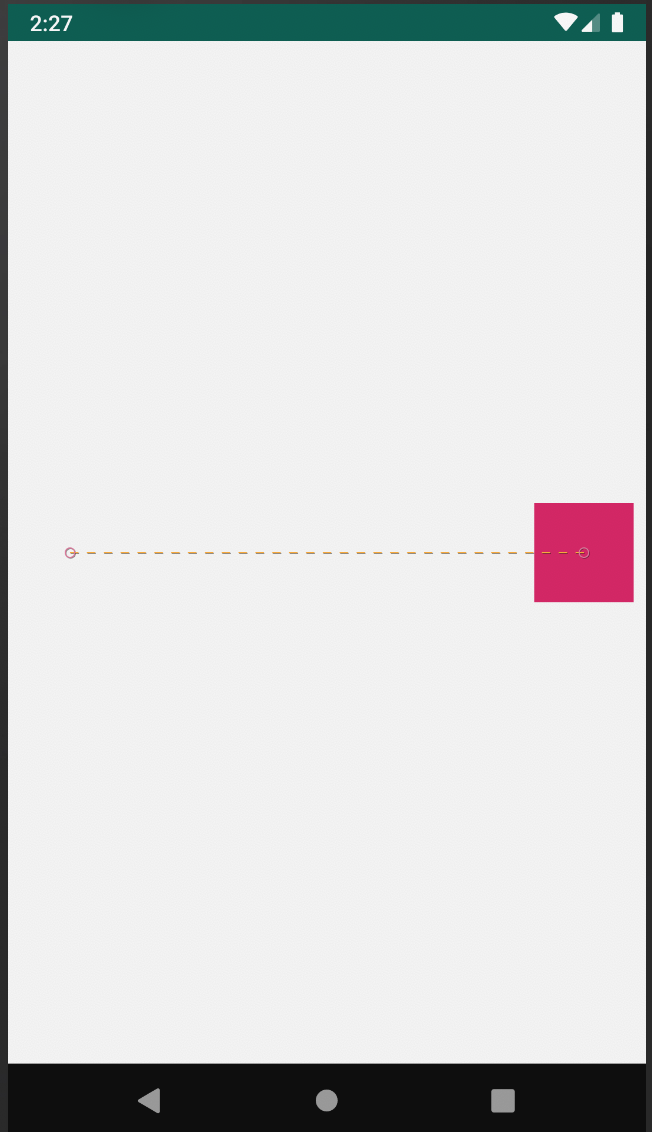
scene.xmlが長くなる問題
上記のようにConstraintSetを書いていると必然的にsence.xmlが長くなって見通しが悪くなりますが、xmlを分けて次のようにも記載することができます。
制約部分はいつもどおり、layout/xmlに記載してしまって motion:constraintSetStart="@layout/motion_01_start" のように参照するだけにすると、役割も明確になって良いかもしれません。
layout/scene_01_start.xml
<?xml version="1.0" encoding="utf-8"?>
<androidx.constraintlayout.widget.ConstraintLayout xmlns:android="http://schemas.android.com/apk/res/android"
    xmlns:app="http://schemas.android.com/apk/res-auto"
    android:layout_width="match_parent"
    android:layout_height="match_parent">

    <View
        android:id="@+id/button"
        android:background="@color/colorAccent"
        android:layout_width="64dp"
        android:layout_height="64dp"
        android:layout_marginStart="8dp"
        app:layout_constraintBottom_toBottomOf="parent"
        app:layout_constraintStart_toStartOf="parent"
        app:layout_constraintTop_toTopOf="parent" />

</androidx.constraintlayout.widget.ConstraintLayout>
layout/scene_01_end.xml
<?xml version="1.0" encoding="utf-8"?>
<androidx.constraintlayout.widget.ConstraintLayout xmlns:android="http://schemas.android.com/apk/res/android"
    xmlns:app="http://schemas.android.com/apk/res-auto"
    android:layout_width="match_parent"
    android:layout_height="match_parent">

    <View
        android:id="@+id/button"
        android:background="@color/colorAccent"
        android:layout_width="64dp"
        android:layout_height="64dp"
        android:layout_marginEnd="8dp"
        app:layout_constraintBottom_toBottomOf="parent"
        app:layout_constraintEnd_toEndOf="parent"
        app:layout_constraintTop_toTopOf="parent" />

</androidx.constraintlayout.widget.ConstraintLayout>
<?xml version="1.0" encoding="utf-8"?>
<MotionScene
    xmlns:motion="http://schemas.android.com/apk/res-auto">

    <Transition
        motion:constraintSetStart="@layout/motion_01_start"
        motion:constraintSetEnd="@layout/motion_01_end"
        motion:duration="1000">
        <OnSwipe
            motion:touchAnchorId="@+id/button"
            motion:touchAnchorSide="right"
            motion:dragDirection="dragRight" />
    </Transition>

</MotionScene>
CustomAttributeについて
CostomAttributeは例えば backgroundColor や ratation といった viewの セッターを呼んだりできます。
ドキュメントに書いてありますが motion:attributeName="BackgroundColor" とした場合 setBackgroundColor を呼ぶことになるので、パスカルケースで記述するところがポイントですね。
また、customAttributeValueは int/float/boolean/stringが指定できて、色は"@color/colorAccent"のようにリソースIDで定義する感じです。
以下のように複数指定することで『左から右に赤から緑に変化しながら90度回転する』みたいなアニメーションが実現できることになります。
    <ConstraintSet
        android:id="@+id/start">
        <Constraint android:id="@id/button">
            <Layout
                android:layout_width="64dp"
                android:layout_height="64dp"
                android:layout_marginStart="8dp"
                motion:layout_constraintBottom_toBottomOf="parent"
                motion:layout_constraintStart_toStartOf="parent"
                motion:layout_constraintTop_toTopOf="parent"
                />
            <CustomAttribute
                motion:attributeName="BackgroundColor"
                motion:customColorValue="@color/colorAccent"
                />
            <CustomAttribute
                motion:attributeName="Rotation"
                motion:customFloatValue="0"
                />
        </Constraint>
    </ConstraintSet>

    <ConstraintSet
        android:id="@+id/end">
        <Constraint android:id="@id/button">
            <Layout
                android:layout_width="64dp"
                android:layout_height="64dp"
                android:layout_marginEnd="8dp"
                motion:layout_constraintBottom_toBottomOf="parent"
                motion:layout_constraintTop_toTopOf="parent"
                motion:layout_constraintEnd_toEndOf="parent"
                />
            <CustomAttribute
                motion:attributeName="BackgroundColor"
                motion:customColorValue="@color/colorPrimary"
                />
            <CustomAttribute
                motion:attributeName="Rotation"
                motion:customFloatValue="90"
                />
        </Constraint>
    </ConstraintSet>
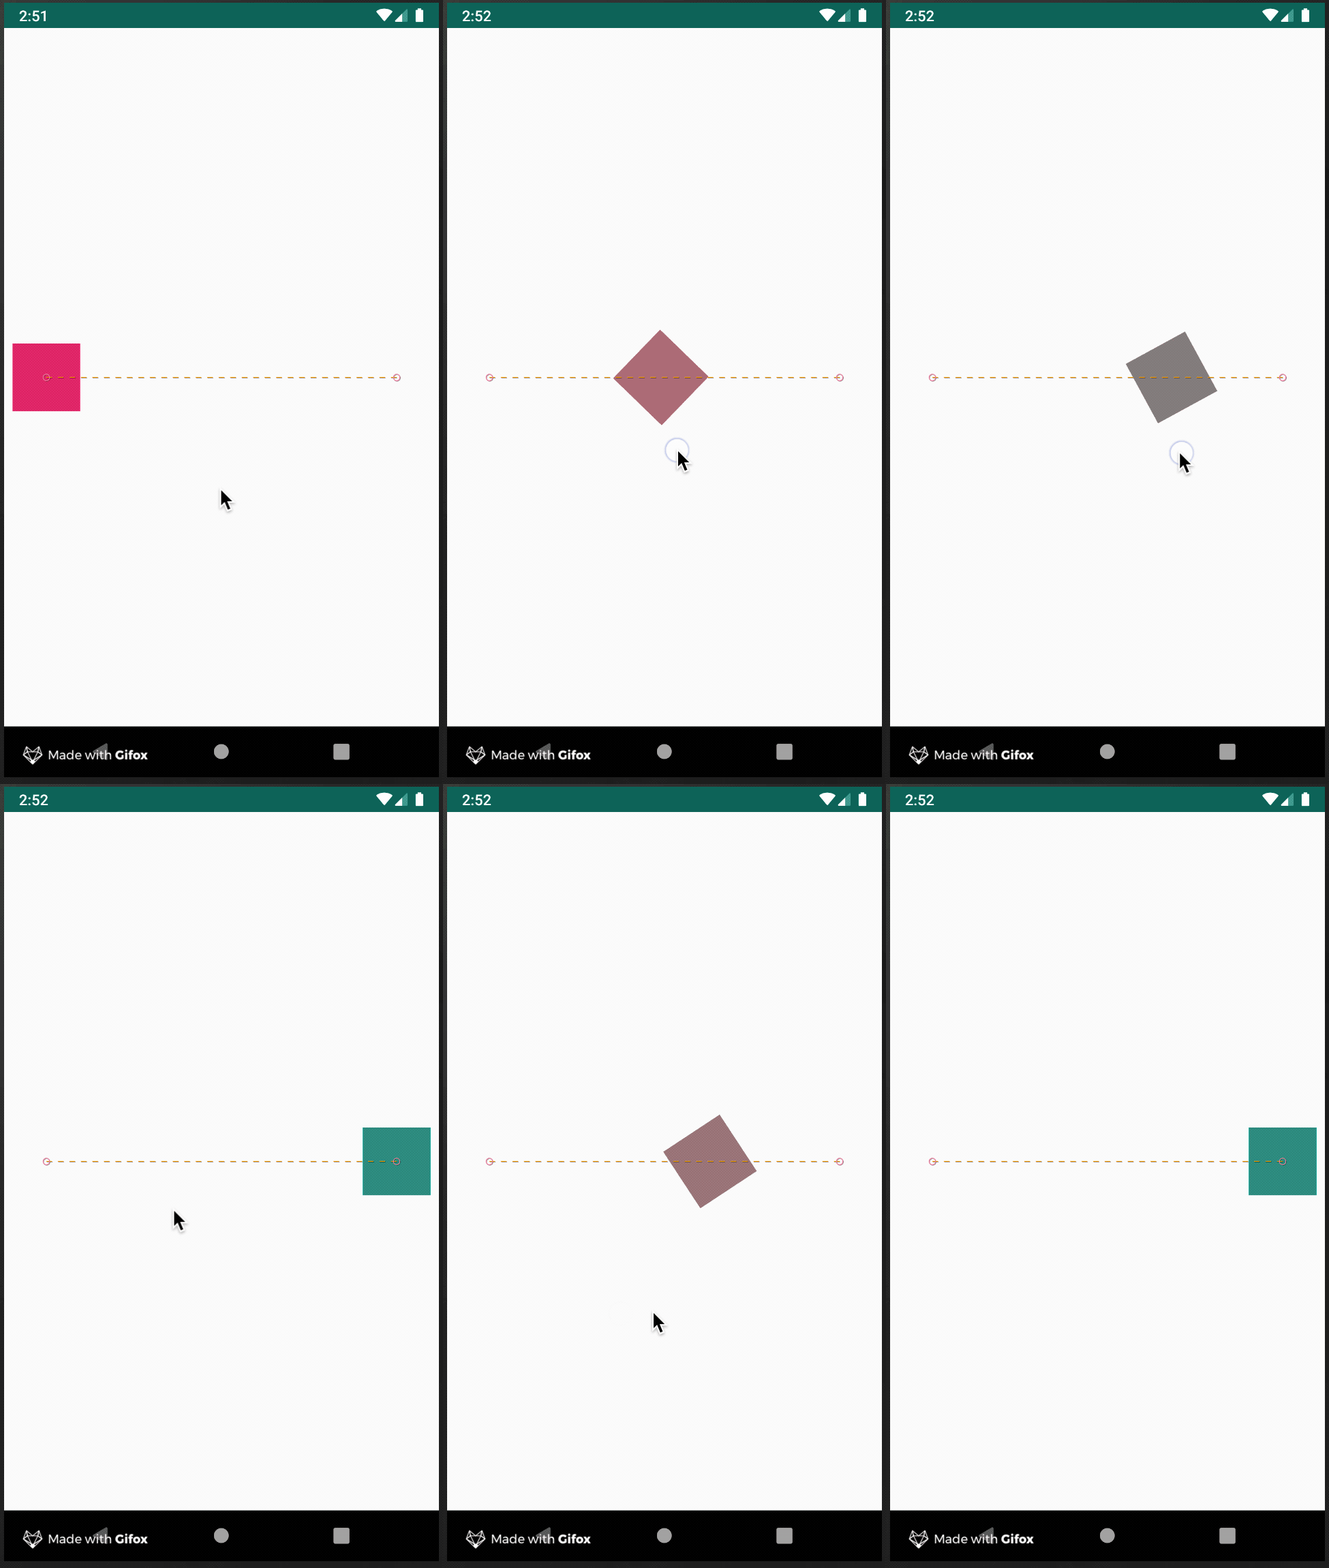
KeyFrameSetについて
今まで指定してきたアニメーションは開始地点と終了地点のみ定義してきました。
A ----------------------> B
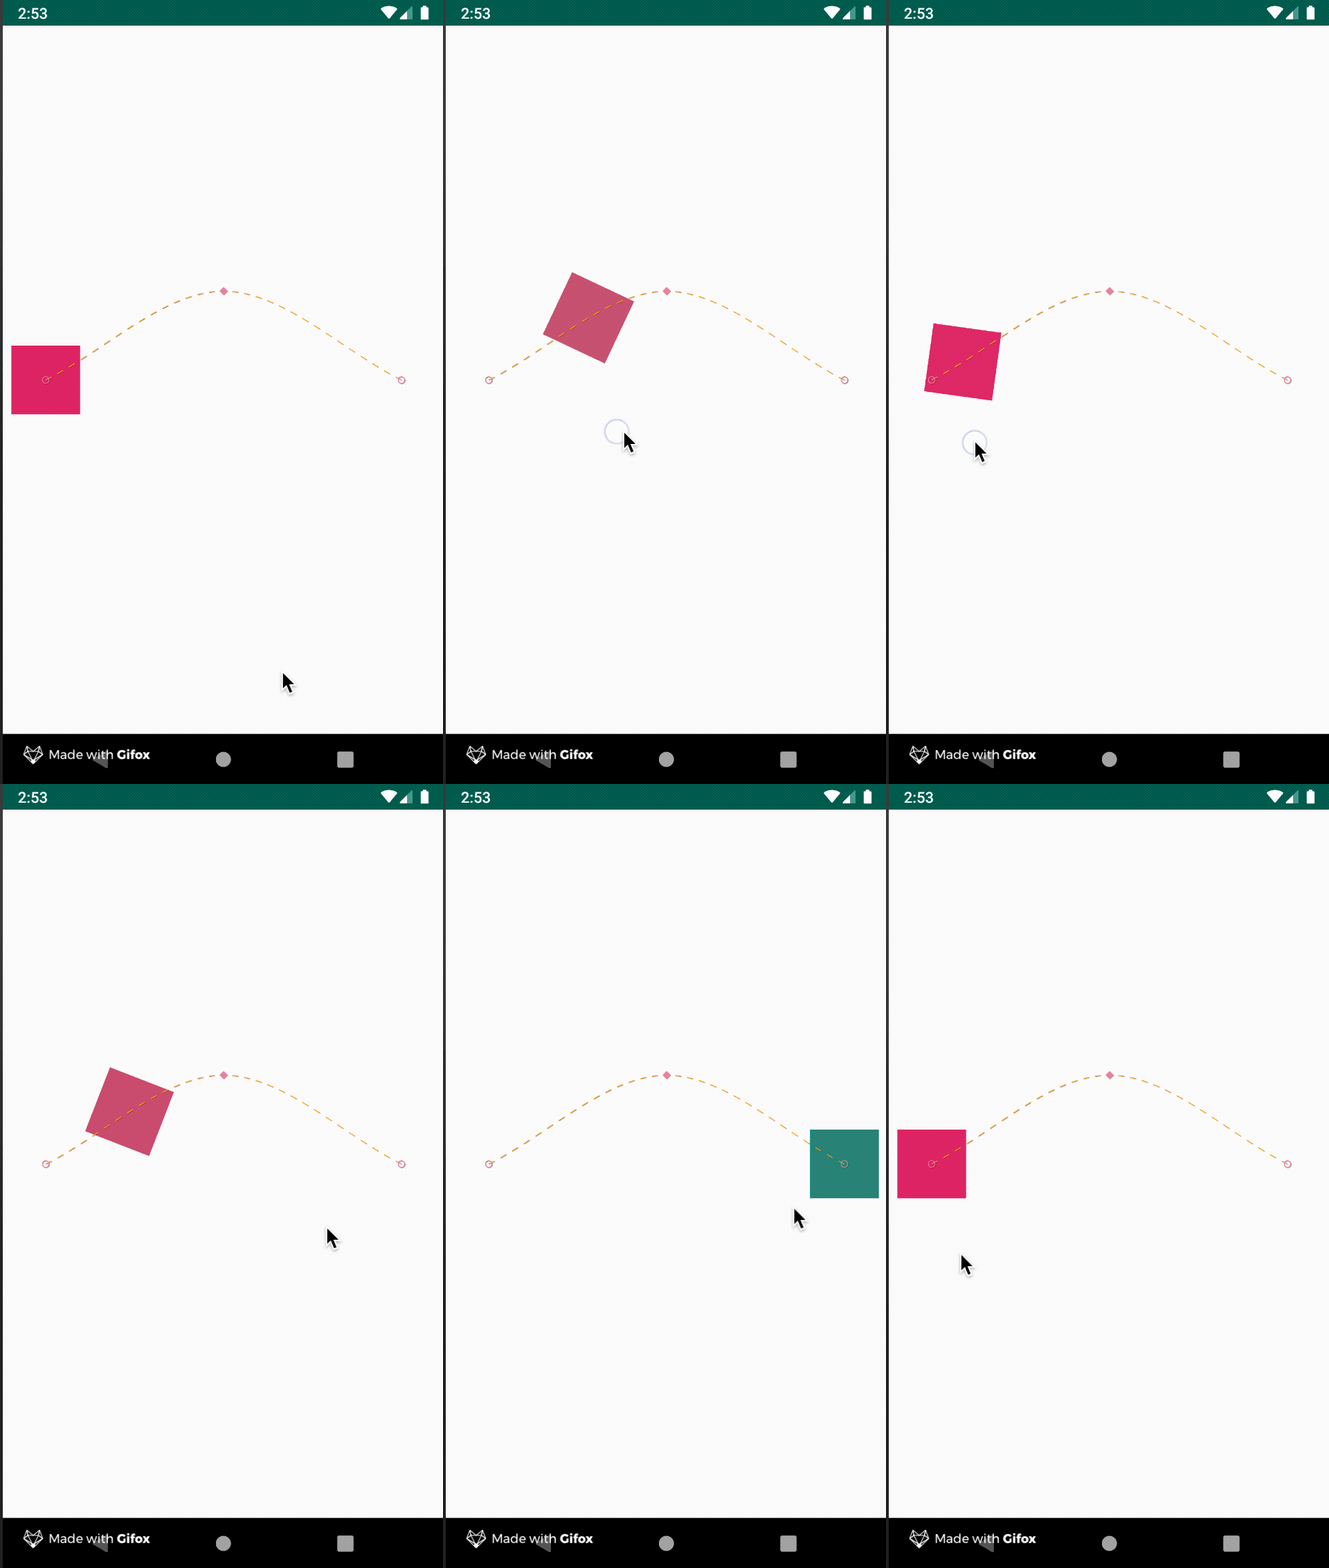
KeyFrameSetを使用すると、このAとBの間に中継地点Pを設けをその間(A->P, P->B)の移動方法、を定義できるようになります。
A ---------->P-----------> B
コードで説明すると
KeyPosition以外にはKeyAttribute、KeyCycle、KeyTimeCycle、KeyTriggerを指定することができますが、 まだKeyPositionしか理解していないのでKeyPositionで説明したいと思います。
この場合、『アニメーションのちょうど真ん中に来た時にY軸に25%移動(マイナスがついているので上に移動します)』となります。
    <Transition
        motion:constraintSetStart="@id/start"
        motion:constraintSetEnd="@id/end"
        motion:duration="1000">
        <OnSwipe
            motion:touchAnchorId="@id/button"
            motion:touchAnchorSide="right"
            motion:dragDirection="dragRight" />
        <KeyFrameSet>
            <KeyPosition
                motion:keyPositionType="pathRelative"
                motion:percentY="-0.25"
                motion:framePosition="50"
                motion:motionTarget="@id/button"/>
        </KeyFrameSet>
    </Transition>
先程のCustomAttributeと組み合わせるとこのようになります。
デバッグについて
xmlでMotionLayoutのattributeに tools:showPaths="true" を追加すると AndroidStudioのデザインビューで --- でアニメーションが描く線が表示されます。
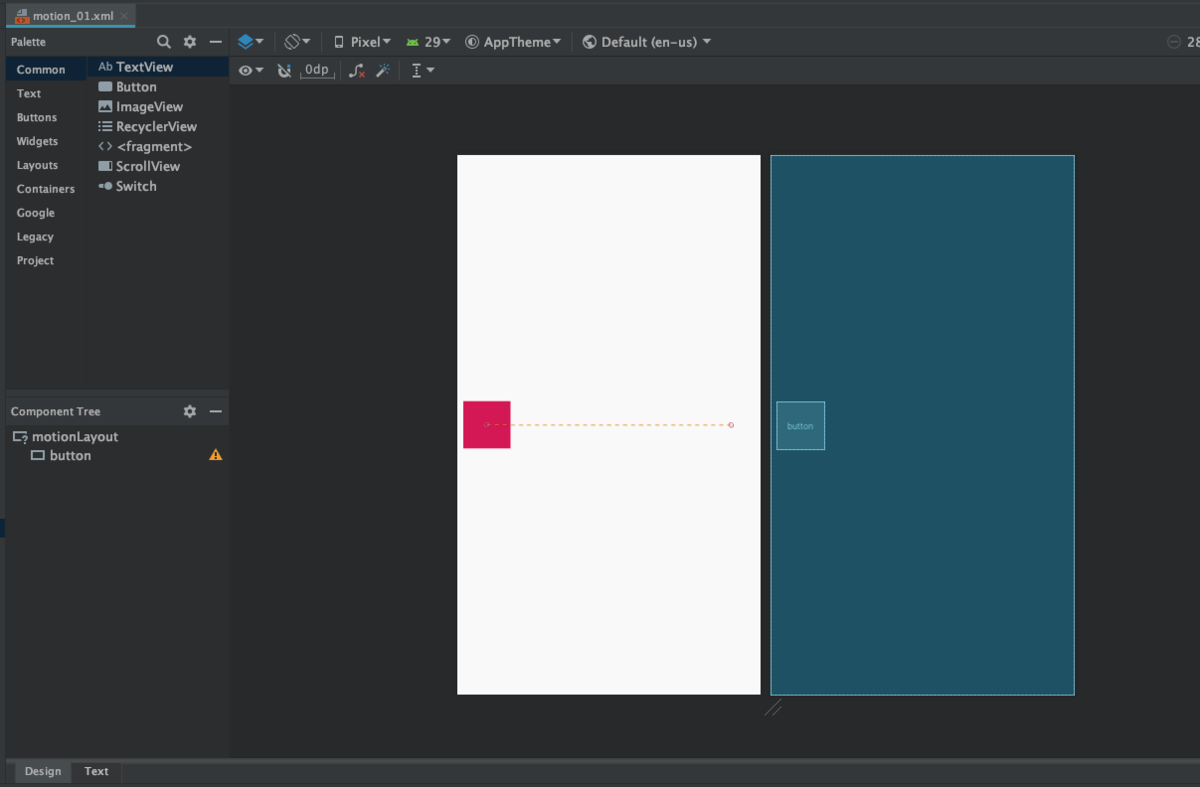
しかし実機やエミュレータでは線は描かれません。
コード上で motionLayout.setDebugMode(MotionLayout.DEBUG_SHOW_PATH) とすると出てくるようになります。
val motionLayout = findViewById<MotionLayout>(R.id.motionLayout)
motionLayout.setDebugMode(MotionLayout.DEBUG_SHOW_PATH)
まとめ
アニメーション自体は昔から存在する仕組みですが、MotionLayoutを使うことでコードを書かないで、xmlで挙動を定義できるようになりました。
これによりViewのレイアウトと業務ロジックを分離して管理できるので見通しが良くなりそうです。
次はもう少し実践向きなレイアウトとアニメーションを試してみたいと思います。
次回Part1
次回Part2
参考記事
理解の助けになりました。ありがとうございます。